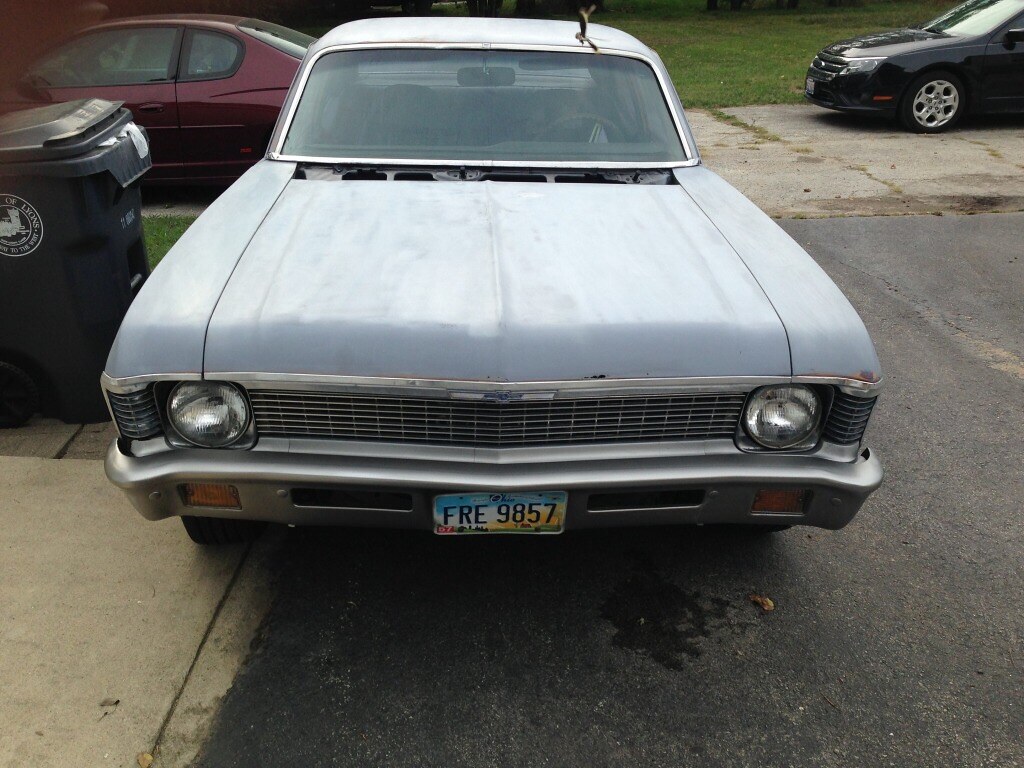
🔧 BUILD 1971 Nova - Work in Progress

General Information

1971 Nova - Insanity in Progress

I bought this Nova last year when I sold my mustang, I was a active member here when this was CSVT so all the info of my old car is still on this site. Some of you know me from other sites as well as some of the old CSVT members who are still around. I apologize in advance for being a little long winded.

I was looking to get back into a classic muscle car that I could restore and modify to my liking. I choose a Nova since they are cheap and my wife wanted it to be a chevy. I enjoy all makes/models domestic or import which is why I enjoy TCG.

Specs:
1971 2 Door Nova factory v8 auto

Engine
350 block 383 stroker
Cam - unknown (I have several cam cards from the previous owners not sure which one is installed)
Rods/pistons - unknown
Heads - stock
Edelbrock intake - unknown which model
Holley 750 double pumper

Trans
700R4
3200 Stall
Shift Kit - Jegs brand

Rearend
10 bolt 8.5
3:56 gears

I knew the car needed some work before I bought it....I just underestimated how bad some of it was going to be. When I got the car the owner I purchased it from had just primer bombed the car and splatter painted the trunk (was still fresh when I went to look at the car). I would have still bought the car but would have negotiated a better price, but hey live and learn. The guy I bought the car from purchased the car from an elderly couple in Ohio who had a binder of documentation which was a huge selling point to me. Unfortunately I didn't look closely to see that the receipts didn't have much specific information. So the documentation only shows dates and what parts were replaced not what they were replaced with (for the most part anyways.) Again no biggie.

The car had 3 paint jobs in it's life plus the primer the guy I bought the car from put on it. Under the primer was a Suzuki gold that was applied in 2002. (what a FUGLY ass color) under the gold was a red. Whenever the red was put on the car it also had extensive body filler applied but no rust or sheet metal repair, more on that later. Under the red was a factory correct blue. The cowl tag says the car should be Sandalwood, while I did find it on a few parts of the car this leads me to believe someone painted the car early on in it's life or worse someone swapped the vin and cowl tag to another car :dunno: . Also there were a few spots where Green was found, I'm assuming a donor car or junk yard parts replacement. To be honest with all the documentation I have it just confuses things even further. The car was also in a few fender benders, the worst being the passenger front fender.

In 2001 the whole suspension was replaced with stock equipment minus air shocks, this was also when the whole drive line was overhauled and the engine was turned into a 383 stroker. I'm just guessing and based on some info I've accumulated from Steves Nova Site SNS, everyone seems to agree this theoretical combo should be around 350-400hp 400+tq.

I drove the car for a few weeks and fixed some legal and safety equipment such as putting on the rear bumper, side mirrors and attaching the seat belts. The car actually drives pretty good, has some good low end torque and the trans shifts firm. These were all the reasons I purchased the car as I didn't want to blow the budget replacing the mechanical's right away while I concentrated on restoring the body and getting it in paint. I was originally hoping to have it in paint in early spring of this year. Currently it may see paint by spring summer of 2015. (crosses fingers)

Goals:
For now I want a nice cruiser that's got some decent hp/tq. I'd like to drive it around town and take it to a few cruises/car shows. During winter I always like to tinker and do upgrades.

My unrealistic dream goal would be to turn it into a pro-touring car. Sitting low on 18x10 or larger wheels. I would also drop in a LS series engine maybe a LQ4 on a tight budget or go wild with a LS3/6 variation. The car will stay an auto, I know some people won't understand that but I love a good auto as much as banging gears in a stick car.

Short term goals that are more realistic is to just restore the vehicle to good quality, I will keep the drivetrain as it is for now as it's in good shape and if anything blows up take it to the next level at that time (budget pending of course). The body will be fully repaired and painted by myself. It will be painted a blue (unsure of which specific color code at this time) but it will be a medium to dark hue.

Bottom line is all work will be done by me, in my garage with whatever tools I currently have or acquire. Hence the whole reason for purchasing this car.

Now to what's happened since I started work along with pics.

As I purchased it, as you can see the body doesn't look bad at all. Looking at it very throughly I could tell there was bondo/mud applied and I did notice some rust in the rear quarters and in the trunk area (which is common for these cars) I also noticed the body bushings were bad again another common problem with age.
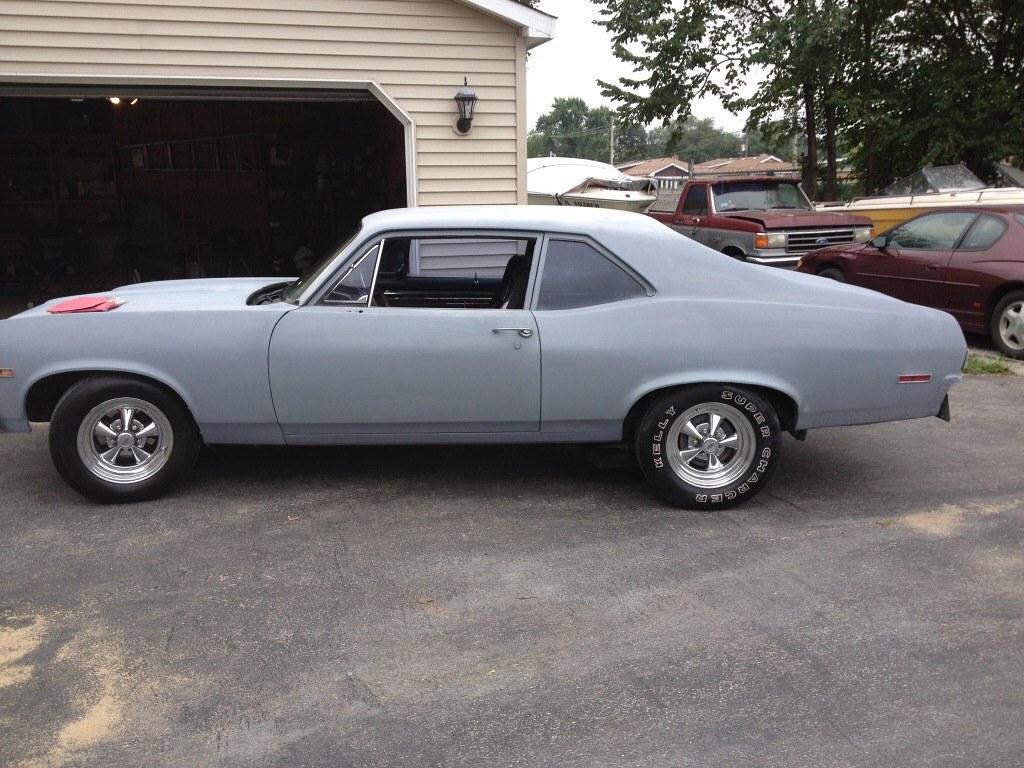


IMG_1489 by Chris Watkins, on Flickr

IMG_1490 by Chris Watkins, on Flickr


Engine Bay, looks can be decieving, the whole front accessory system is a redneck engineer mess along with the fan and rad shroud.
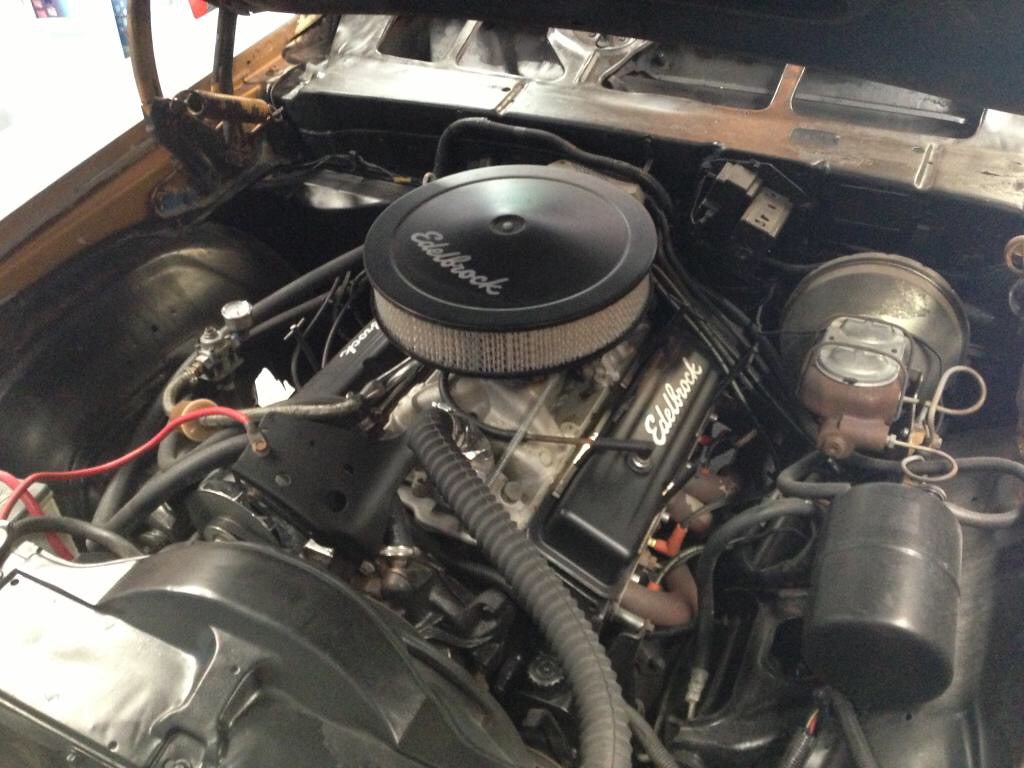
IMG_1487 by Chris Watkins, on Flickr

IMG_1503 by Chris Watkins, on Flickr


IMG_1504 by Chris Watkins, on Flickr

Pics of the interior, the seats are trashed and the carpet doesn't fit right as it's either a universal or not the correct for this make/model/year.
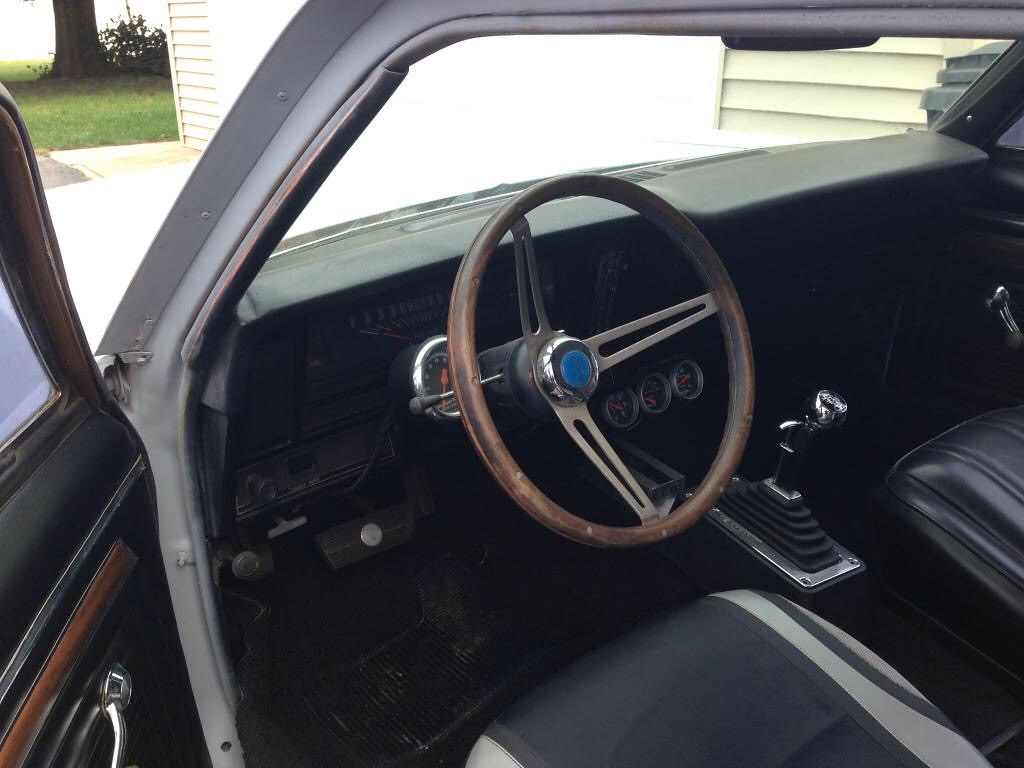
IMG_1499 by Chris Watkins, on Flickr


I'll break this up into a few posts.
  • Like
Reactions: Spivitz and HeavyG

FESTER665

TCG Elite Member
TCG Premium
Apr 13, 2008
40,169
66,695
Streamwood
Here's a pic, yes I know the undercarriage is nasty looking. I still need to get this car up on some blocks and spend a few days with a wire wheel. I'll get that in a few weeks.

I really need to do that as well to the Cobra, but guessing I'll be waiting for a full face shield and respirator due to covid-19 issues.
 

cap42

Restoration Hell
Mar 22, 2005
2,783
2,491
Bolingbrook IL
Been slacking on posting the updates but work has been progressing.

Started with cutting out the rot.

IMG_0542.JPG

Using the cut out section as a template on the new drop off pan.
IMG_0543.JPG

Welded in
IMG_0546.JPG

Now I was able to reattach the quarter panel.

IMG_0547.JPG

Then I finished making my patches for the quarter and all welded in.

IMG_0550.JPG

I then moved on to getting the bumper preped. By taking out an inch on each side of the bumper lots has to be grinded off. On the driver side the bumper was tapped by something and bent in slightly. Using my 70+ yr old vise I got the bumper strait but needed to bang out the dent.

First pic, see the shiny spots? Those are the low spots from the dent, the file marks are the high spots.

IMG_0551.JPG

After a few hours of banging away, hammer/dolly work. Still need to work on it more but gives you an idea of how much time this takes.

IMG_0552.JPG

There are many dings in this bumper I wanted to tackle this driver side section before I welded the bumper back together. The smaller sections are easier to work with instead of one big piece.
 

cap42

Restoration Hell
Mar 22, 2005
2,783
2,491
Bolingbrook IL
Are you rechroming the bumpers after? There's a reason a lot of em get painted over after a car is worked on, it's the time consuming stuff you're doing now.

Yes, I don't like the look of these old muscle cars with painted bumpers. These bumpers are in really poor shape, the front bumper someone sanded the chrome off and made a brushed look. The rear has more dents in it than I care to count. So I will do my best to weld these up strait, bang out any dents and if they still look like shit I will paint them temporarily and order a new replacement set and cut those up.
 
  • Like
Reactions: Great White Drake

cap42

Restoration Hell
Mar 22, 2005
2,783
2,491
Bolingbrook IL
Have you thought about sending em out to a chrome shop to get fixed? I know that's kind of a rarity these days but supposedly they'd work those over a lot.

Then again with what you're doing it's not really about that.

I know chrome shops can do the metalwork to make them look good. If it's a good shop they could do it in less time and most likely a better job.

First it would be incredibly expensive and it would just be cheaper to order new replacement bumpers and cut the same material out to fit the modifications I've done to the car. The second part which is why I am even attempting this is to see what I can actually do.

The whole theme of this car is to see how good of a car I can produce with just what's in my garage. Built not Bought
 

cap42

Restoration Hell
Mar 22, 2005
2,783
2,491
Bolingbrook IL
Moar work on the bumper, just stating this up front. There is no metal filler in these photos. All dents were pounded out and using files to sand down high spots and identify low spots.


first up, before
B9B4D3D6-4F06-46DE-ACE3-4B26FA7BE1C8.jpeg
after
C4571C37-4352-495F-969E-E23A13522425.jpeg


Before


740CEF40-156F-48BC-BD8E-794C5B5E03C9.jpeg
After
1574E9E0-4559-4B03-B325-FDFB964201CC.jpeg
71B102C5-A350-4392-9165-DD6CAE397647.jpeg
I then tacked the bumper back together to do test fit.

40F8DA10-2A16-4B02-95D4-5B1F8EC37C77.jpeg

A3616DA9-2046-4C61-91AB-38799717418E.jpeg

8D74404D-B6BE-4E3B-B451-E8A51BB374C8.jpeg

I need to grab after pics as I took more of the lip off and got it to where when there is body filler and paint on the body it should be a tight gap.

I got side tracked by this
5520DA48-27FD-4504-94FB-FC2E5716A19F.jpeg
That was from where the bumper was tapped sometime in its life and I was fixing the dent in previous post. I got most of it fixed by sticking the bumper in my big ass vice. There is still a lot of fine tuning to be done still.
 

cap42

Restoration Hell
Mar 22, 2005
2,783
2,491
Bolingbrook IL
My previous post was from my phone browser and wasn't working so good attaching pictures and putting them in the right order. Now that I am at my pc here is the pictures I'd like some feedback on if anyone has input.

I pointed this out in a previous post but I wanted to highlight it here. I'm still scratching my head on what to do here, shortening the bumper moved the style line in the bumper so it no longer matches with the car. Now I've stared at this for many an hour and it looks fine if you look at the car sitting down or kneeling eye level with the bumper, however if your standing and looking down at the car as these pictures show it absolutely drives me boonkers!


I attached the orginal in case my highlights were in the way.
IMG_0572.JPG


Ignore the yellow section, the bumper is a stamped piece and thickness of the bumper ( top section that meets the car) is not uniform. I already have a tape line set to cut a strip out of the bumper to make that uniform. The blue sections is my issue. As you can see the style line of the car no longer matches up with the style line pressed into the bumper.
IMG_0572-edit.jpg

There is no way I can see to cut that same amount out of the bumper in any location to keep the style line where it is and move the outer wrap around section closer to the car. I don't have the tools to re-create that style line in a different location out of new metal.

Options as I see it.

1. Leave it as is
2. Trash this bumper, buy a replacement and instead of shortening the bumper add metal to the wrap around section to get it closer to the car body.
3. Cut the wrap around sections off and recreate new ones.

I can tell you option 1 isn't even an option, this just won't fly. Option 2 has merit but these bumpers are huge as it is and I'll just be adding bulk to it and I'm not quite sure if it will look right. Option 3 is a great deal of work that I am prepared to do if needed but I also am not sure if I can get the appropriate shapes with my hobbyist fab tools.

If someone can see another option please point it out, because I'm doubtful of the all these.
 
  • Like
Reactions: Gav'sPurpleZ

cap42

Restoration Hell
Mar 22, 2005
2,783
2,491
Bolingbrook IL
OCD is not your friend. :) Are you looking for a way to move the bumper out to match the body line, or is it the curve of the body line you want to put into the bumper?

Don't get me started on my OCD lol.

I want to tuck the bumpers so they are close to the body of the car, so I took 2 inches out of the middle area of the bumper. 1 inch on each side and I like this look, however it moved the outer peaks of the bumper in towards the center of the car. Now they don't line up with the body any longer. If I add the 2 inches back into the bumper all it does is push the outer wrap around sections out away from the car again. The peak is too close to the warp around sections.
 

cap42

Restoration Hell
Mar 22, 2005
2,783
2,491
Bolingbrook IL
But doesn't the line of the bumper line up well with the peak of the fender/QP? Maybe I'm not seeing the picture right or the bodywork is throwing my eye off.

If you look at the last post with pictures, the second picture has 2 blue lines I marked up to show it better. The blue on the body is the peak on the quarterpanel. The blue on the bumper is where the peak on the bumper is now.
 

Chris91LX

Addict
TCG Premium
Sep 2, 2008
621
1,245
Crystal Lake
Ah, ok. You could try fabbing a new bumper maybe. I know I've seen the bumpers on that model Nova's tucked on Iron Resurrection and Hand Built Hot Rods on the Motor trend TV shows. Maybe you can get some ideas there? Look up Joe Rogan's Nova built by Pure Vision (Hand Built Hot Rods), they did some super cool mods to that thing.
 

cap42

Restoration Hell
Mar 22, 2005
2,783
2,491
Bolingbrook IL
A lot of people take the 69 Camaro bumper and then do a roll pan since the Camaro bumper is so small. I am in the same mindset of Steve Strope (Pure Vision) that Nova's were known for their big bumpers so I won't be going a different bumper route. I do know Joe Rogan's Nova, but all the pics online suck and don't give a true idea of dimension and the show glosses over the bumpers and focuses on the grafting of Camaro panels into the Nova Body for those cool wheel arches.

That pretty much means I am on option 3 I listed above. Cut up the bumpers even more and try and make the bumper flow with the body better.
 

cap42

Restoration Hell
Mar 22, 2005
2,783
2,491
Bolingbrook IL
Got sidetracked with home projects but spent some time going over the bumper. I'll update the thread later when I can get to that.

In the meantime I am going to start gathering the new parts I will need. I still have time before I need things but I would like to get a jump on it an acquire these over time. Some of the parts are going to add up quick.

First up on the list is tracking down a good set of 243/799 heads. If anyone has a set in good condition or see's any online please shoot me a PM.
 

cap42

Restoration Hell
Mar 22, 2005
2,783
2,491
Bolingbrook IL
Home projects and work have put a hamper on progress the last month but did get some time on it this weekend. Not too many pics of everything going on, I was more focused on getting shit done.

First up as stated by last post I am still working on that rear bumper. I had to cut the driver side section back off and straiten it again. I used a contour tool to get what the passenger side looked like and applied it to the driver side. It took some heat and a lot of massaging with a hammer and my vice but I got it damn near perfect. In the below pic you can see just a small gap in the center section, otherwise the shape matches the passenger side.

IMG_0601.JPG

I then tack welded the bumper back together focusing on getting the bumper as strait as possible. I still ran into issues with the lowest section of the bumper close to the body of the car as seen in previous posts. So if it wasn't the bumper anymore it had to be the body side. So I took the contour finder and took a bunch of measurements and they all looked pretty close. I then threw a strait edge on the fender horizontally, took a pic of this but doesn't explain much. With the shape of the car it is suppose to tuck in at the rear of the car, based on this picture you can see the gap in the strait edge in the middle where it should be at the right side of the picture (rear of the car). So I need to cut this open and move the outside edge in at least 1/2 inch. That will fix that issue and then I can start mocking up new bumper mounts and go from there.

IMG_0602.JPG

The rear bumper is still mocked up and just taped in place, I wanted to start on the front bumper assembly so I could get the car looking proportioned. Man what a pain, you have to put the grille, bumper cover inserts all in place before the bumper will go on properly. The front bumper is also bent, if you look at the passenger side the section near the turn signal is warped, you can also see the far section is also twisted up. The passenger fender needs a lot of work as nothing aligns properly but that will be a later post.

IMG_0603.JPG

Some side shots of how far that bumper sticks out (n)

IMG_0604.JPG

IMG_0605.JPG

I am not digging how the front end looks on this car, that grill has to go, the bumper is hideous, this is just all sorts of ugly.
 

cap42

Restoration Hell
Mar 22, 2005
2,783
2,491
Bolingbrook IL
I started this weekend working on fixing all the holes in the trunk, very boring only 1 pic.

IMG_0610.JPG

Plan is to move from the rear of the car forward getting all the metal work finished and then in a month or two be able to sling filler and primer on the car.

After the trunk area was all finish welded I worked on the drivers patch I made a few months back. I sliced the panel took some material out and tack welded it in place. Now the bumper fit the body.

IMG_0611.JPG

I then hung the bumper in place with my shims and painters tape and voila!

IMG_0612.JPG

I didn't take pictures of the next part because I didn't finish and you'll see that on the next update. I started thinking of how I was going to mount the bumper now the locations have changed. I have the stock mounts which are made of heavy steel, what the hell they won't work anymore let's cut em up to fit.

This is where I stopped, I need a way to correctly measure the new angle and depth the mounts need to be. There isn't room for me to get anything between the rear brace and the bumper with it in place. I ordered a digital angle finder and will get creative on finding the depth. That's for next updates.

Next updates should include new parts, I will be ordering things every month or so. Once the car is in primer and bodywork is done it will be a large hit to the pocketbook if I were to start buying things then.

I'm still looking for 243/799 heads if anyone has any.
 

cap42

Restoration Hell
Mar 22, 2005
2,783
2,491
Bolingbrook IL
Only 1 pic this week, I am working on the mounts for the bumper. I used up all my 1/4 plate stock which I think would have been the best to fab up my own mounts. Since I didn't I took the factory mounts which are pretty stout and started modifying them. I literally spent over 8 hours between last weekend and this weekend on just one mount. The picture is showing the passenger side mount (Right) cut up and the driver side (left) stock. Excuse the mess on the workbench.

IMG_0620.JPG

Doesn't look like much but with the bumper being so close to the body and brace of the car there is zero room to get in and mark anything up. So it is literally shaving off a bit at a time praying I don't take off too much, then bolting the mount on and then placing the bumper in place and taking more measurements.

The passenger side mount is done, the driver side needs some more cut out of it. When they are all set I will be welding the mounts directly to the back side of the bumper. It will just be tacked for a while, I may go grab some 1/4 plate on my next metal store run. If I fab up my own mounts I can make slotted ones which may give me some adjustment which would be usefull during re-assembly of the car. We will see.

There are no pics of the front bumper work yet, I didn't make any changes but I have been looking at what needs to be done. The front bumper I can easily close the large gaps and bring the bumper in close to the grill side of the car. I just need to drill new slotted holes in the frame horns. I won't know if I need to cut anything out of the bumper till I push the car out of the garage with the rear bumper in it's final location. Then I will look and see how much I want to take out to tuck the sides.
 

Mr_Roboto

Doing the jobs nobody wants to
TCG Premium
Feb 4, 2012
25,922
31,102
Nashotah, Wisconsin (AKA not Illinois)
I always wondered why body work was so expensive, then I started cutting shit out on my car and am realizing just the sheer amount of time that gets spent on it is why...

Oh I can't imagine it being anything but 75-85% labor. Nothing to do on it is quick.
 
  • Like
Reactions: FESTER665

cap42

Restoration Hell
Mar 22, 2005
2,783
2,491
Bolingbrook IL
A bit pic heavy this update.

I got both rear bumper mounts cut down no pics on those, I am still thinking I may go a different route with some heavy plate steel and making my own mounts we will see on that. I know I will be welding the mounts to the back side of the bumper so before my last round of test fits I took a wire wheel to the inside and then spayed it down with fast etch. I didn't grab pics before I sprayed which would have really shown how nasty the inside of the bumper looked.

Here is a pic a few mins after I hit it with fast etch. You can see the heavy rust, these spots just wouldn't come clean with a wire wheel. I'm using Eastwood's Fast Etch and it's some serious shit, burns your skin and hell it's destroyed some of my concrete floor in areas I didn't get it cleaned up fast enough.

IMG_0624.JPG

Here is the after, about 30 mins later.

IMG_0625.JPG

Bumper got thrown back on and taped it back in place, even though the mounts are ready to go I'm not ready to just burn them in permanent. I needed to get a better visual of the mockup so I pushed the car into the driveway. Ignore the strap and chain, this is how I get the car back in the garage., it was also time to clean under the car.

IMG_0626.JPG

The above pic shows the body of the car sitting lower on the driverside, I need to check all the mounting points as I don't recall the car having a lean before. This lean was throwing me off, I at first thought it was the bumper. I later noticed it was actually the body of the car leaning this way. Regardless it makes it hard to look at the car and make sure everything looks right before making permanent changes.

Below pic is just a nice full view.

IMG_0628.JPG

A close up of the rear of the car, the bumper is hanging ever so slightly below the lower quarter panel. I need to re measure everything which is not easy as there are very few reference areas I trust from either the factory or my repairs.
IMG_0627.JPG


Here you can see what I am after on the passenger side, the bottom of the bumper is in perfect alignment with the lower quarter and the side section of the bumper is vertical. It's hard to see in this picture but I measured the tail light panel to the bumper on both sides they measure out perfect. So the problem with the driver side is either the bumper is out of whack or one of the panels (driver quarter, tail light panel etc).

IMG_0629.JPG


Again here is the look I am going for, you will just barely be able to see the side of the bumper with a tight gap to the car.
IMG_0630.JPG

Closeup of the area, I still need to take out just over 1/16th in the upper section from the side of the bumper here so it's uniform on both sides. That will also make the gap acceptable when there is filler and paint on the car. The gap is much bigger than it looks in these pictures.
IMG_0631.JPG

Now the driver side.

IMG_0632.JPG

Here you can see the uniform gap top to bottom and shows how much of a gap there really is, plenty for filler and paint. The bumper needs a ton of fine tuning and finish work. This whole exercise is to see what I like and not like about the modifications and what will work or not. The bumper will be on and off this car another 2 or 3 dozen times as I get the fit perfected and the bumper straitened. There is also material I need to weld in... yada yada yada.
IMG_0633.JPG


For the hell of it some front shots nothing new here aside from throwing in the headlights.
IMG_0634.JPG

IMG_0635.JPG
 

Thread Info