
Install the TCG app
how_to_install_app_on_ios
follow_along_with_video_below_to_see_how_to_install_our_site_as_web_app

Note: this_feature_currently_requires_accessing_site_using_safari
You are using an out of date browser. It may not display this or other websites correctly.
You should upgrade or use an alternative browser.
You should upgrade or use an alternative browser.
More options
Who Replied?


Can we say Upgrades WOO HOO Yea buddy
UMI upper lower rear control arms w/ included spacers for sway bar to bring back to factory level ROUND 1 of 3 DONE ......
to be continued
Have to get new bushings for rear end housing and at 13 bucks won't be bad at all LOL
Yukon Posi w/ all needed bearings and crush sleeve
New rear cover just run of the Mill one
4 UPDATES FOR ONE 1 of 4 here
I really thank ya guys / gals for reading my Build thread means alot and sorry been slacking on posting and who gets a Cold almost Flu in the Middle of spring Summer THIS GUY OK here we go
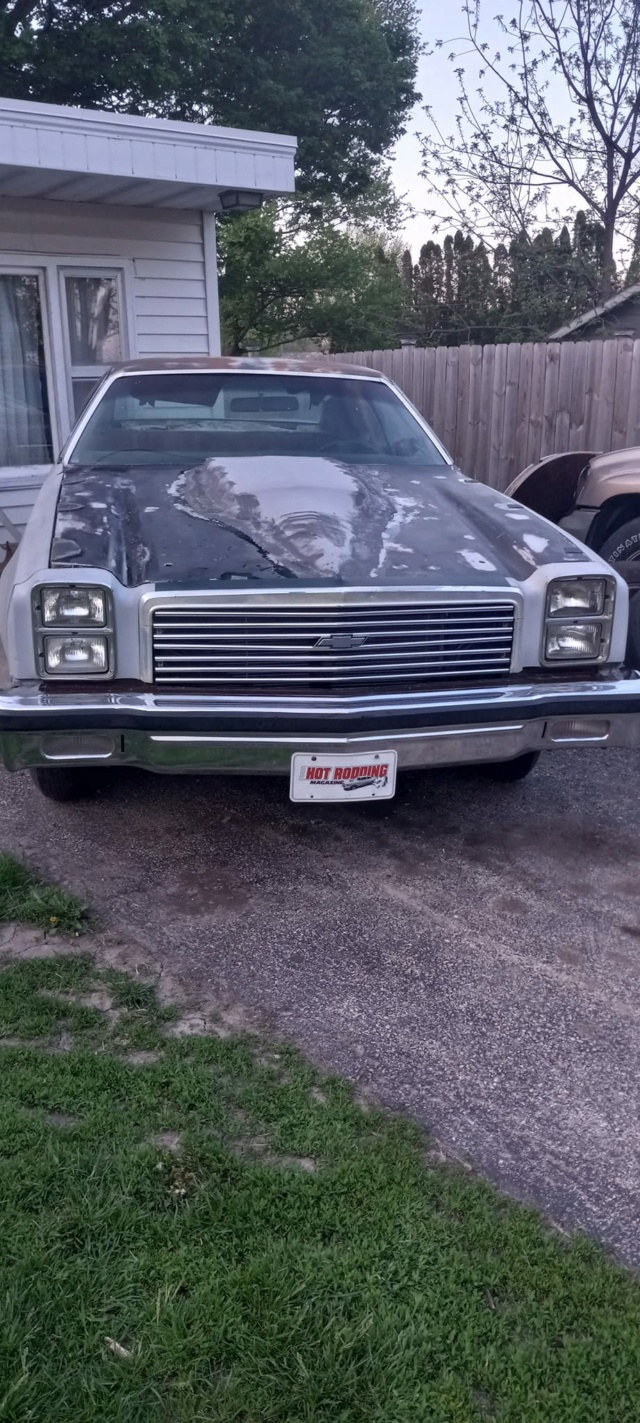
FIRST PICTURE is before picture, Since that one I removed it all off and started round two today
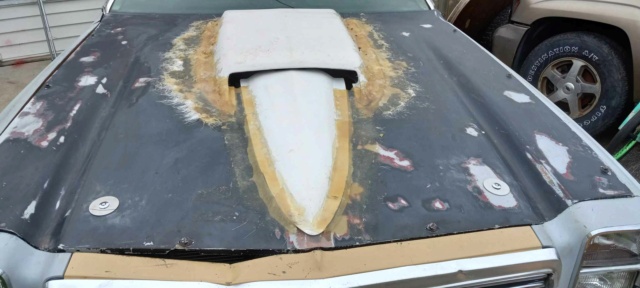
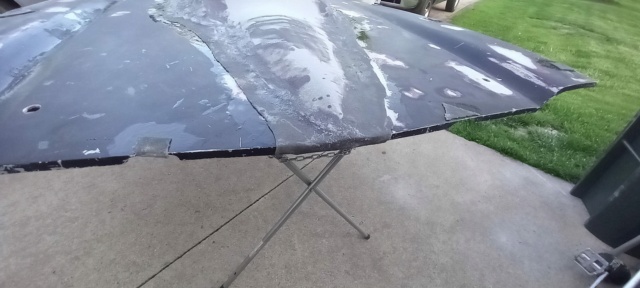
Well swamp A$$ weather finally Left Northern Illinois and was able to get busy on the Fiberglass hood project and make it look actually like a blind person didn't glass it in, I have several things to do to it BUT at least now it don't look half bad.
I AM ACTUALLY contemplating leaving the front Part of stinger closed I kinda like it that way now still up in arms about it though and Kevin Stroh I got the front peak looking more like it belongs instead of an afterthought ..... Have some sanding then glass bondo then more sanding sanding sanding
.
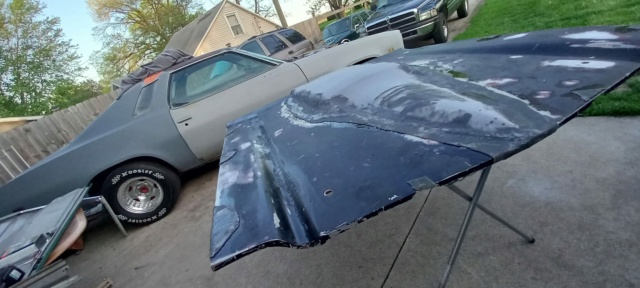
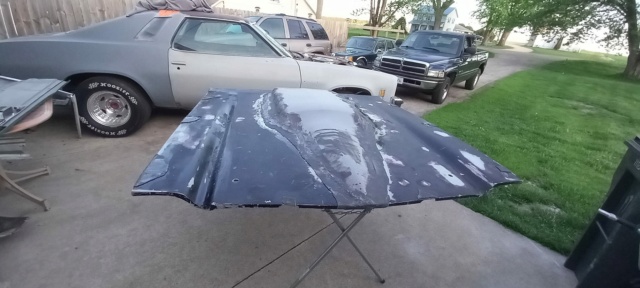
I made kinda patches over the dzus fastener holes since I removed them tomorrow I am gonna flip it over and fill the holes then Go spend the day with family Watching my Oldest Daughter trade her Diploma for an SE Title She did so good ended with a 3.5 GPA
.
I thought was a 3.2 but surprise ? then to Dinner with Family so that Monday I can get back on it sanding I will be sanding the top side of patch flat

I really thank ya guys / gals for reading my Build thread means alot and sorry been slacking on posting and who gets a Cold almost Flu in the Middle of spring Summer THIS GUY OK here we go
FIRST PICTURE is before picture, Since that one I removed it all off and started round two today
Well swamp A$$ weather finally Left Northern Illinois and was able to get busy on the Fiberglass hood project and make it look actually like a blind person didn't glass it in, I have several things to do to it BUT at least now it don't look half bad.
I AM ACTUALLY contemplating leaving the front Part of stinger closed I kinda like it that way now still up in arms about it though and Kevin Stroh I got the front peak looking more like it belongs instead of an afterthought ..... Have some sanding then glass bondo then more sanding sanding sanding
.
I made kinda patches over the dzus fastener holes since I removed them tomorrow I am gonna flip it over and fill the holes then Go spend the day with family Watching my Oldest Daughter trade her Diploma for an SE Title She did so good ended with a 3.5 GPA
.
I thought was a 3.2 but surprise ? then to Dinner with Family so that Monday I can get back on it sanding I will be sanding the top side of patch flat
2 of 4 Updates
Sell the Swivels I said get new Seats I said, Well I will dammed if that didn't open the biggest can of worms I have ever seen, The Previous Owner had Inner Outer Wheelhouse's and rear 1/4's put on by a Body shop in Derby Kansas in 2014 2015 time frame and they never put any seam sealer in to help seal the Joints.
.
Also old owner must have cut the seat bracket to change something BUT passed away sadly while working on it and cut thru the floor right next to it (its small enuf to flatten up and apply some panel bond and seal it up no biggee.
.
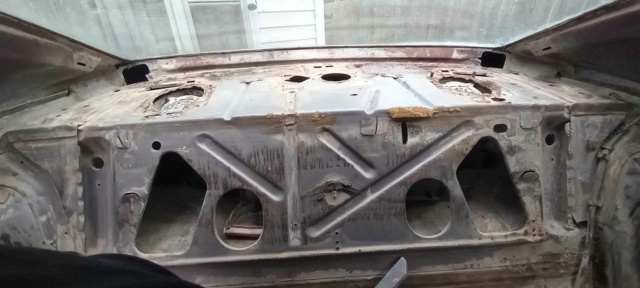
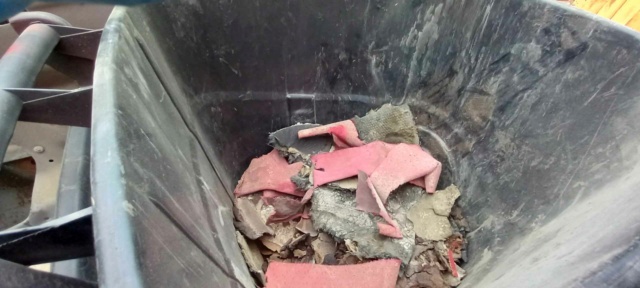
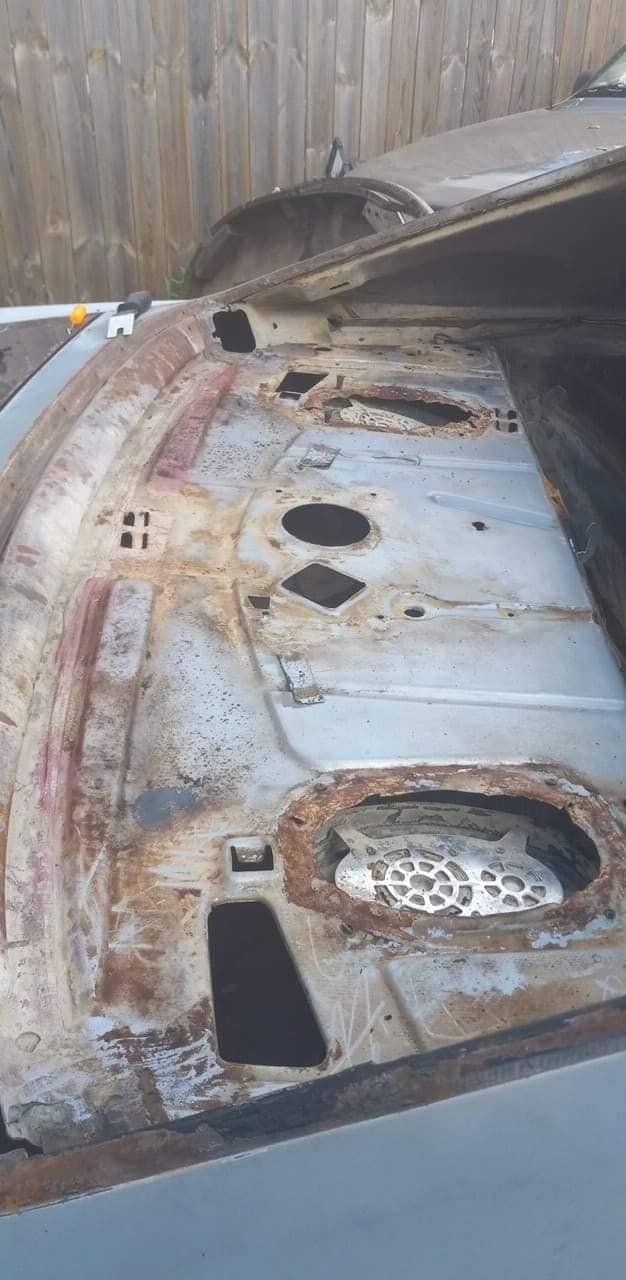
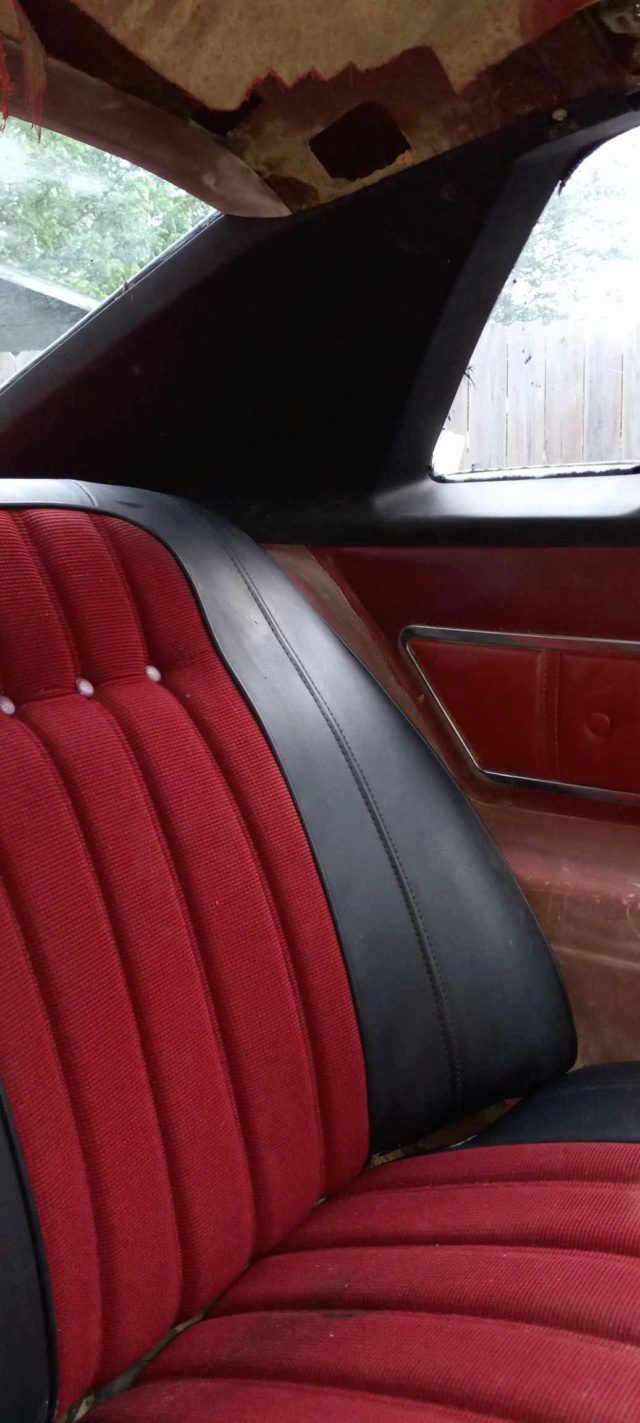
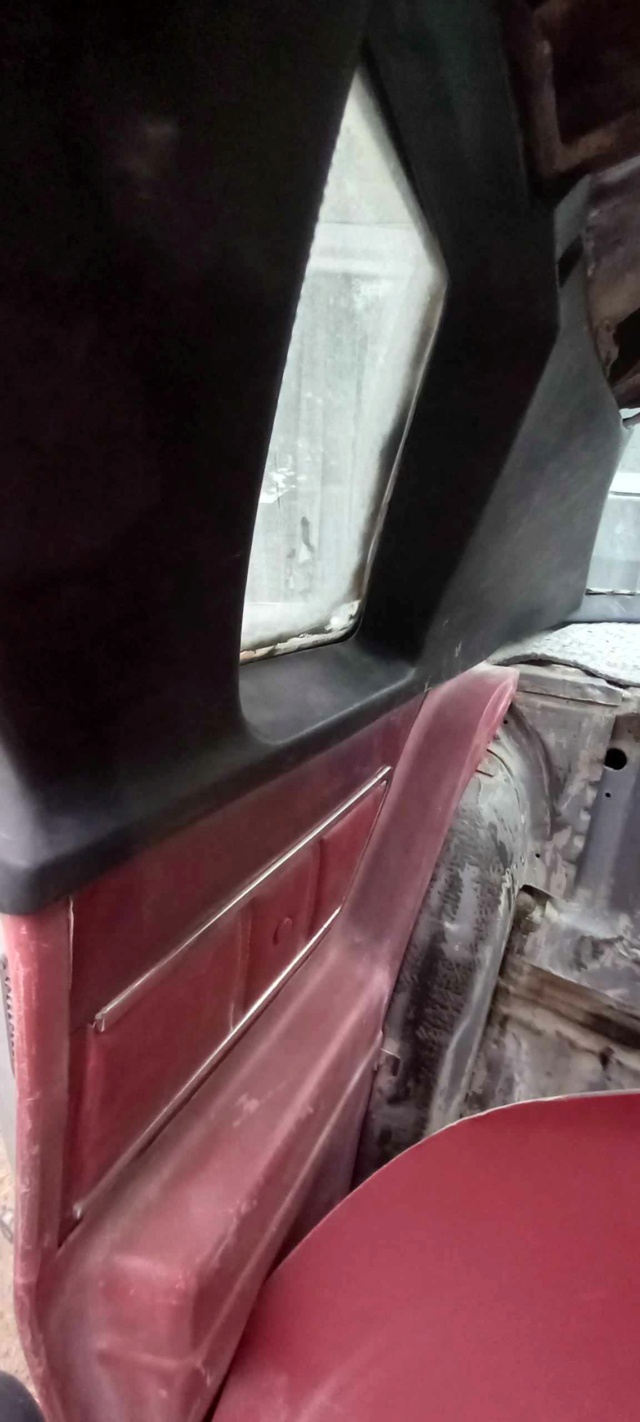
I will be spending my time over next few days Instead of Installing new seats I will be removing all the interior and power washing the Interior DAMM I didn't want to do that yet BUT Its apart and it needs it BADLY I filled a Half of a 32 gallon trach can with Just gravel dust Back seat insulation and Old package tray WHAT A MESS SO FAR SO GOOD NO RUST in package tray BUT found the Leak in rear window by a Previous or continued retry to seal the back window I will need to get that addressed also before all said and done


Sell the Swivels I said get new Seats I said, Well I will dammed if that didn't open the biggest can of worms I have ever seen, The Previous Owner had Inner Outer Wheelhouse's and rear 1/4's put on by a Body shop in Derby Kansas in 2014 2015 time frame and they never put any seam sealer in to help seal the Joints.
.
Also old owner must have cut the seat bracket to change something BUT passed away sadly while working on it and cut thru the floor right next to it (its small enuf to flatten up and apply some panel bond and seal it up no biggee.
.
I will be spending my time over next few days Instead of Installing new seats I will be removing all the interior and power washing the Interior DAMM I didn't want to do that yet BUT Its apart and it needs it BADLY I filled a Half of a 32 gallon trach can with Just gravel dust Back seat insulation and Old package tray WHAT A MESS SO FAR SO GOOD NO RUST in package tray BUT found the Leak in rear window by a Previous or continued retry to seal the back window I will need to get that addressed also before all said and done
3 of 4 Updates
SNEAK PEEK into New seat plans Ty Nick Wellik from Iowa for the Seats there are gonna look sweet in there and be alot more comfortable than the swivels for this short fat guy LOL
.
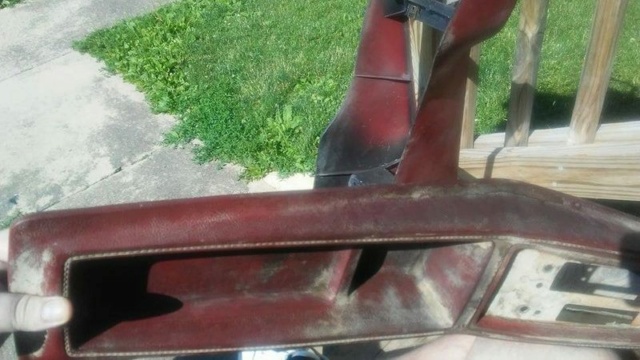
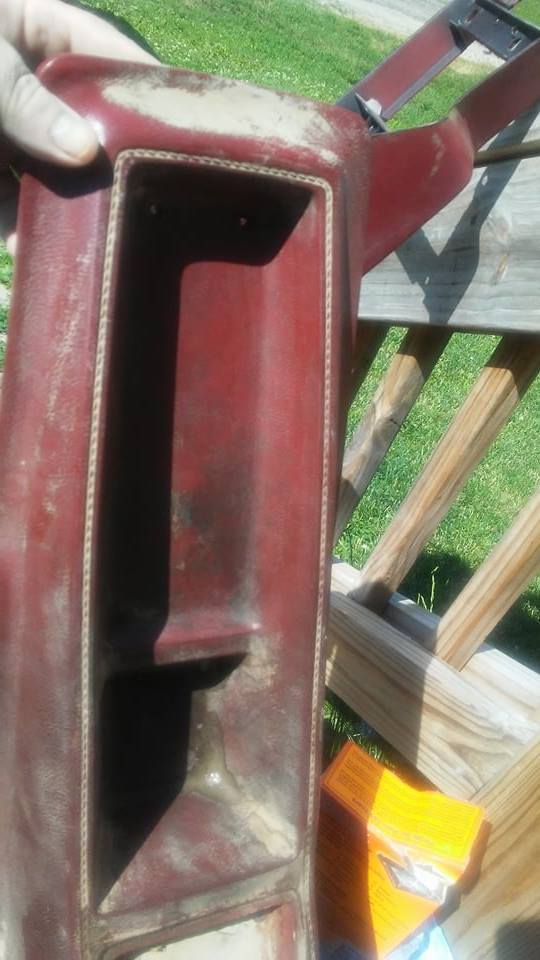
I pulled out my New package tray that came with car I finally have seats that will look good with it
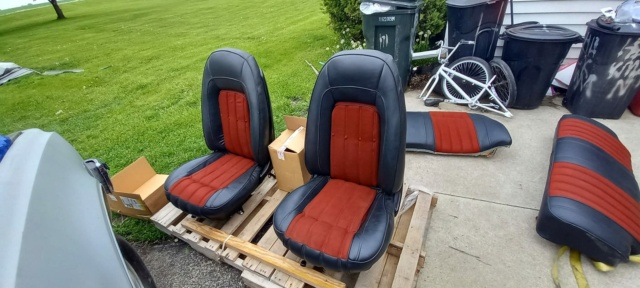

SNEAK PEEK into New seat plans Ty Nick Wellik from Iowa for the Seats there are gonna look sweet in there and be alot more comfortable than the swivels for this short fat guy LOL
.
I pulled out my New package tray that came with car I finally have seats that will look good with it
4 of 4 Updates, Last One and Kinda Long was a Happy Post
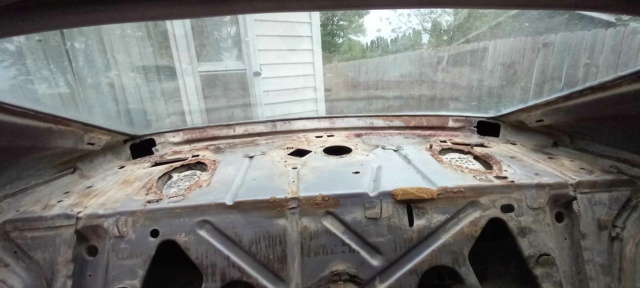
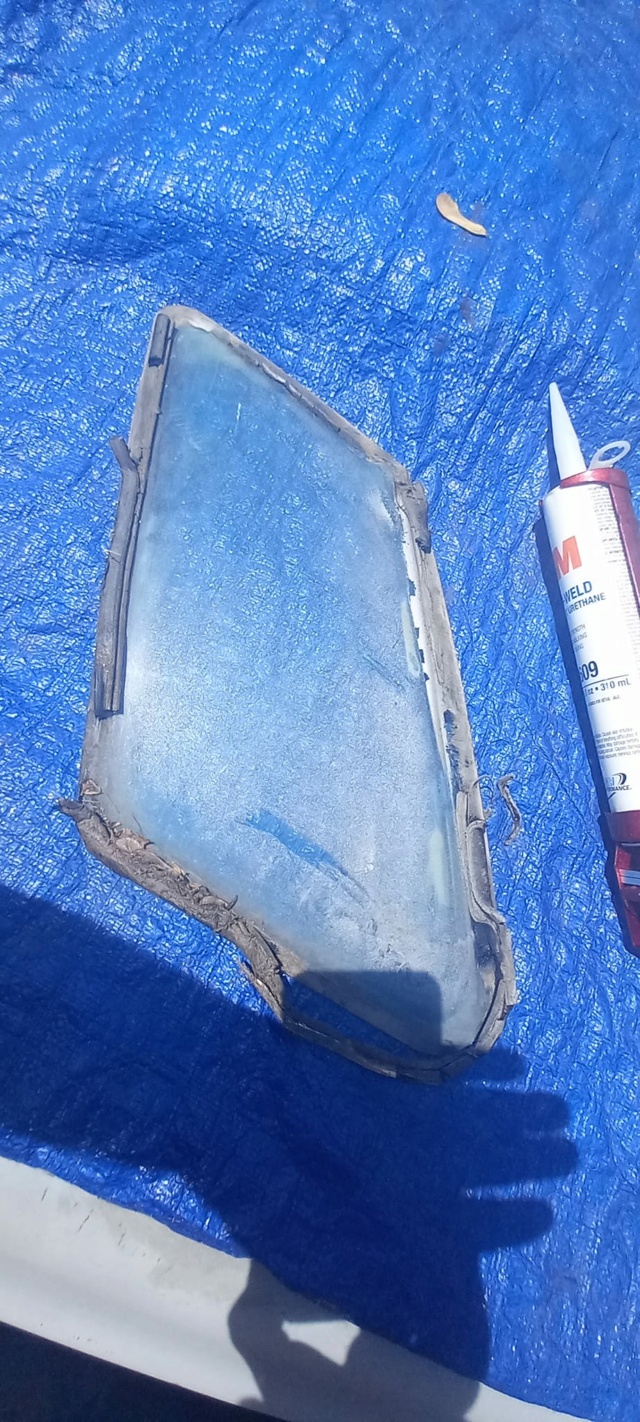
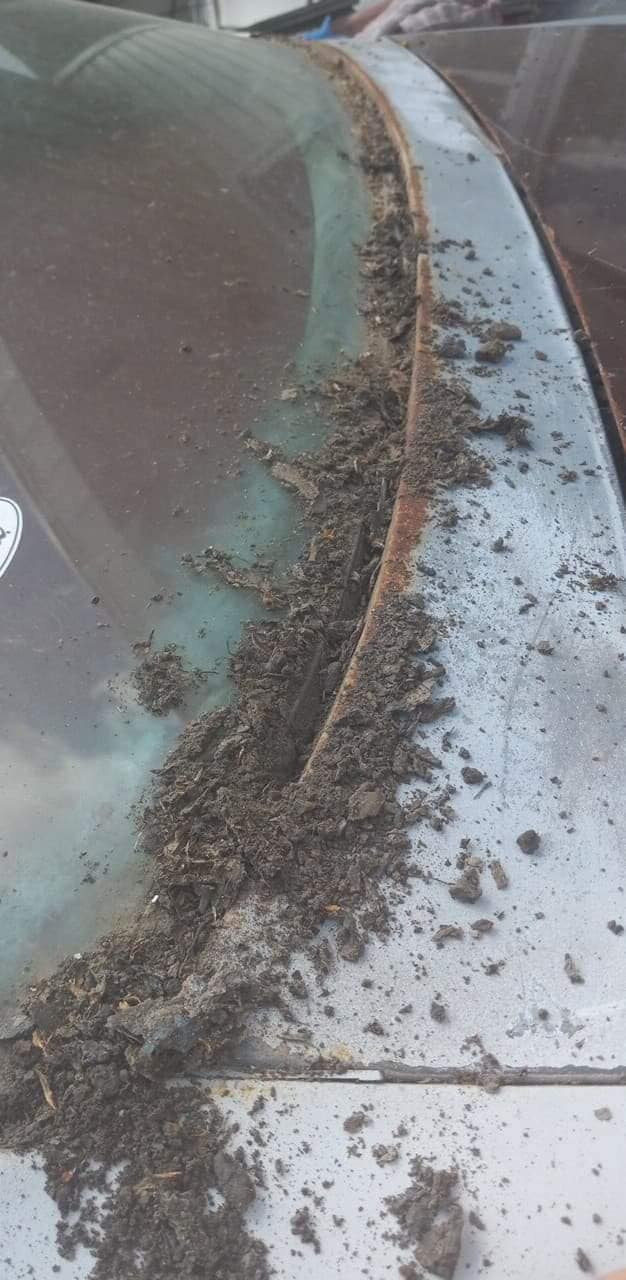
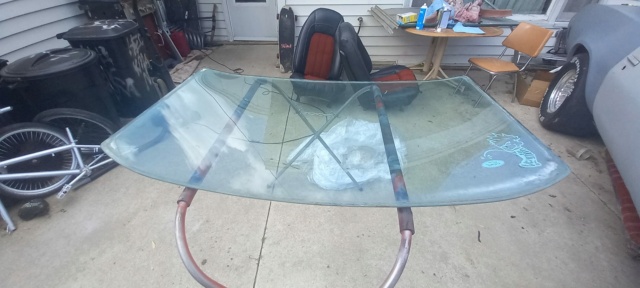
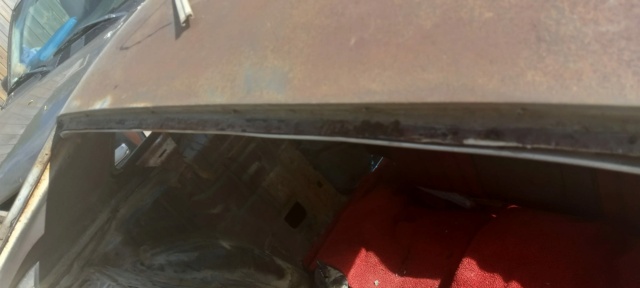
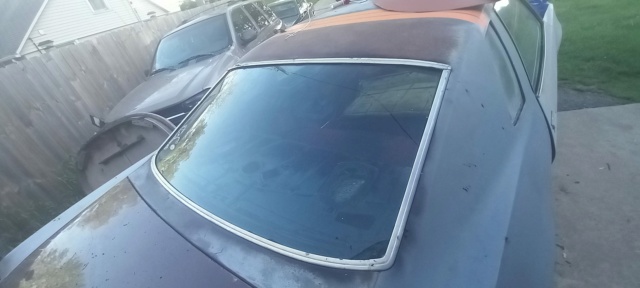
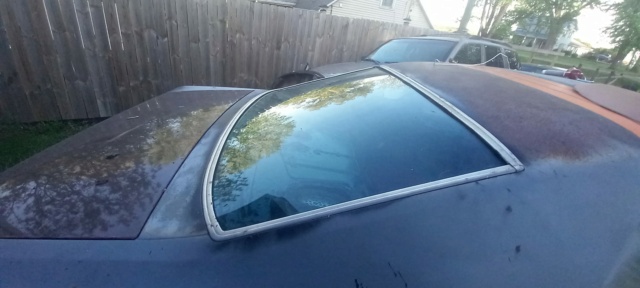
Well went to reinstall the opera window after it gingerly fell out of its home LOL I was mocking up the seat I got from Nick Wellik and clipped it and it fell out to the inside of car thankfully, Anywho I clean up the glass and then got a Wild hair you know where and decided to Pull the rear window chrome I know there was a Leak there already so had to be done.
.
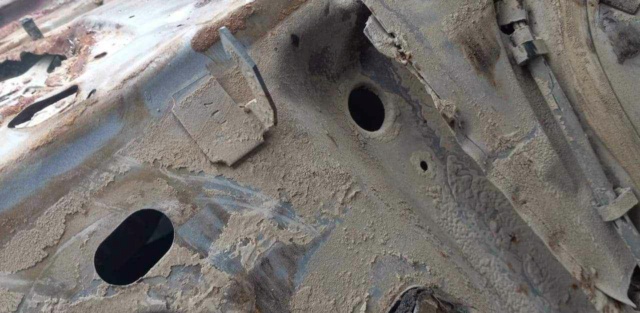
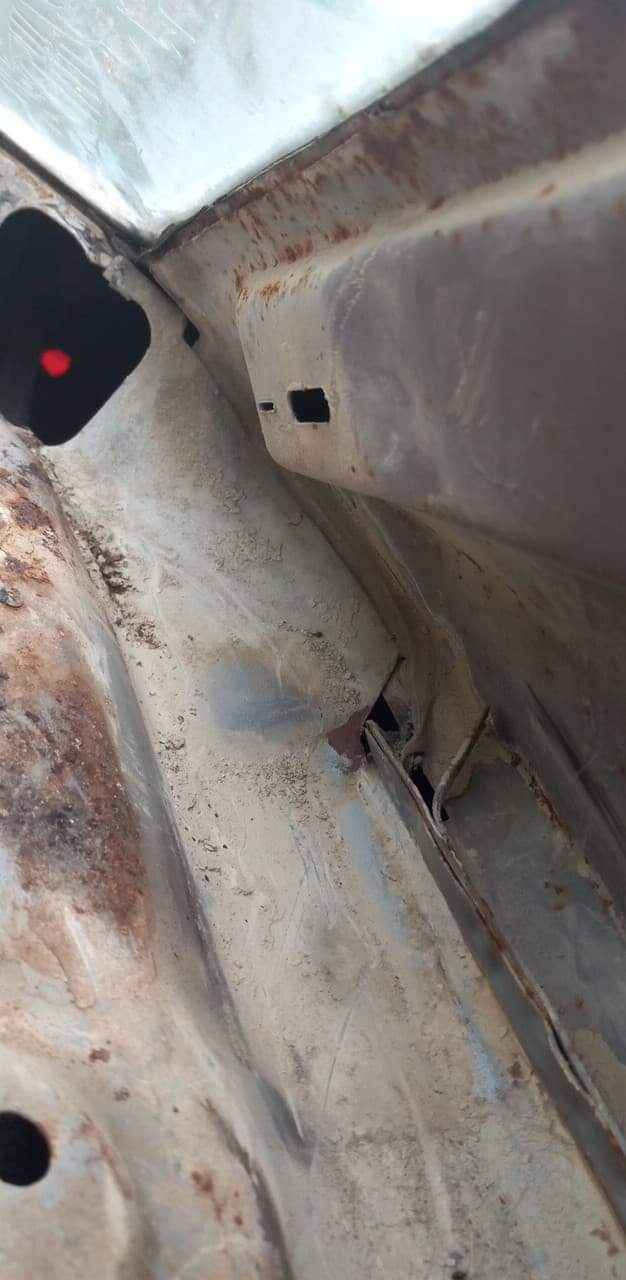
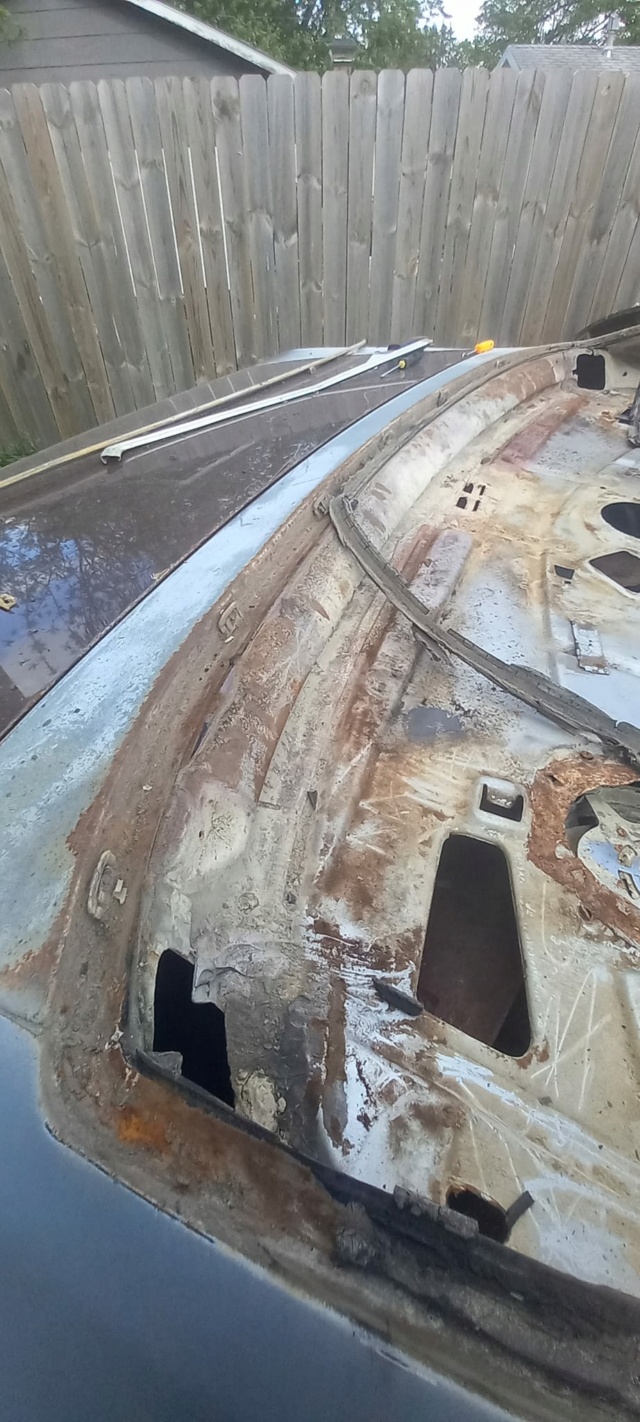
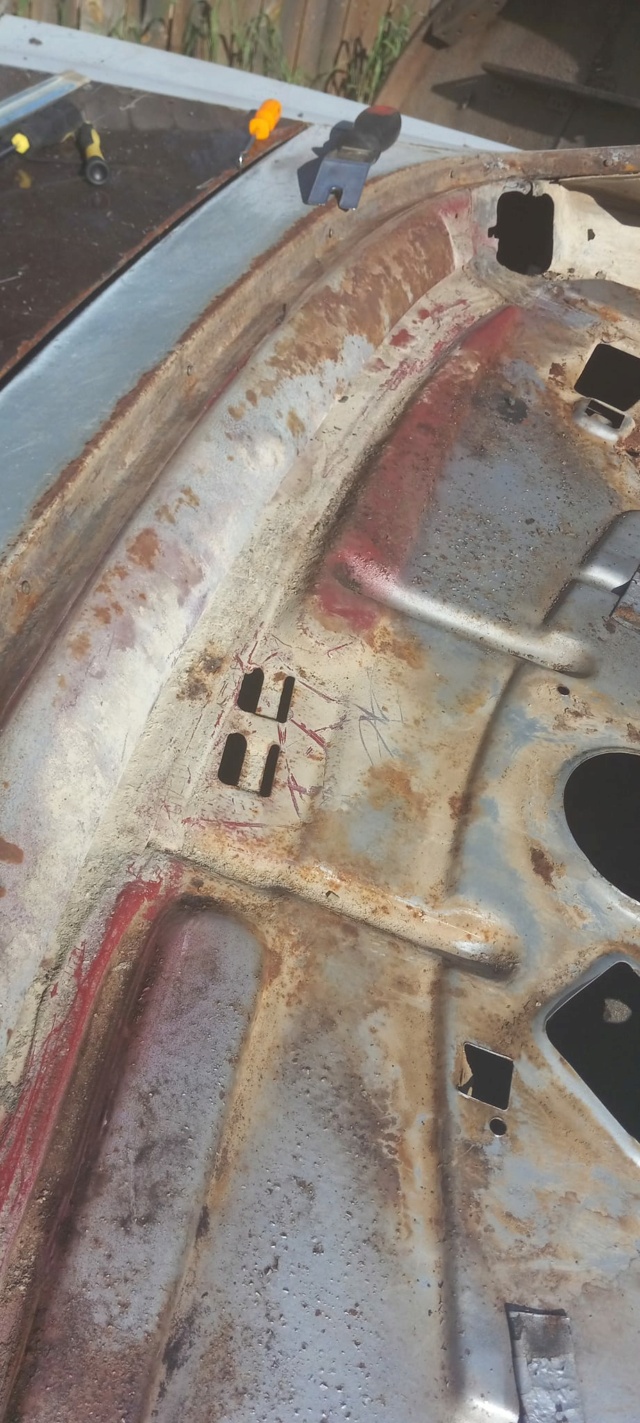
What I seen next made my heart fall out of chest in shear shock, Ok lets do this go grab vacuum and start fearing the worst as I say a Prayer under my breath, I vacuum the channel out yup your right I found the leak, BUT Wait Just wait a minute I am not seeing any holes yet well Ok then.
.
So I start messing with the glass and notice some of the Butyl tape has urethane squeezed between the glass and tape 2 maybe 3 time's, No at this Point if your still reading which I hope you are anyway. Now I start lifting up on the glass with my windshield tool and Low and behold and it wants to come out, WELL I WILL BE DIPPED at this time I am calling my friend
Samuelson John Cruztow ( has a yard with glass BUT doesn't have it inventoried yet) so I know LKQ just got a Lemans of 1977 Flavor in the yard so I keep going at the glass ever so gently and Low and behold it comes Out in Perfect condition Not a chip anywhere YAY
.
NOW FOR THE REST OF THE STORY I am 2 for 2 on windshield channels THERE IS NO RUST THRU ON FRONT OR REAR WINDSHIELD CHANNEL'S thank you for reading if you came this far I am really really happy with this esp after finding all that dirt and crap in the channel


Well went to reinstall the opera window after it gingerly fell out of its home LOL I was mocking up the seat I got from Nick Wellik and clipped it and it fell out to the inside of car thankfully, Anywho I clean up the glass and then got a Wild hair you know where and decided to Pull the rear window chrome I know there was a Leak there already so had to be done.
.
What I seen next made my heart fall out of chest in shear shock, Ok lets do this go grab vacuum and start fearing the worst as I say a Prayer under my breath, I vacuum the channel out yup your right I found the leak, BUT Wait Just wait a minute I am not seeing any holes yet well Ok then.
.
So I start messing with the glass and notice some of the Butyl tape has urethane squeezed between the glass and tape 2 maybe 3 time's, No at this Point if your still reading which I hope you are anyway. Now I start lifting up on the glass with my windshield tool and Low and behold and it wants to come out, WELL I WILL BE DIPPED at this time I am calling my friend
Samuelson John Cruztow ( has a yard with glass BUT doesn't have it inventoried yet) so I know LKQ just got a Lemans of 1977 Flavor in the yard so I keep going at the glass ever so gently and Low and behold it comes Out in Perfect condition Not a chip anywhere YAY
.
NOW FOR THE REST OF THE STORY I am 2 for 2 on windshield channels THERE IS NO RUST THRU ON FRONT OR REAR WINDSHIELD CHANNEL'S thank you for reading if you came this far I am really really happy with this esp after finding all that dirt and crap in the channel
I still have to Wire the 454 up yet the Windshield debacle and the Gravel road in the back seat Put a damper on that Plan, I know I had to fix the leak first, cause I replaced the floors already and don't want to do that Again anytime soon, I am Hoping to have it running after we Move back to Byron area At end Of June.Target date to drive it?
We had house here that you came to
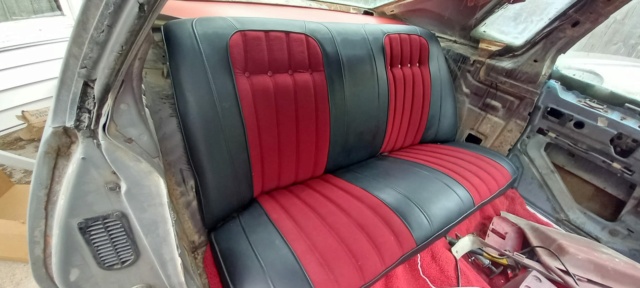
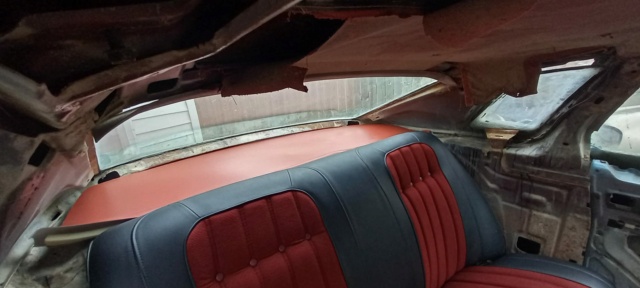
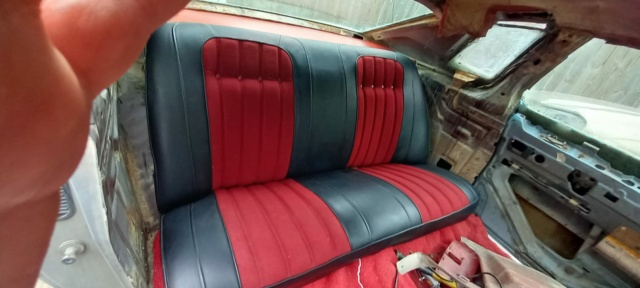
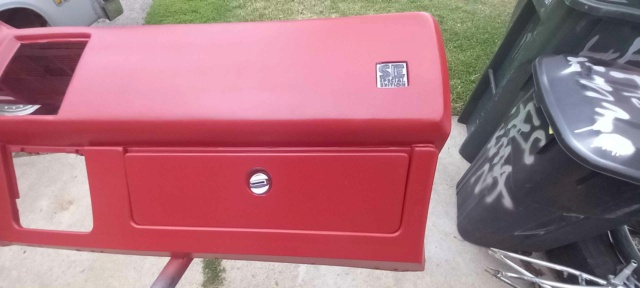
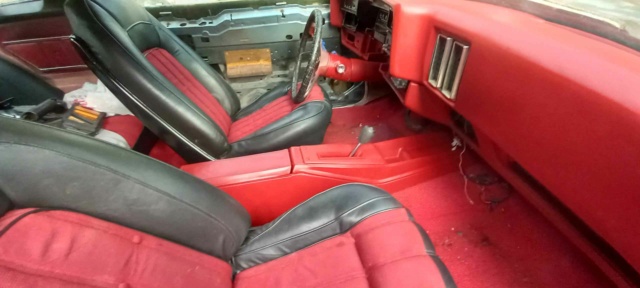
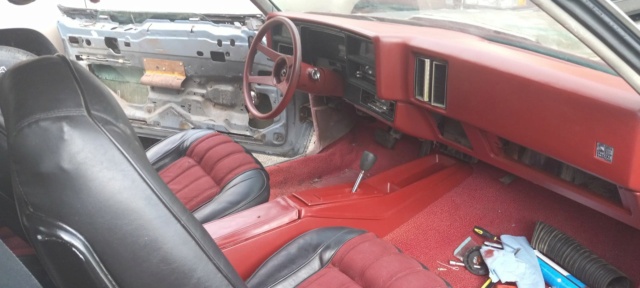
Well, I finally got the Seats in car and package tray Buttoned Up I have to drill two new holes for each seat as the Holes for the swivel seats were WAYYYYYYY off LOL But thanks to my friend in Iowa (Nick Wellik) They look great in there, I have to switch the red dash in and dye the remainder of the red Interior yet But I needed to get these in to see what I was Missing
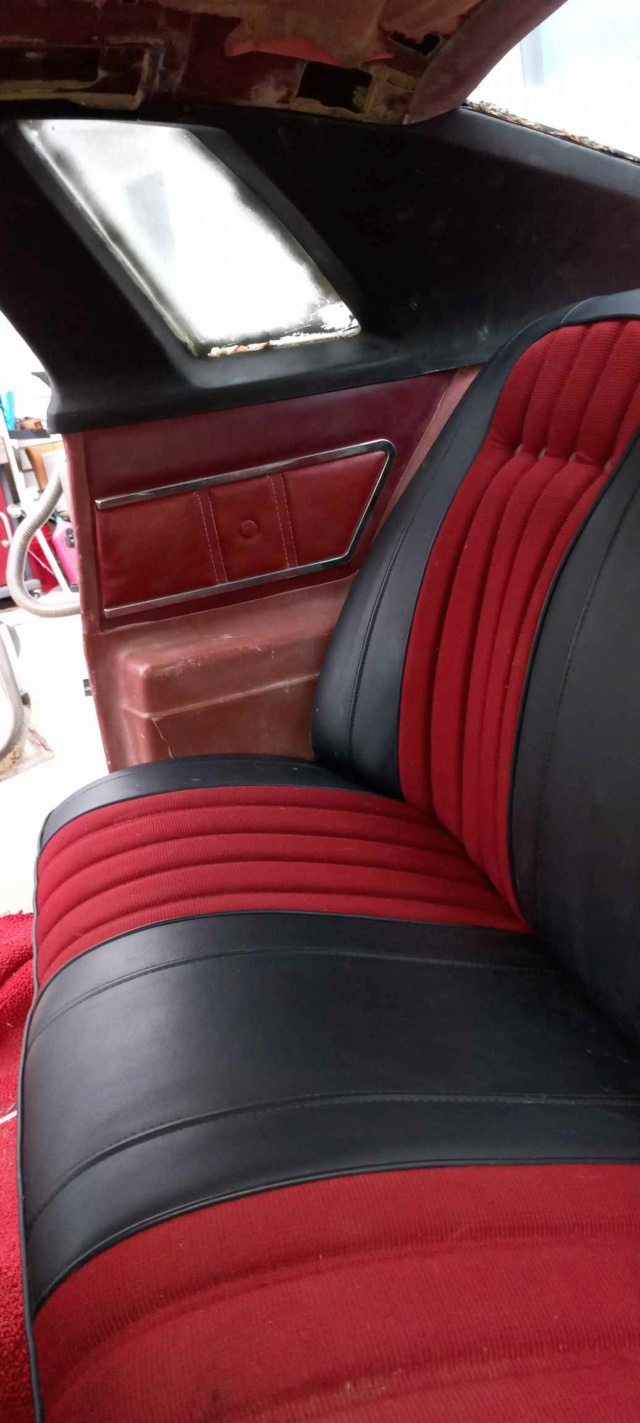
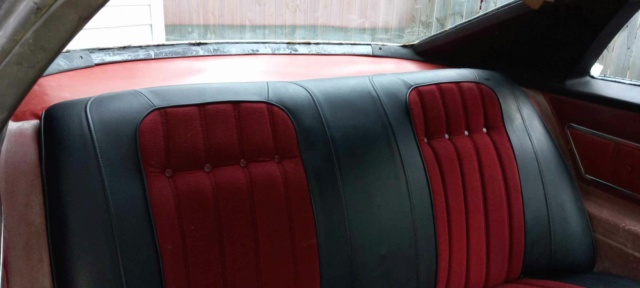
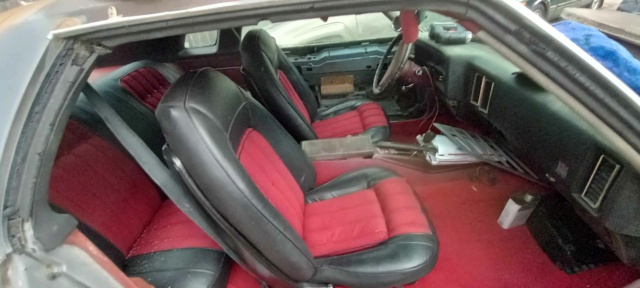
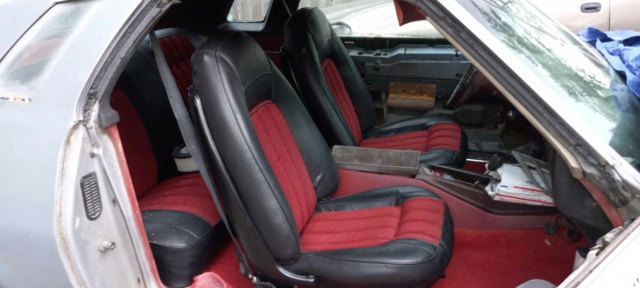


Thank ya Buddy Came from a 1977 Gran Prix via a 1975 Monte CarloThose seats are pimp af.
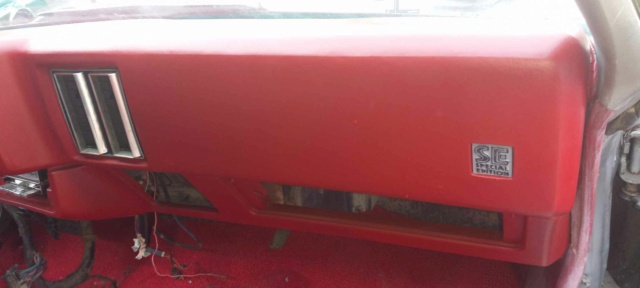
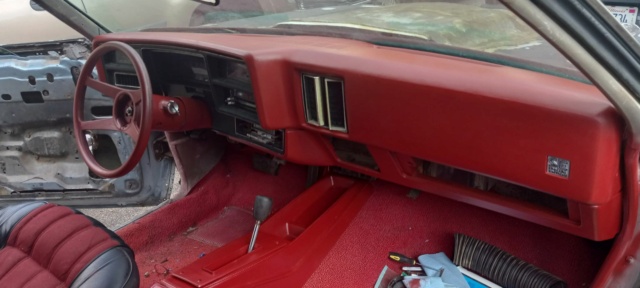
Progress is progress, I have to pull the Black dash out for it sold Going to a good Home and he is Happy with it for his is Mutilated LOL Anyway I took the Red dash from the Shed rafters wrapped in Plastic and for a reason I am stumped it was scratched to all get out and even had to Fill in a spot or two with glazing putty HMM got me stumped .....
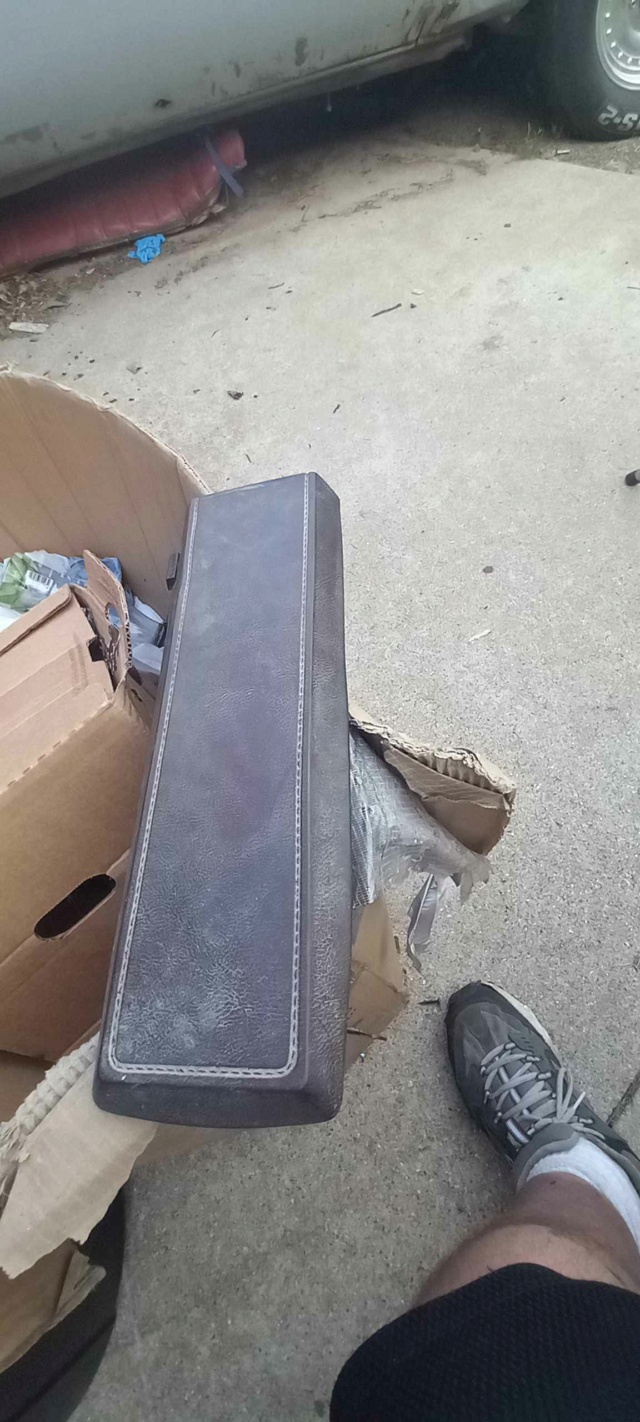
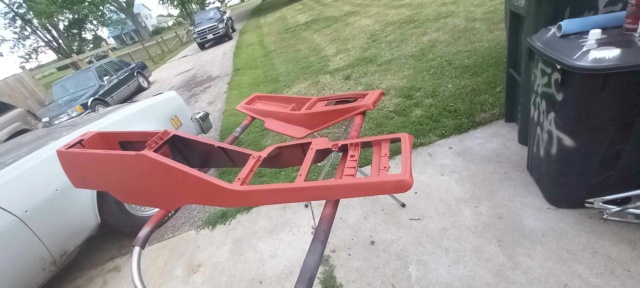
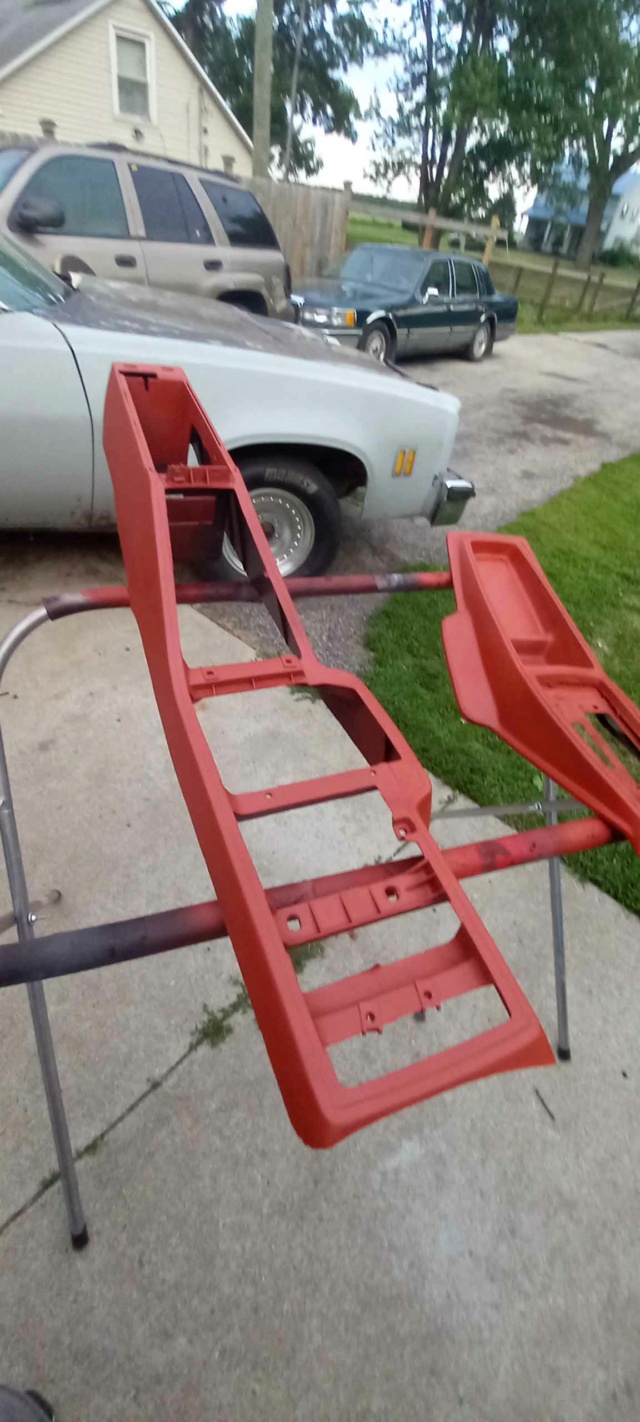
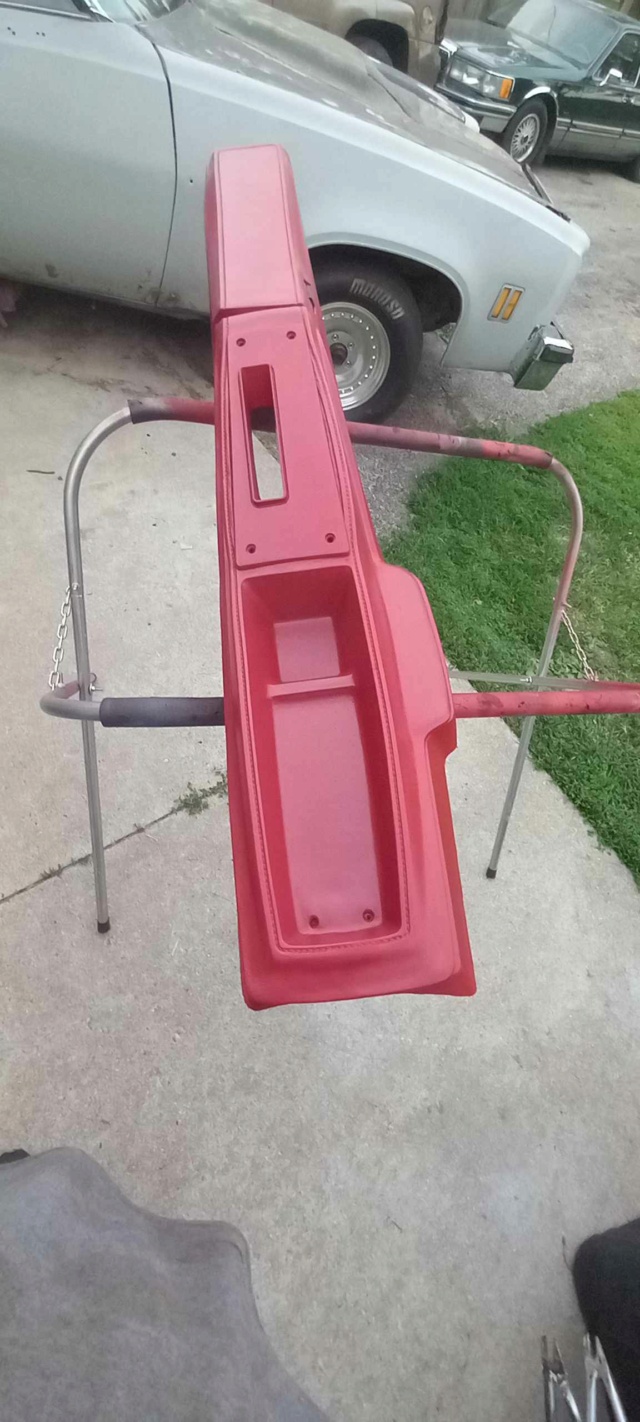
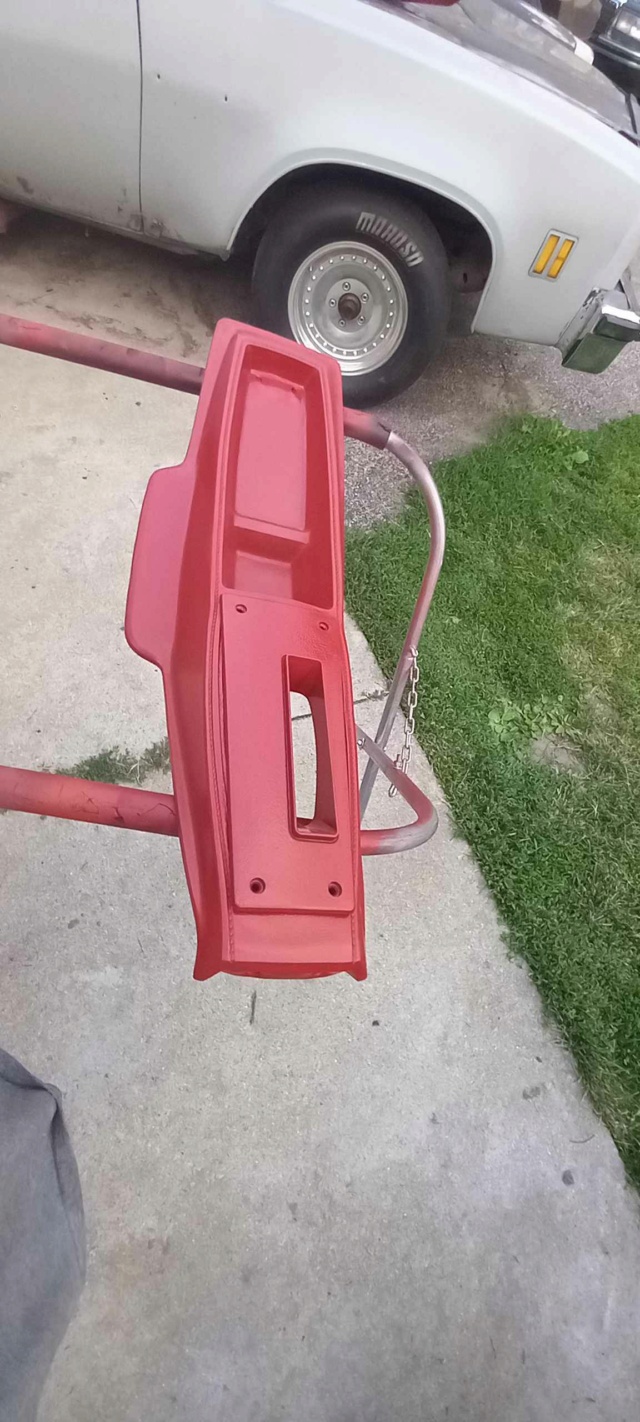
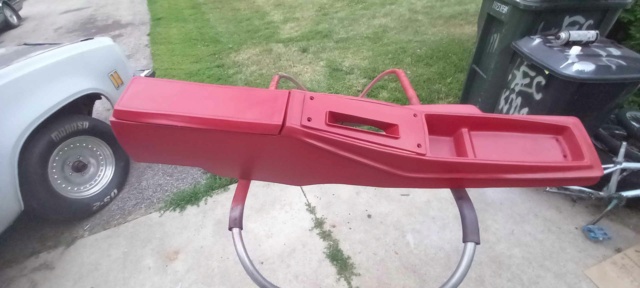
So this brings me to my Nasty looking console I had to do that Before the pretty dash Install oh my word it was Bad the red was almost brownish black from Never being cleaned before I got it, So took hot water with Blue dawn dish soap (doesn't leave a residue) cleaned it up, dried it thoroughly, Then Adhesion Promoter (sit 15 minutes) then another light coat of promoter again, Then plastic primer, then 3 Nice coats of firethorne red YAYYYYY
NOW its ready for install tomorrow after I apply clear coat Let it dry while pulling the Black dash then sit back and enjoy the Nice redone Interior ALL THATS LEFT to paint is the sail panels and the rear side armrest panels THEN ALL DONE Sorta LOL
Nice work dude, it all looks really goodProgress is progress, I have to pull the Black dash out for it sold Going to a good Home and he is Happy with it for his is Mutilated LOL Anyway I took the Red dash from the Shed rafters wrapped in Plastic and for a reason I am stumped it was scratched to all get out and even had to Fill in a spot or two with glazing putty HMM got me stumped .....
So this brings me to my Nasty looking console I had to do that Before the pretty dash Install oh my word it was Bad the red was almost brownish black from Never being cleaned before I got it, So took hot water with Blue dawn dish soap (doesn't leave a residue) cleaned it up, dried it thoroughly, Then Adhesion Promoter (sit 15 minutes) then another light coat of promoter again, Then plastic primer, then 3 Nice coats of firethorne red YAYYYYY
NOW its ready for install tomorrow after I apply clear coat Let it dry while pulling the Black dash then sit back and enjoy the Nice redone Interior ALL THATS LEFT to paint is the sail panels and the rear side armrest panels THEN ALL DONE Sorta LOL
Thanks Shawn it's getting thereNice work dude, it all looks really good
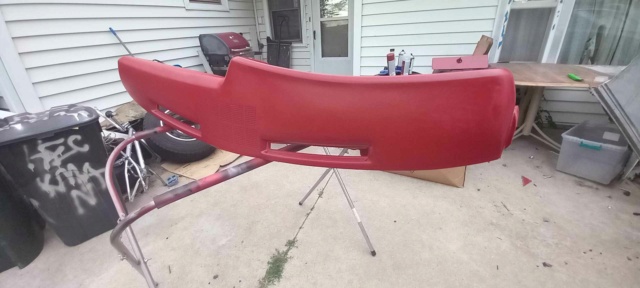
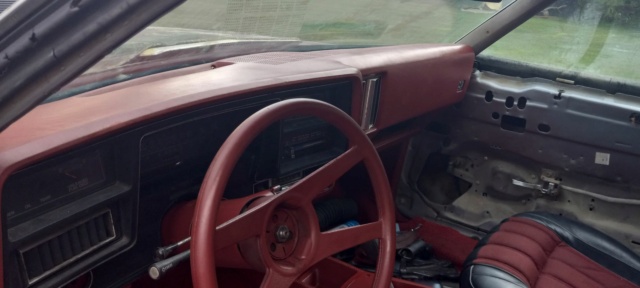
1st pic is before I redone dash, rest are Mounted today till rained yet again will finish it up over next few days
.
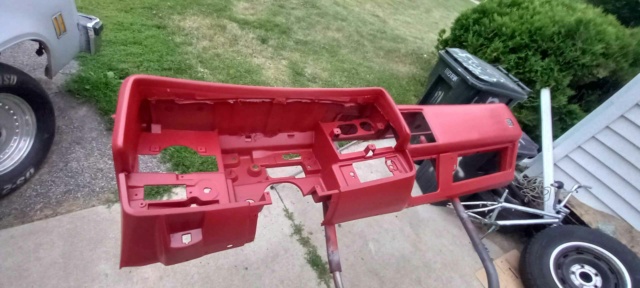
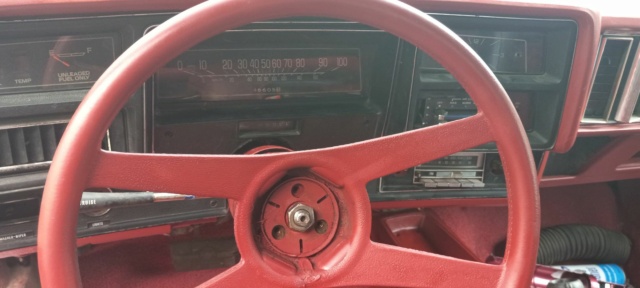
Well Dash is in, Console is just sitting in there have to get correct screws can't locate them LOL Steering column is painted its getting ever so close I can see it finished in my head ONLY THING LEFT to paint is sail panels WOOT WOOT Yayyyy
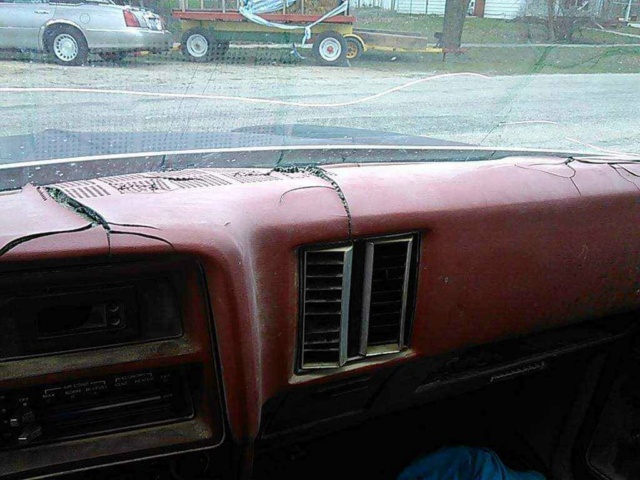
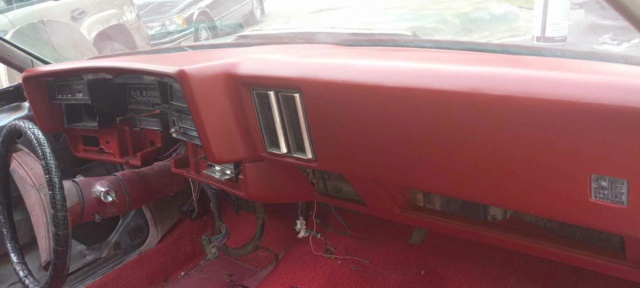


.
Well Dash is in, Console is just sitting in there have to get correct screws can't locate them LOL Steering column is painted its getting ever so close I can see it finished in my head ONLY THING LEFT to paint is sail panels WOOT WOOT Yayyyy


My hands and arms sure don't I WOULD NEVER do it again and glad my Daughter's Chevelle already has a Dash done It had a cap put on it WIll have some time into it maybe a few hours to blend the cap in to make it look more uniform like it's not there ALSO CAN SEE the difference with the speaker holes there not as Wide as Normal dash
Hers is also going Black interior so have to do that also the 3rd pic is Her CHevelle SE Mr_Roboto
Mine will be Black Exterior Firethorn Red and hers will be Silver with Black interior AND STILL LOOKING FOR Camaro style buckets for hers (Second Gen or 5th gen seats) No cloth need Black Vinyl


Hers is also going Black interior so have to do that also the 3rd pic is Her CHevelle SE
Mine will be Black Exterior Firethorn Red and hers will be Silver with Black interior AND STILL LOOKING FOR Camaro style buckets for hers (Second Gen or 5th gen seats) No cloth need Black Vinyl
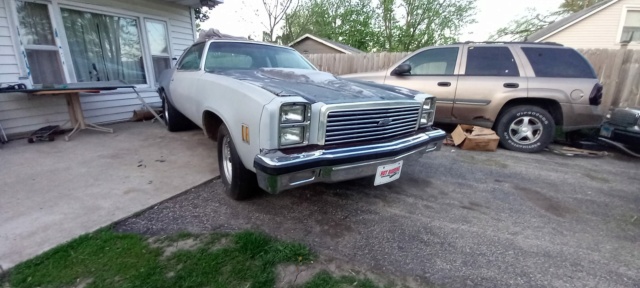
Well my Car's got some good attention the other Day by Stacey David's Gearz from Motor trend TV and YouTube
Chose mine and my Daughter's cars for what are you working on Series on FB and IG kinda kewl it would get recognized like that
Chose mine and my Daughter's cars for what are you working on Series on FB and IG kinda kewl it would get recognized like that
Finished up the Dash wiring everything is back where it belongs except ashtray and glovebox being on the dash, Bezel is In for the LAST time I am so happy for that its been a Long time coming I am start to see the Light on the end of tunnel for the Interior Just seats bolted in, finish the sail panels and secure package tray down and then ITS DONE WHEW DONE DONE DONE
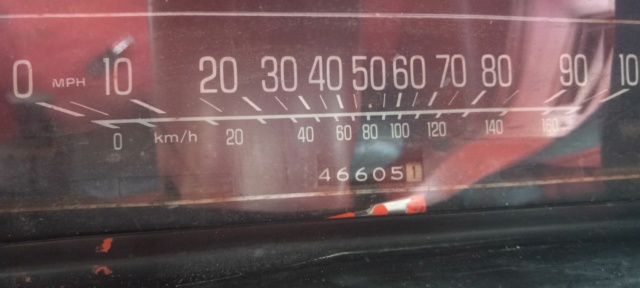
YES That is Actual Miles, Title backs it up

YES That is Actual Miles, Title backs it up
The only reason switching cars is daughter informed me she wants to move out when she's 21 so it would not have been done anyways and wanted her to have a complete car before then Want and need her safe when she is driving So the 454 will be yanked and put the original 305 back in LOOK FOR NEW BUILD THREAD FROM ME she is taking this one over
Thread Info
-
 Created
 -
233Replies
-
12KViews
-
Participants list