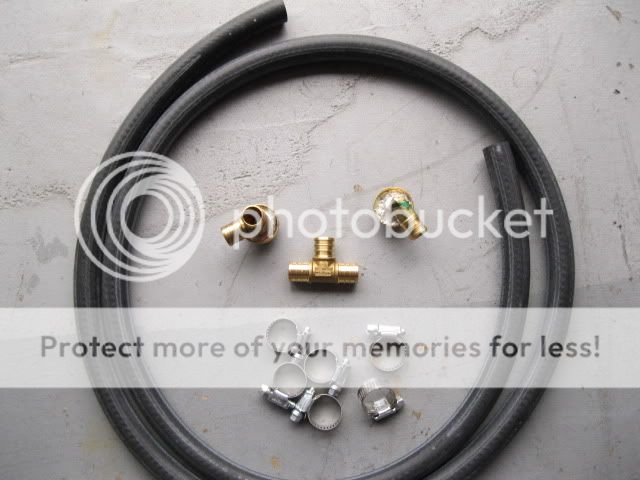
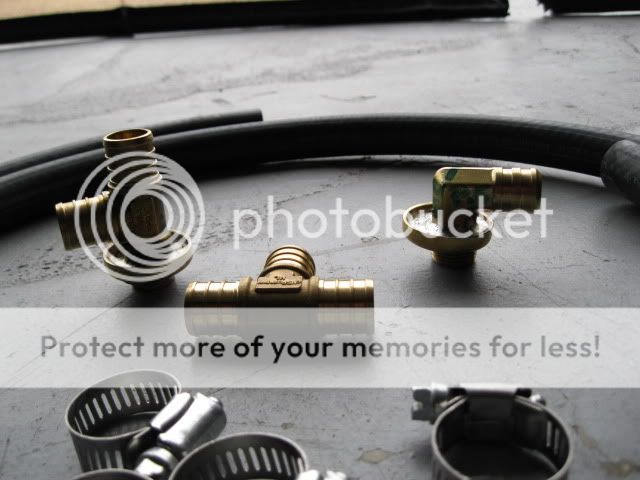
I've seen 2 other wrenches make homemade cooling mods (Blown3.8/Zack). Finally, it's my turn to give it a shot. I went with the same expansion plug design with a few changes to make it my own. My cooling mod is 100% brass with 5/8" fittings and I made better use of the T adapter that ties the 2-cylinder banks together by putting it on the DS expansion plug where there is PLENTY room to accommodate it. Gates hose is a must have, it's been VERY reliable to me in the past so don't cheap out with no name heater hose.
Here is a side view of the modified expansion plugs. Notice the amount of solder I used; it almost fills the bowls on each expansion plug. If that wasn't enough I still soldered the bottom area under the plug. The extra time I spent doing this will ensure it will be leak free
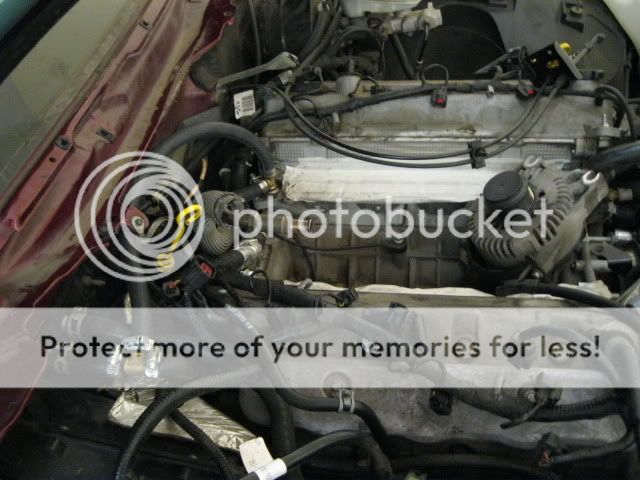
To get started the remove the negative post from the battery, then start disconnecting the wire harness **use a precision screwdriver to remove the retainer clips, this will ensure you won't break any retainers**, after removing the connectors go ahead and remove the fuel feed using the correct disconnect tool

Now is a good time to spray the EGR pipe with a good penetrating oil and allow it to settle. After waiting break, it lose with a crescent wrench

Next, it's time to drain the radiator. What you think you're going to do a cooling mod and not change out the 9yo radiator coolant? NO!
Put a drip pan under the DS lower radiator area and remove the white drainplug then undo the cap on the overflow tank. Allow all the fluid to drain out of the radiator then move the drip pan under the thermostat housing then remove the hose connected to the bottom of the engine, and allow the engine to drain
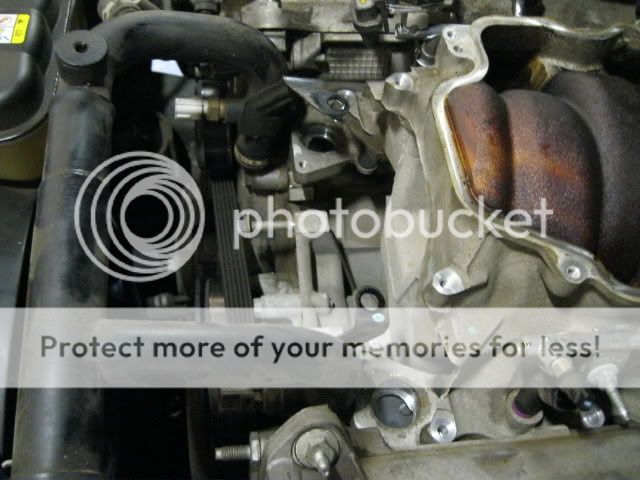
You can now remove the alternator and set it aside, then remove the upper cross over tube. Place the COT in front of the timing cover so it's out of the way
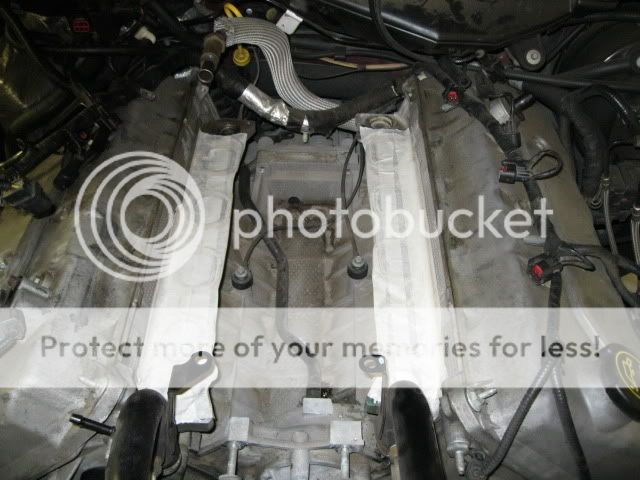
Now comes the fun part, remove all the upper intake bolts and prepare to be shocked. This is what EVERY MM intake looks like, if your SC'ed your no exception, this is what your SC rotors/intercooler/lower intake will look like

Before attempting to remove the lower intake make sure you disconnect the wire harness from the back of the intake **this is a VERY important step**
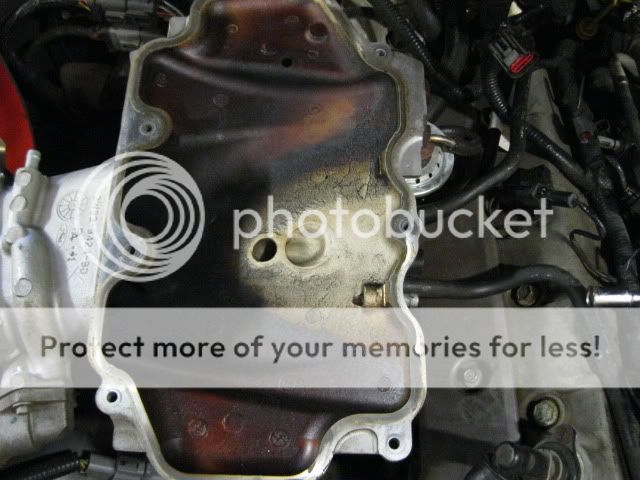
The lower intake has a few ounces of wet oil pooled in the base. I tried to get a good pic but it's hard to get both the camera lense and the flash in such a small area. No amount of Seafoam will get this much oil/oil vapors cleaned out of the intake track

You can see the area where the heated pcv bung actually worked and where it didn't
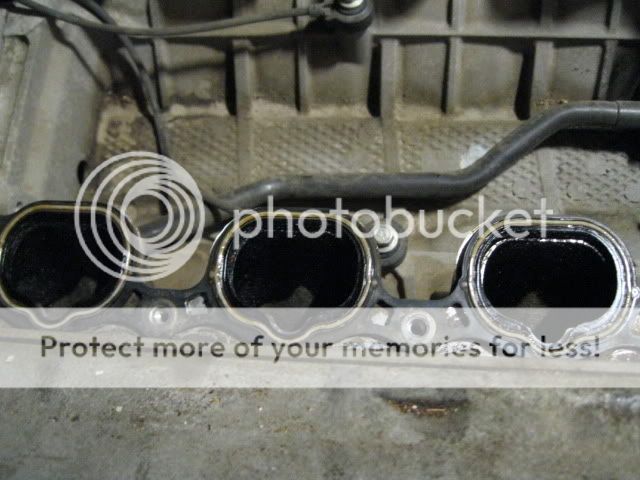
Some of you would argue oil in the intake track won't harm a thing. I strongly disagree, the oil collected in the intake is a performance robber. It kills the airflow in the intake making the airstream more turbulent and as a worse case it will eventually make its way into the combustion chamber. Look at the oil buildup on the air passages in the cylinder heads. There is no doubt this MM smoked on startup
Make sure when you remove the lower intake you have a shop vac handy to get the debris on the cylinder heads. Afterwards tape them good
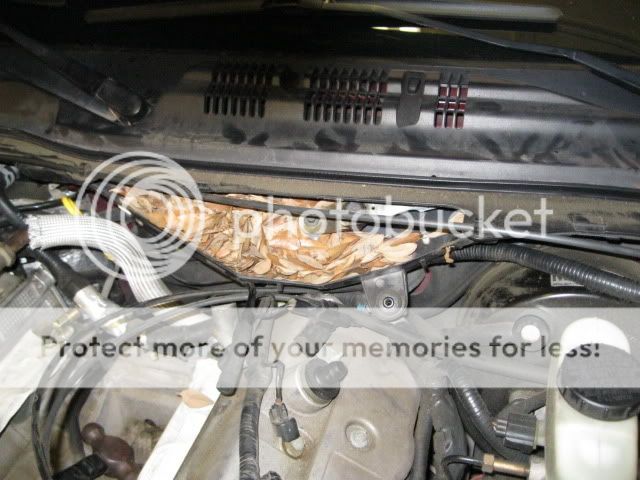
You will need to remove the wiper cowl to gain access to the expansion plug on the DS. Here is what the wiper cowl looked like on this MM. Wonder why the wipers quit working or go wacky on some cars?
Now you can knock out the stock expansion plugs with a hammer and chisel. If you need to hit it more than a few times you're doing it wrong. Here is a video:
After removing the stock expansion plugs be sure to remove the OEM sealer inside of the cylinder head, then clean them with alcohol, and finally apply a good thread sealer to both the cylinder head and the modified expansion plugs. The product I used dries but remains pliable.
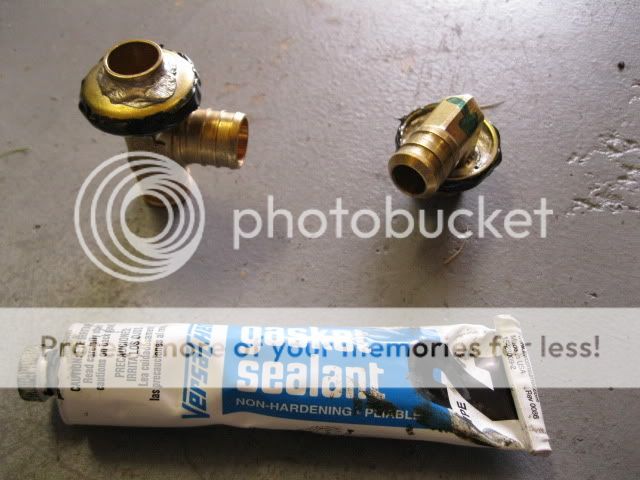
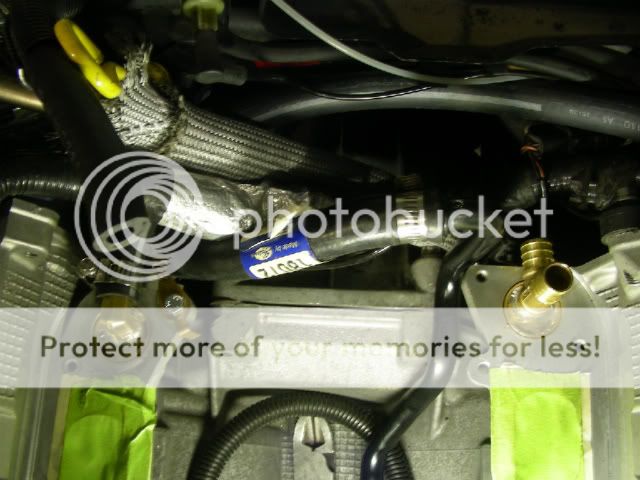
Now you can drive the modified expansion plugs into the cylinder heads (the PS gets clocked at 12:00 the DS gets clocked at 10:00), connect the 5/8" hose and tie the 2-cylinder banks together. You will need to leave a length of hose to get to the return at the heater core. Notice I let the DS be the output to the water pump. I did this to avoid tight bends by connecting to the PS. Most all cooling mods use the PS as a feed.

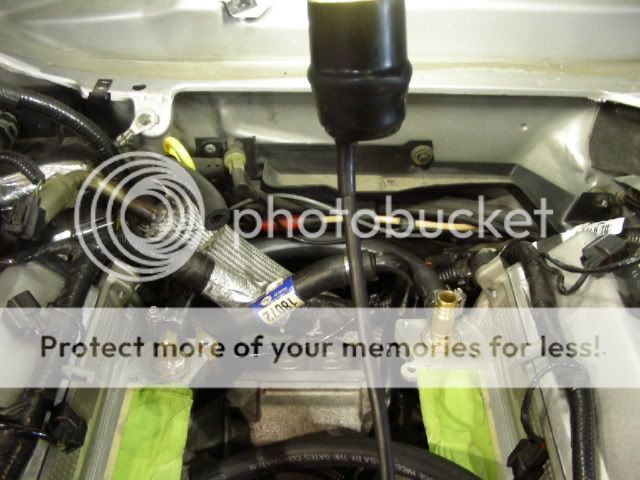
Here is a pic with the lower intake installed
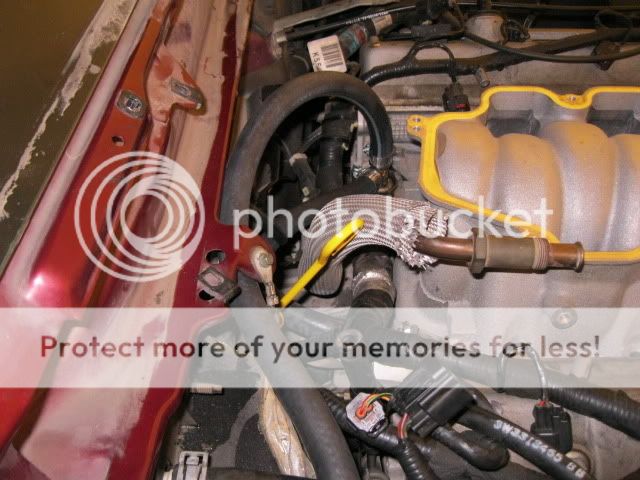
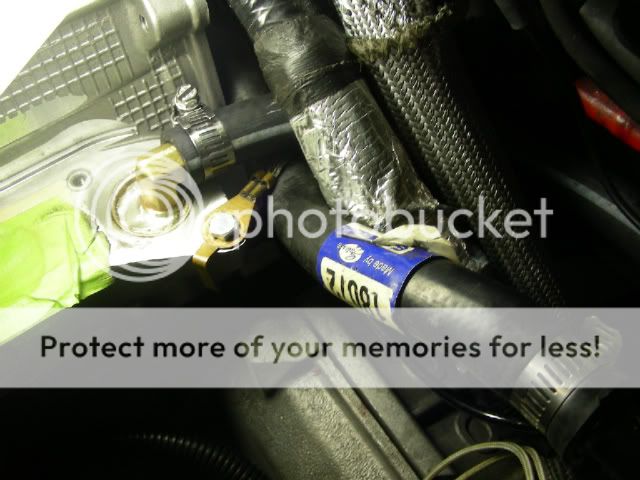
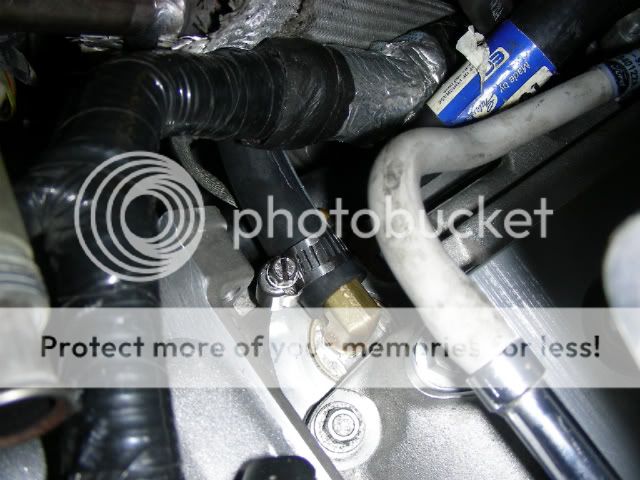
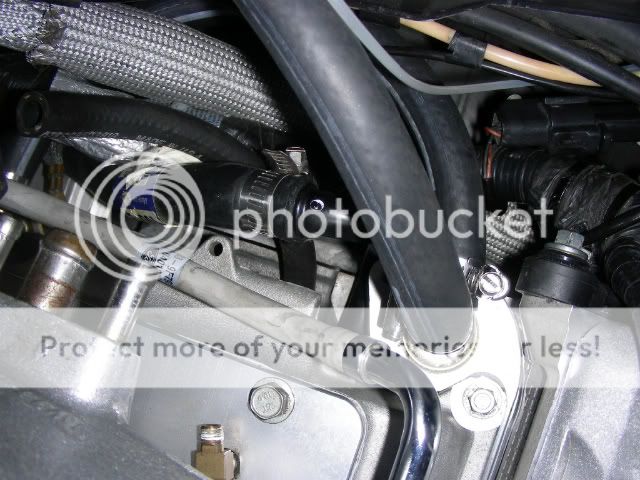
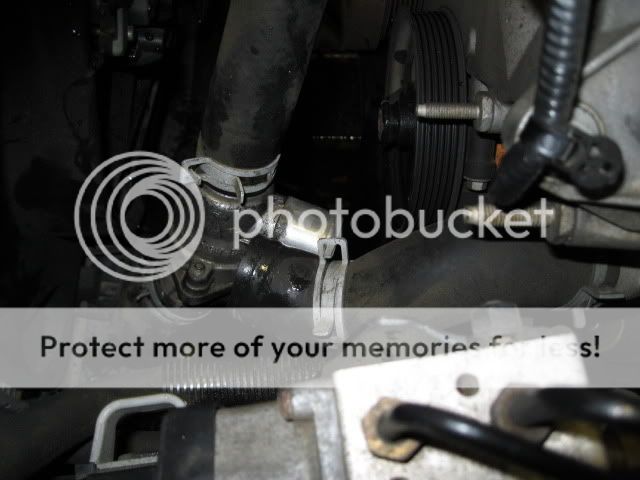
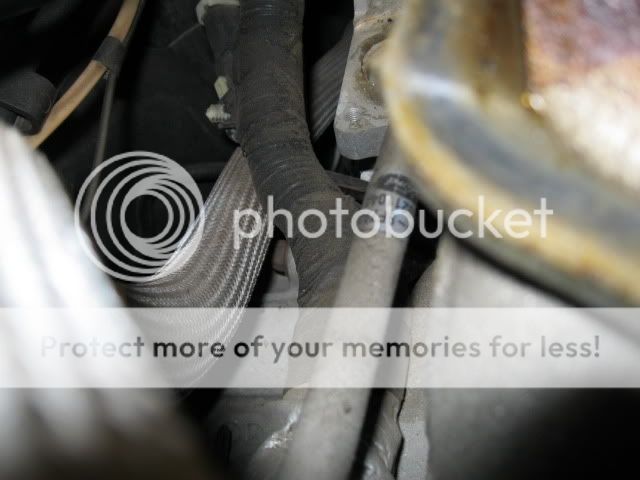
You will want to connect to the hose that goes to the pipe that runs under the lower intake to the back of the water pump. There is no need to touch the cross over tube with this design. To the layman its unseen
If you're considering a cooling mod try to find one that doesn't use the cross over tube as a return. My reason for this thinking is, if you look at all the external hose routing from both the heater core and the heated pcv bung they get fed from the crossover tube and return to the pipe that runs under the lower intake, directly to the back of the water pump. If you tap the crossover tube, you're taking the feed from the crossover tube and returning it to the crossover tube which makes no sense.
The last thing to do is to fill and burp the system
Ford 4.6L DOHC Coolant Refill & Burp Procedure by Reische Performance Products
Here is a side view of the modified expansion plugs. Notice the amount of solder I used; it almost fills the bowls on each expansion plug. If that wasn't enough I still soldered the bottom area under the plug. The extra time I spent doing this will ensure it will be leak free
To get started the remove the negative post from the battery, then start disconnecting the wire harness **use a precision screwdriver to remove the retainer clips, this will ensure you won't break any retainers**, after removing the connectors go ahead and remove the fuel feed using the correct disconnect tool
Now is a good time to spray the EGR pipe with a good penetrating oil and allow it to settle. After waiting break, it lose with a crescent wrench
Next, it's time to drain the radiator. What you think you're going to do a cooling mod and not change out the 9yo radiator coolant? NO!
Put a drip pan under the DS lower radiator area and remove the white drainplug then undo the cap on the overflow tank. Allow all the fluid to drain out of the radiator then move the drip pan under the thermostat housing then remove the hose connected to the bottom of the engine, and allow the engine to drain
You can now remove the alternator and set it aside, then remove the upper cross over tube. Place the COT in front of the timing cover so it's out of the way
Now comes the fun part, remove all the upper intake bolts and prepare to be shocked. This is what EVERY MM intake looks like, if your SC'ed your no exception, this is what your SC rotors/intercooler/lower intake will look like
Before attempting to remove the lower intake make sure you disconnect the wire harness from the back of the intake **this is a VERY important step**
The lower intake has a few ounces of wet oil pooled in the base. I tried to get a good pic but it's hard to get both the camera lense and the flash in such a small area. No amount of Seafoam will get this much oil/oil vapors cleaned out of the intake track
You can see the area where the heated pcv bung actually worked and where it didn't
Some of you would argue oil in the intake track won't harm a thing. I strongly disagree, the oil collected in the intake is a performance robber. It kills the airflow in the intake making the airstream more turbulent and as a worse case it will eventually make its way into the combustion chamber. Look at the oil buildup on the air passages in the cylinder heads. There is no doubt this MM smoked on startup
Make sure when you remove the lower intake you have a shop vac handy to get the debris on the cylinder heads. Afterwards tape them good
You will need to remove the wiper cowl to gain access to the expansion plug on the DS. Here is what the wiper cowl looked like on this MM. Wonder why the wipers quit working or go wacky on some cars?
Now you can knock out the stock expansion plugs with a hammer and chisel. If you need to hit it more than a few times you're doing it wrong. Here is a video:
After removing the stock expansion plugs be sure to remove the OEM sealer inside of the cylinder head, then clean them with alcohol, and finally apply a good thread sealer to both the cylinder head and the modified expansion plugs. The product I used dries but remains pliable.
Now you can drive the modified expansion plugs into the cylinder heads (the PS gets clocked at 12:00 the DS gets clocked at 10:00), connect the 5/8" hose and tie the 2-cylinder banks together. You will need to leave a length of hose to get to the return at the heater core. Notice I let the DS be the output to the water pump. I did this to avoid tight bends by connecting to the PS. Most all cooling mods use the PS as a feed.
Here is a pic with the lower intake installed
You will want to connect to the hose that goes to the pipe that runs under the lower intake to the back of the water pump. There is no need to touch the cross over tube with this design. To the layman its unseen
If you're considering a cooling mod try to find one that doesn't use the cross over tube as a return. My reason for this thinking is, if you look at all the external hose routing from both the heater core and the heated pcv bung they get fed from the crossover tube and return to the pipe that runs under the lower intake, directly to the back of the water pump. If you tap the crossover tube, you're taking the feed from the crossover tube and returning it to the crossover tube which makes no sense.
The last thing to do is to fill and burp the system
Ford 4.6L DOHC Coolant Refill & Burp Procedure by Reische Performance Products
Last edited: