Got two I've done so far. I'm creating this as a guide for those who need it and a placeholder for the information I need to look back on.
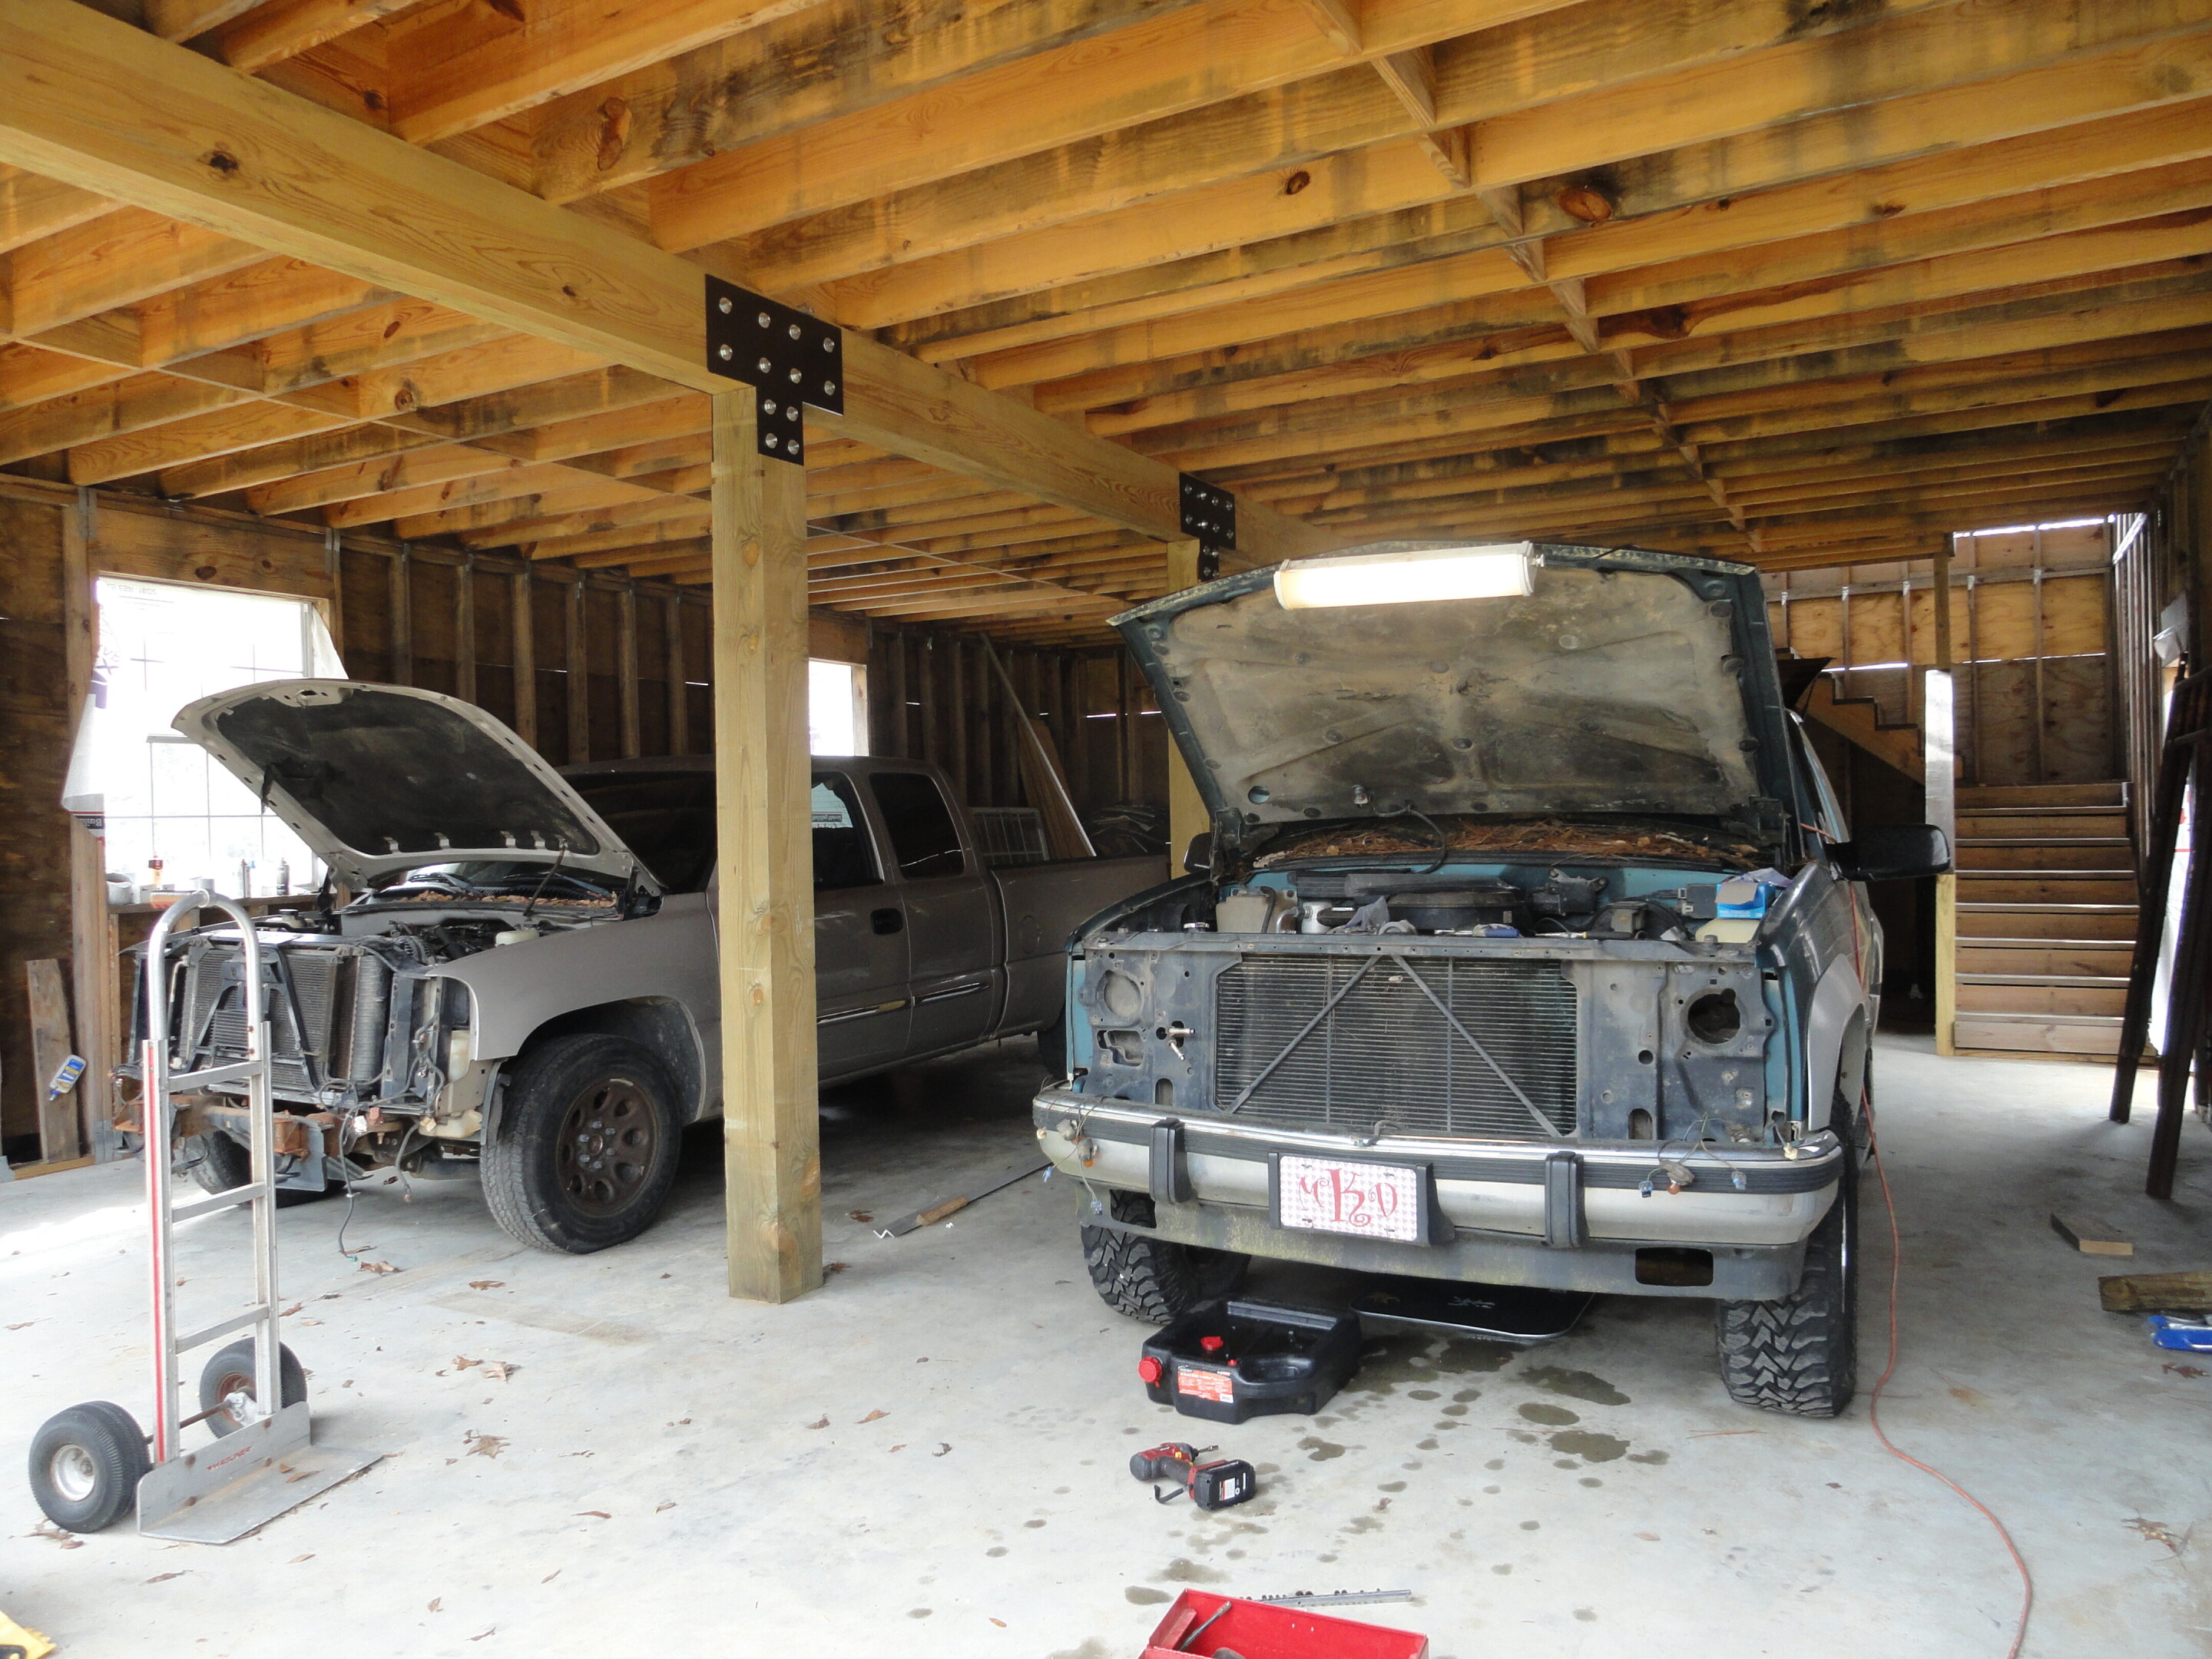
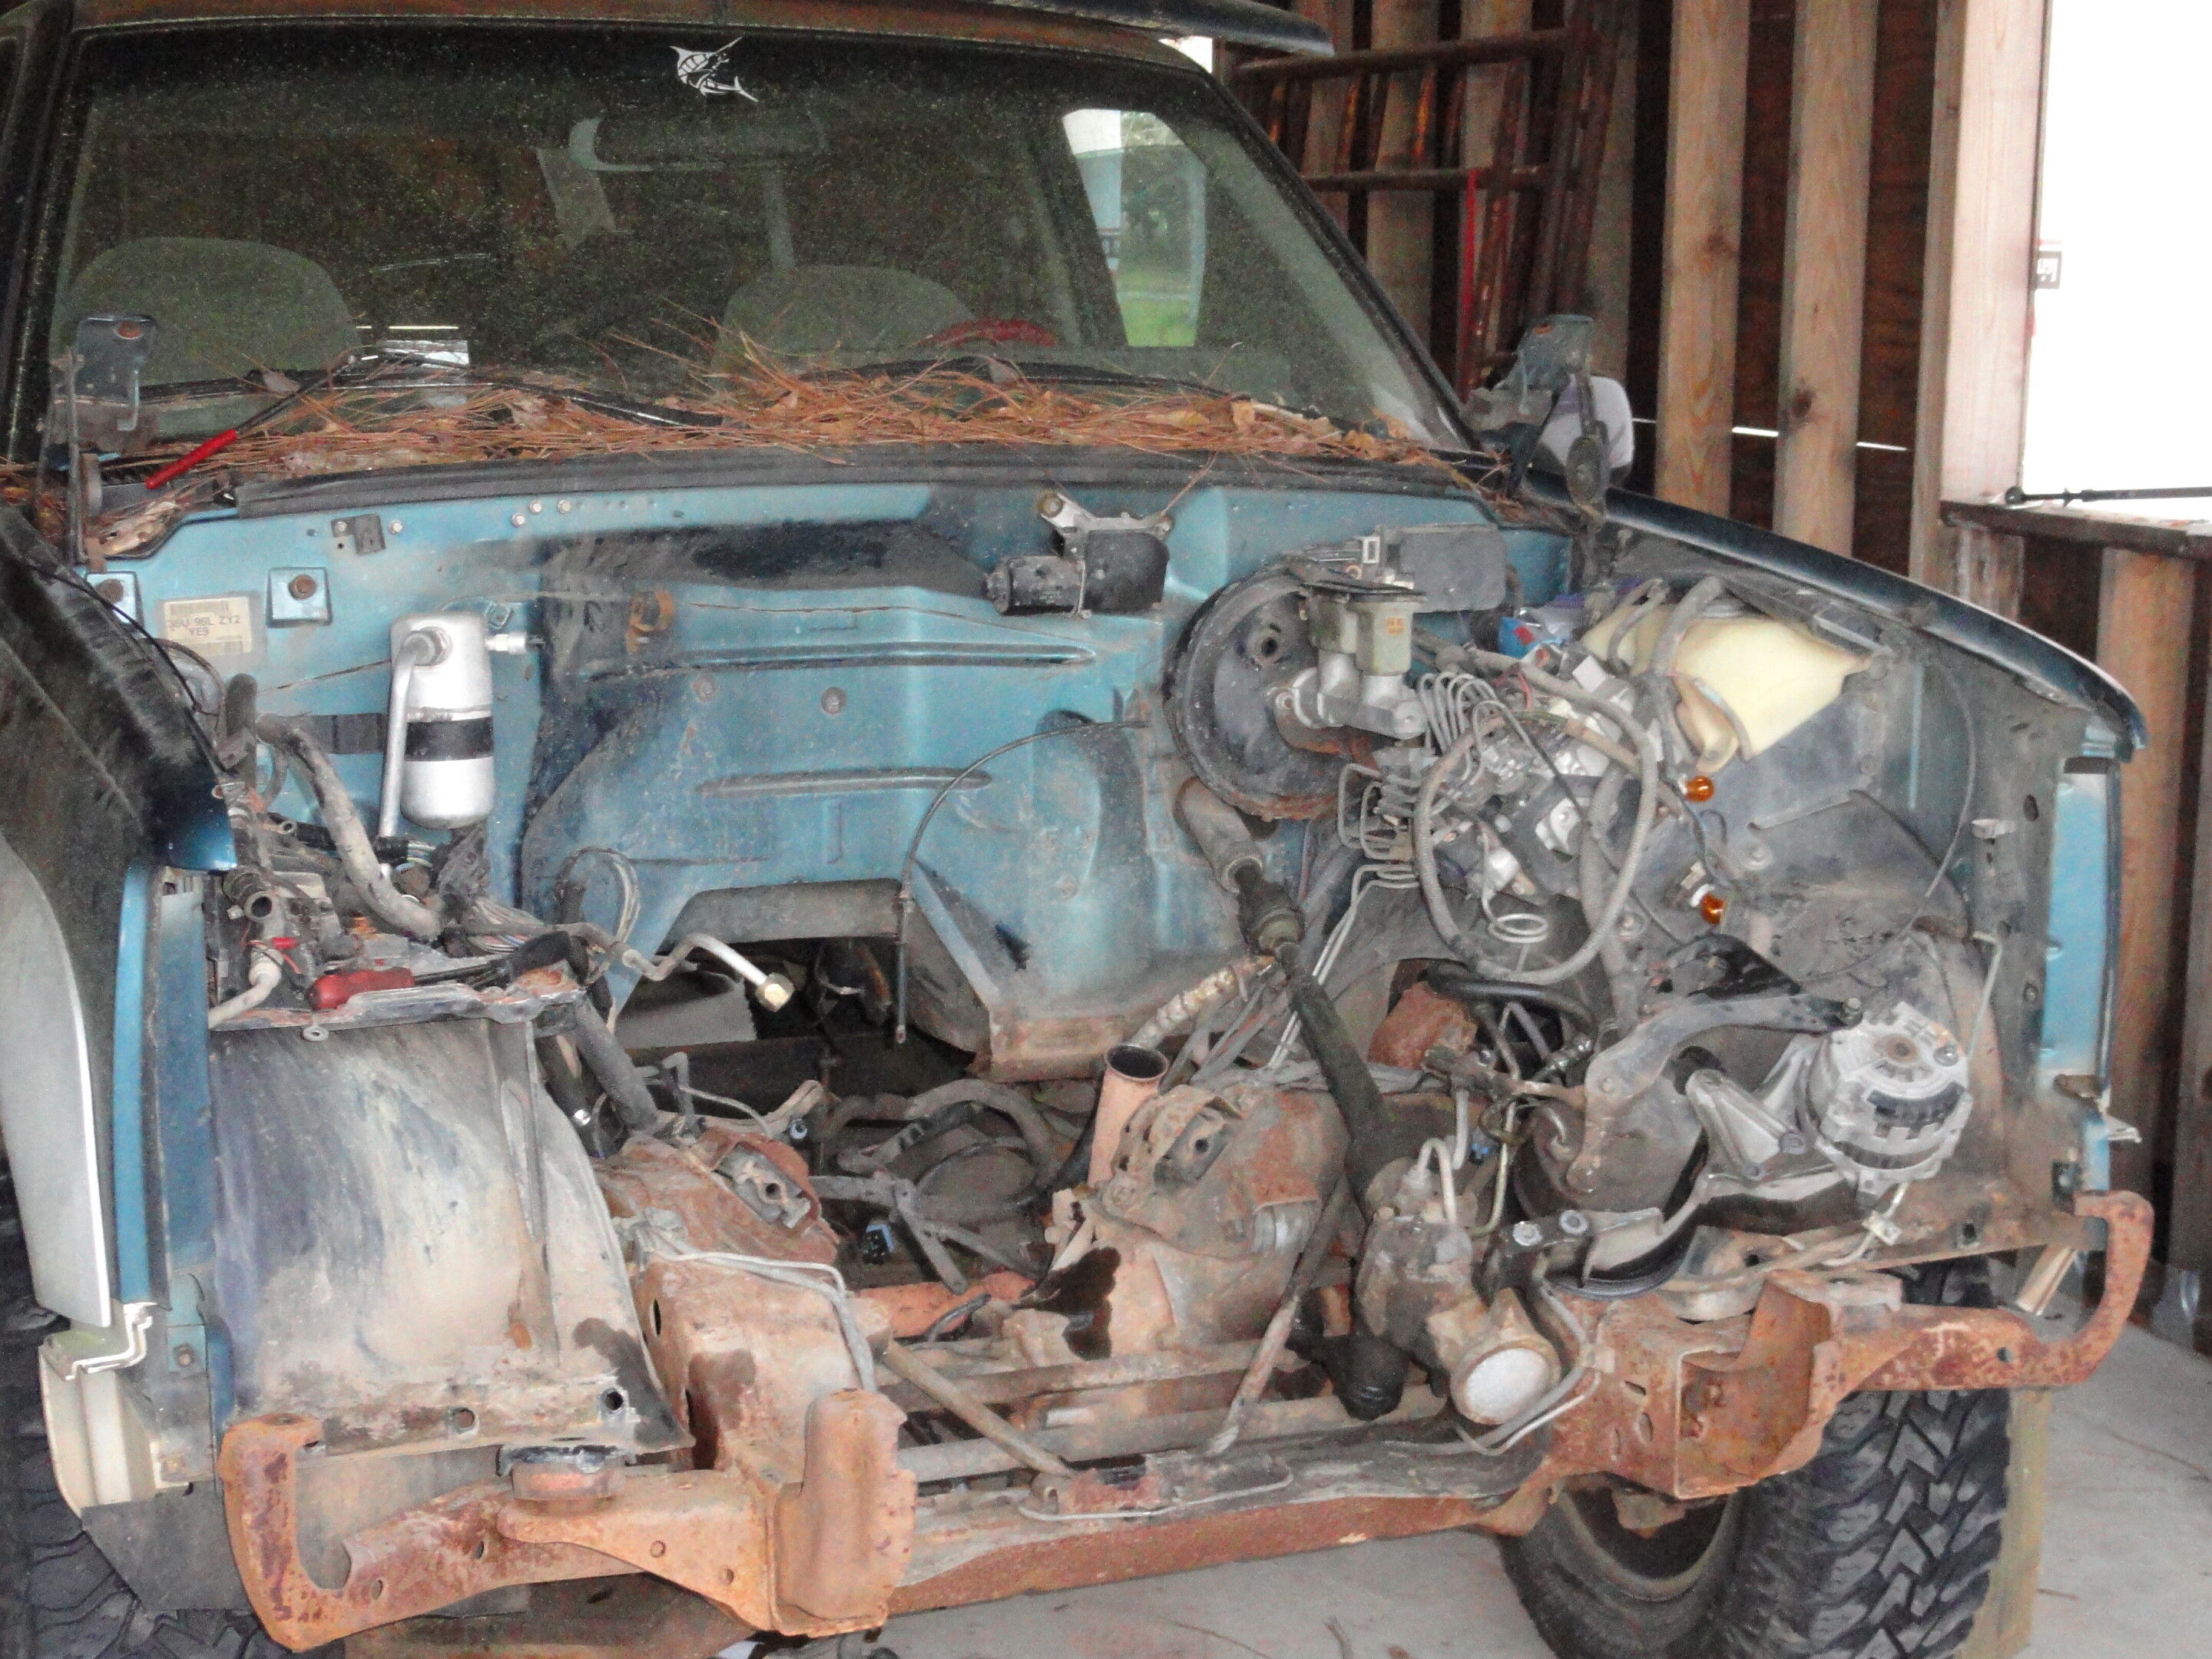
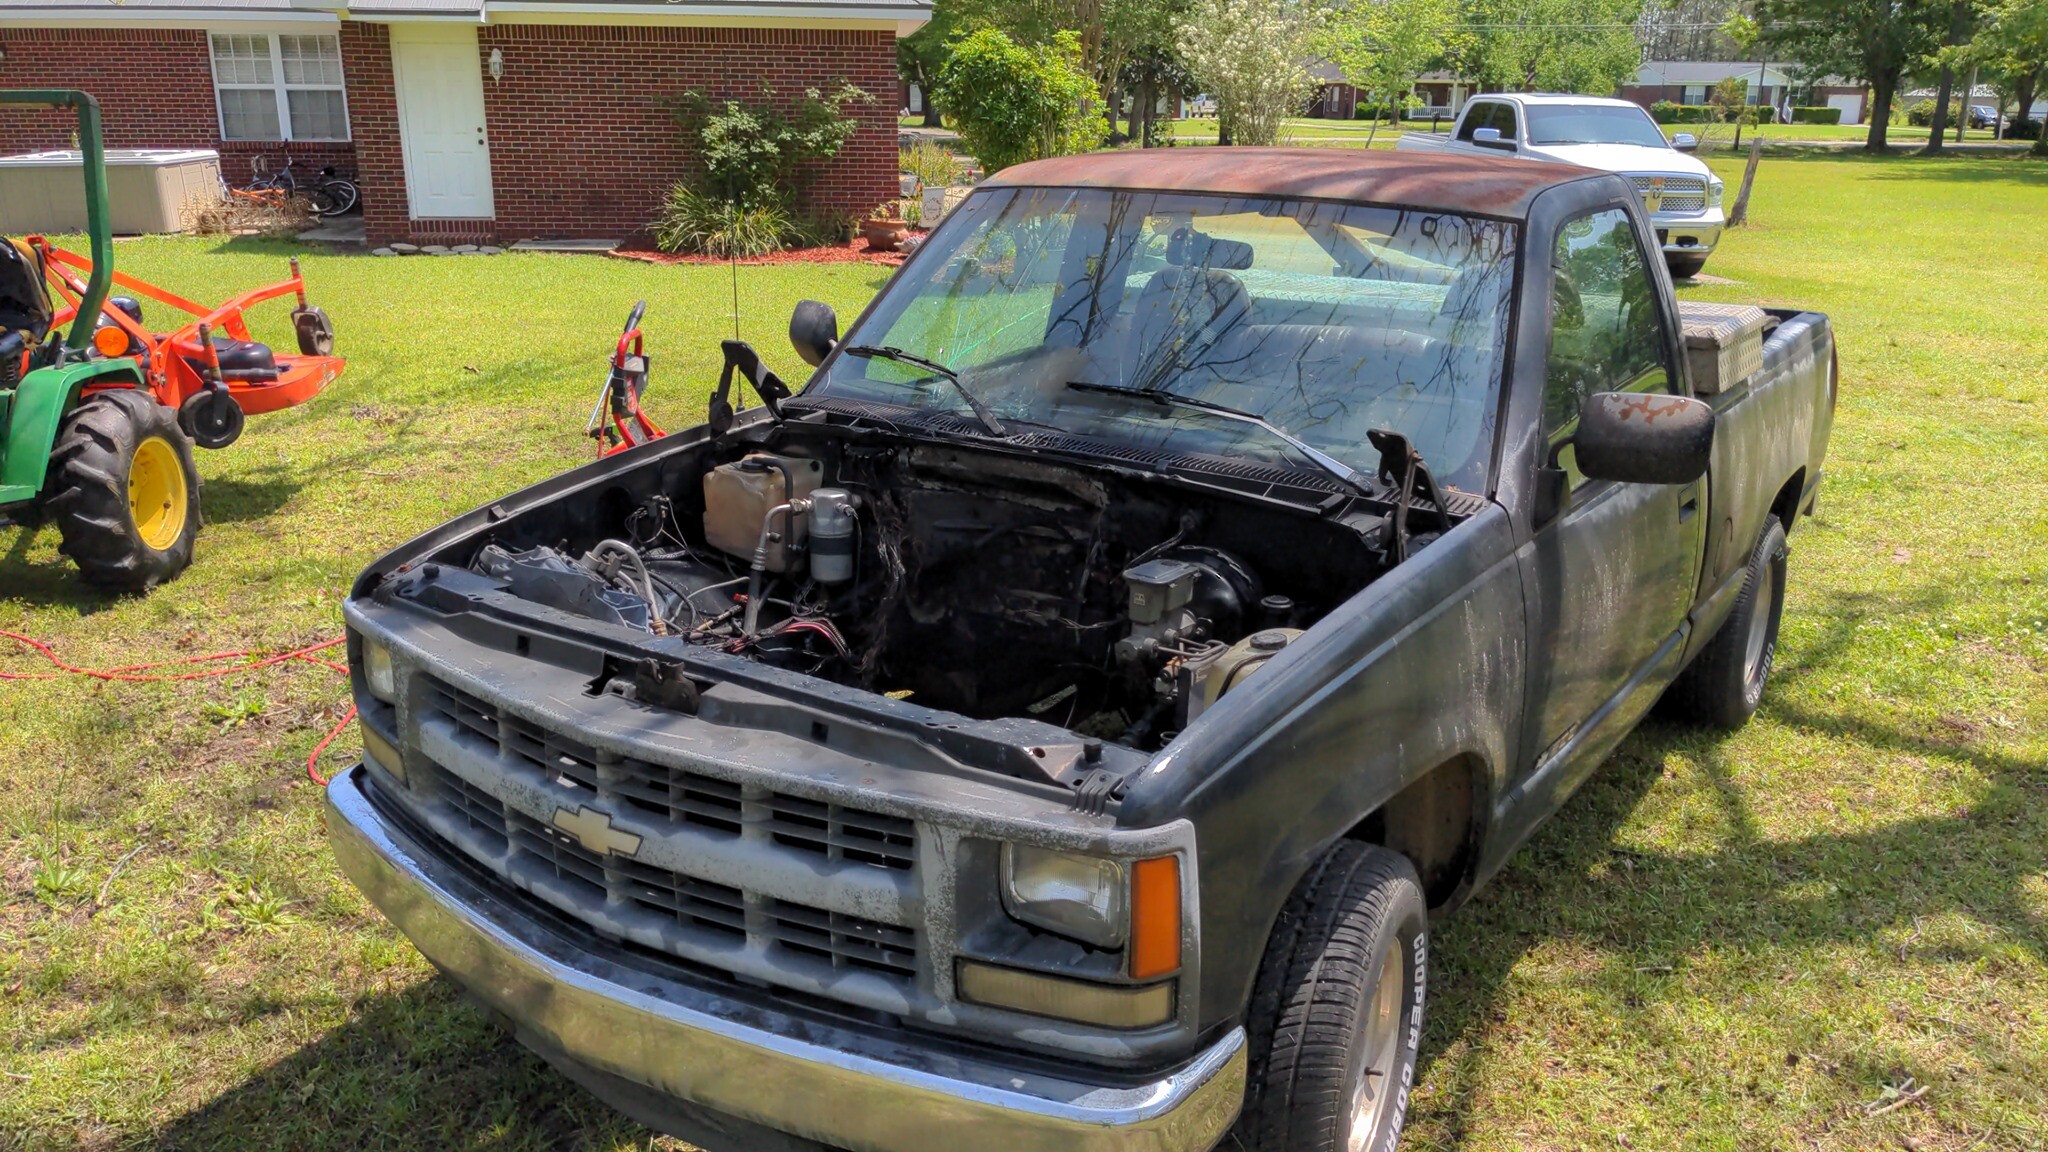
I guess I'll start with my dad's truck, actually the second swap I did. 1994 c1500 W/T. Originally it was a 4.3 5 speed with a 2.92 open diff. About 3 years ago the v6 started giving him issues and I had a 350 TBI laying there so we swapped it. Ran good but never great. Always had a weird issue where you'd fire it up, drive it somewhere and it wouldn't start back up. Let it sit for some length of time and It would fire up and drive. I started looking at wiring diagrams attempting to methodically sort through it which quickly tumbled into firing the parts cannon. Dad finally got sick of it, and put a carburetor on it (Damn them compooters) and after like 4 months it backfired and caught fire; burned up the engine bay and most of the wiring.
That's when I convinced him to let me swap it. I used lessons learned from my first swap and I think this one has turned out pretty okay.
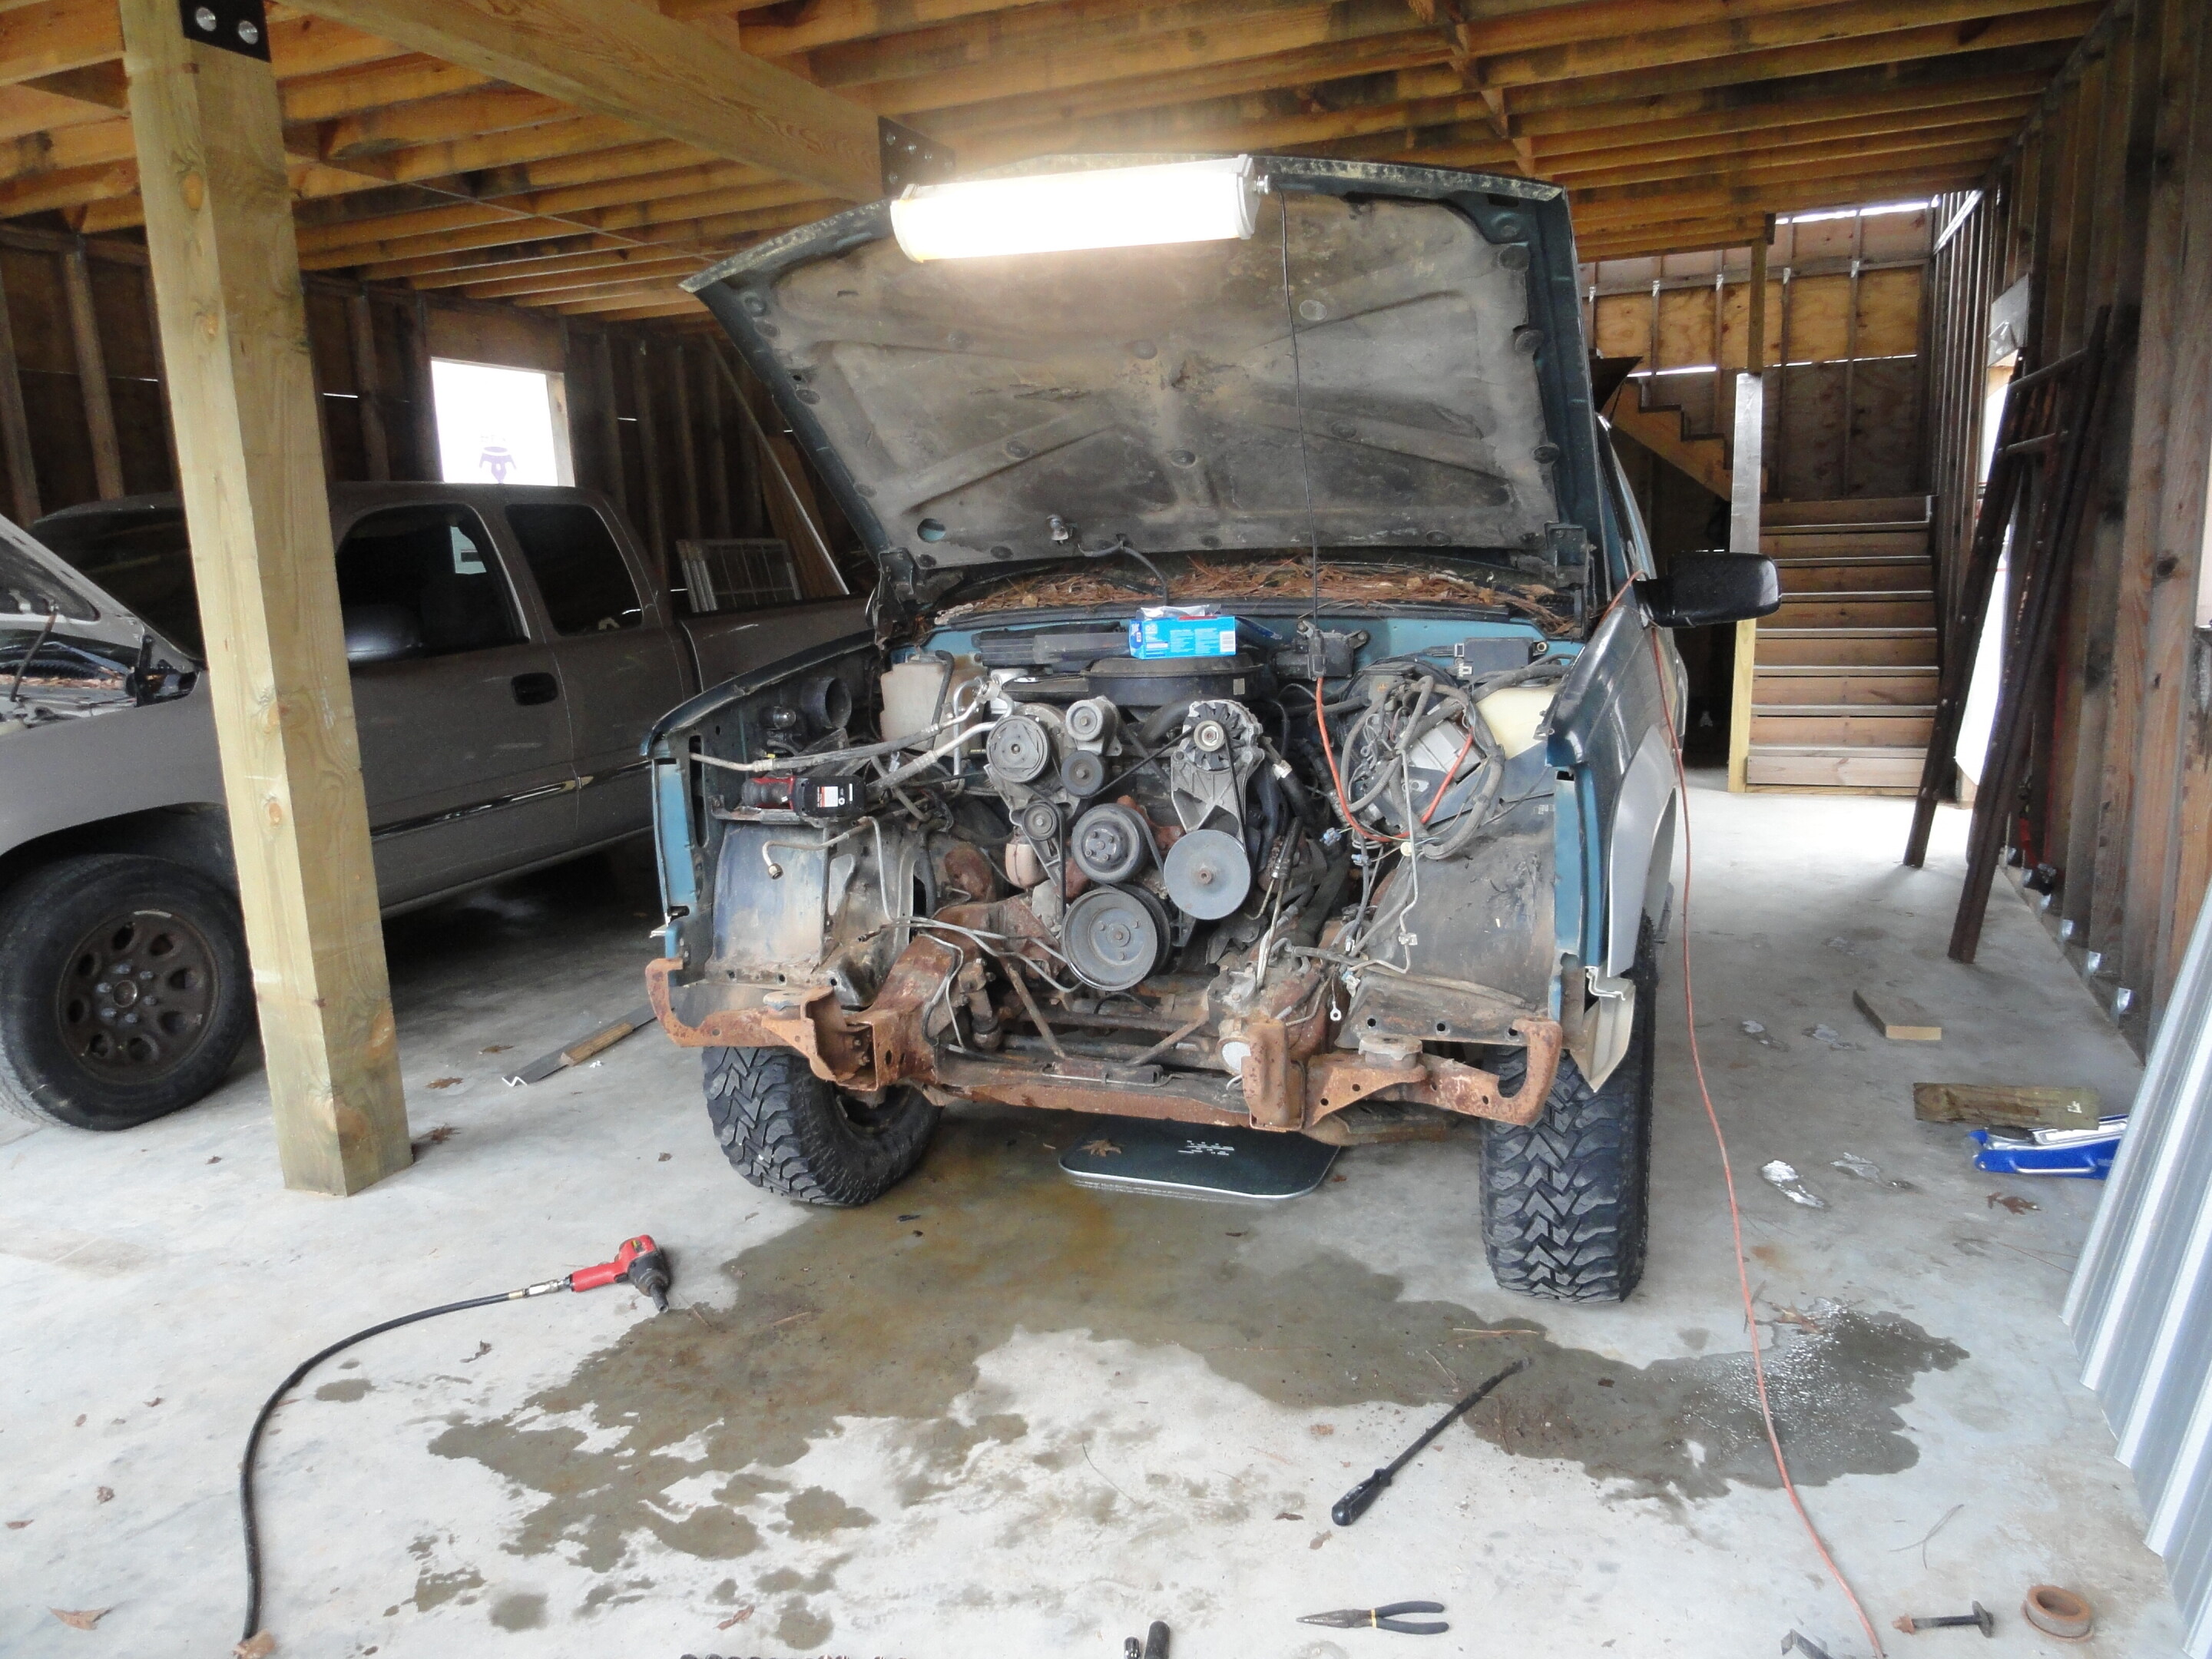
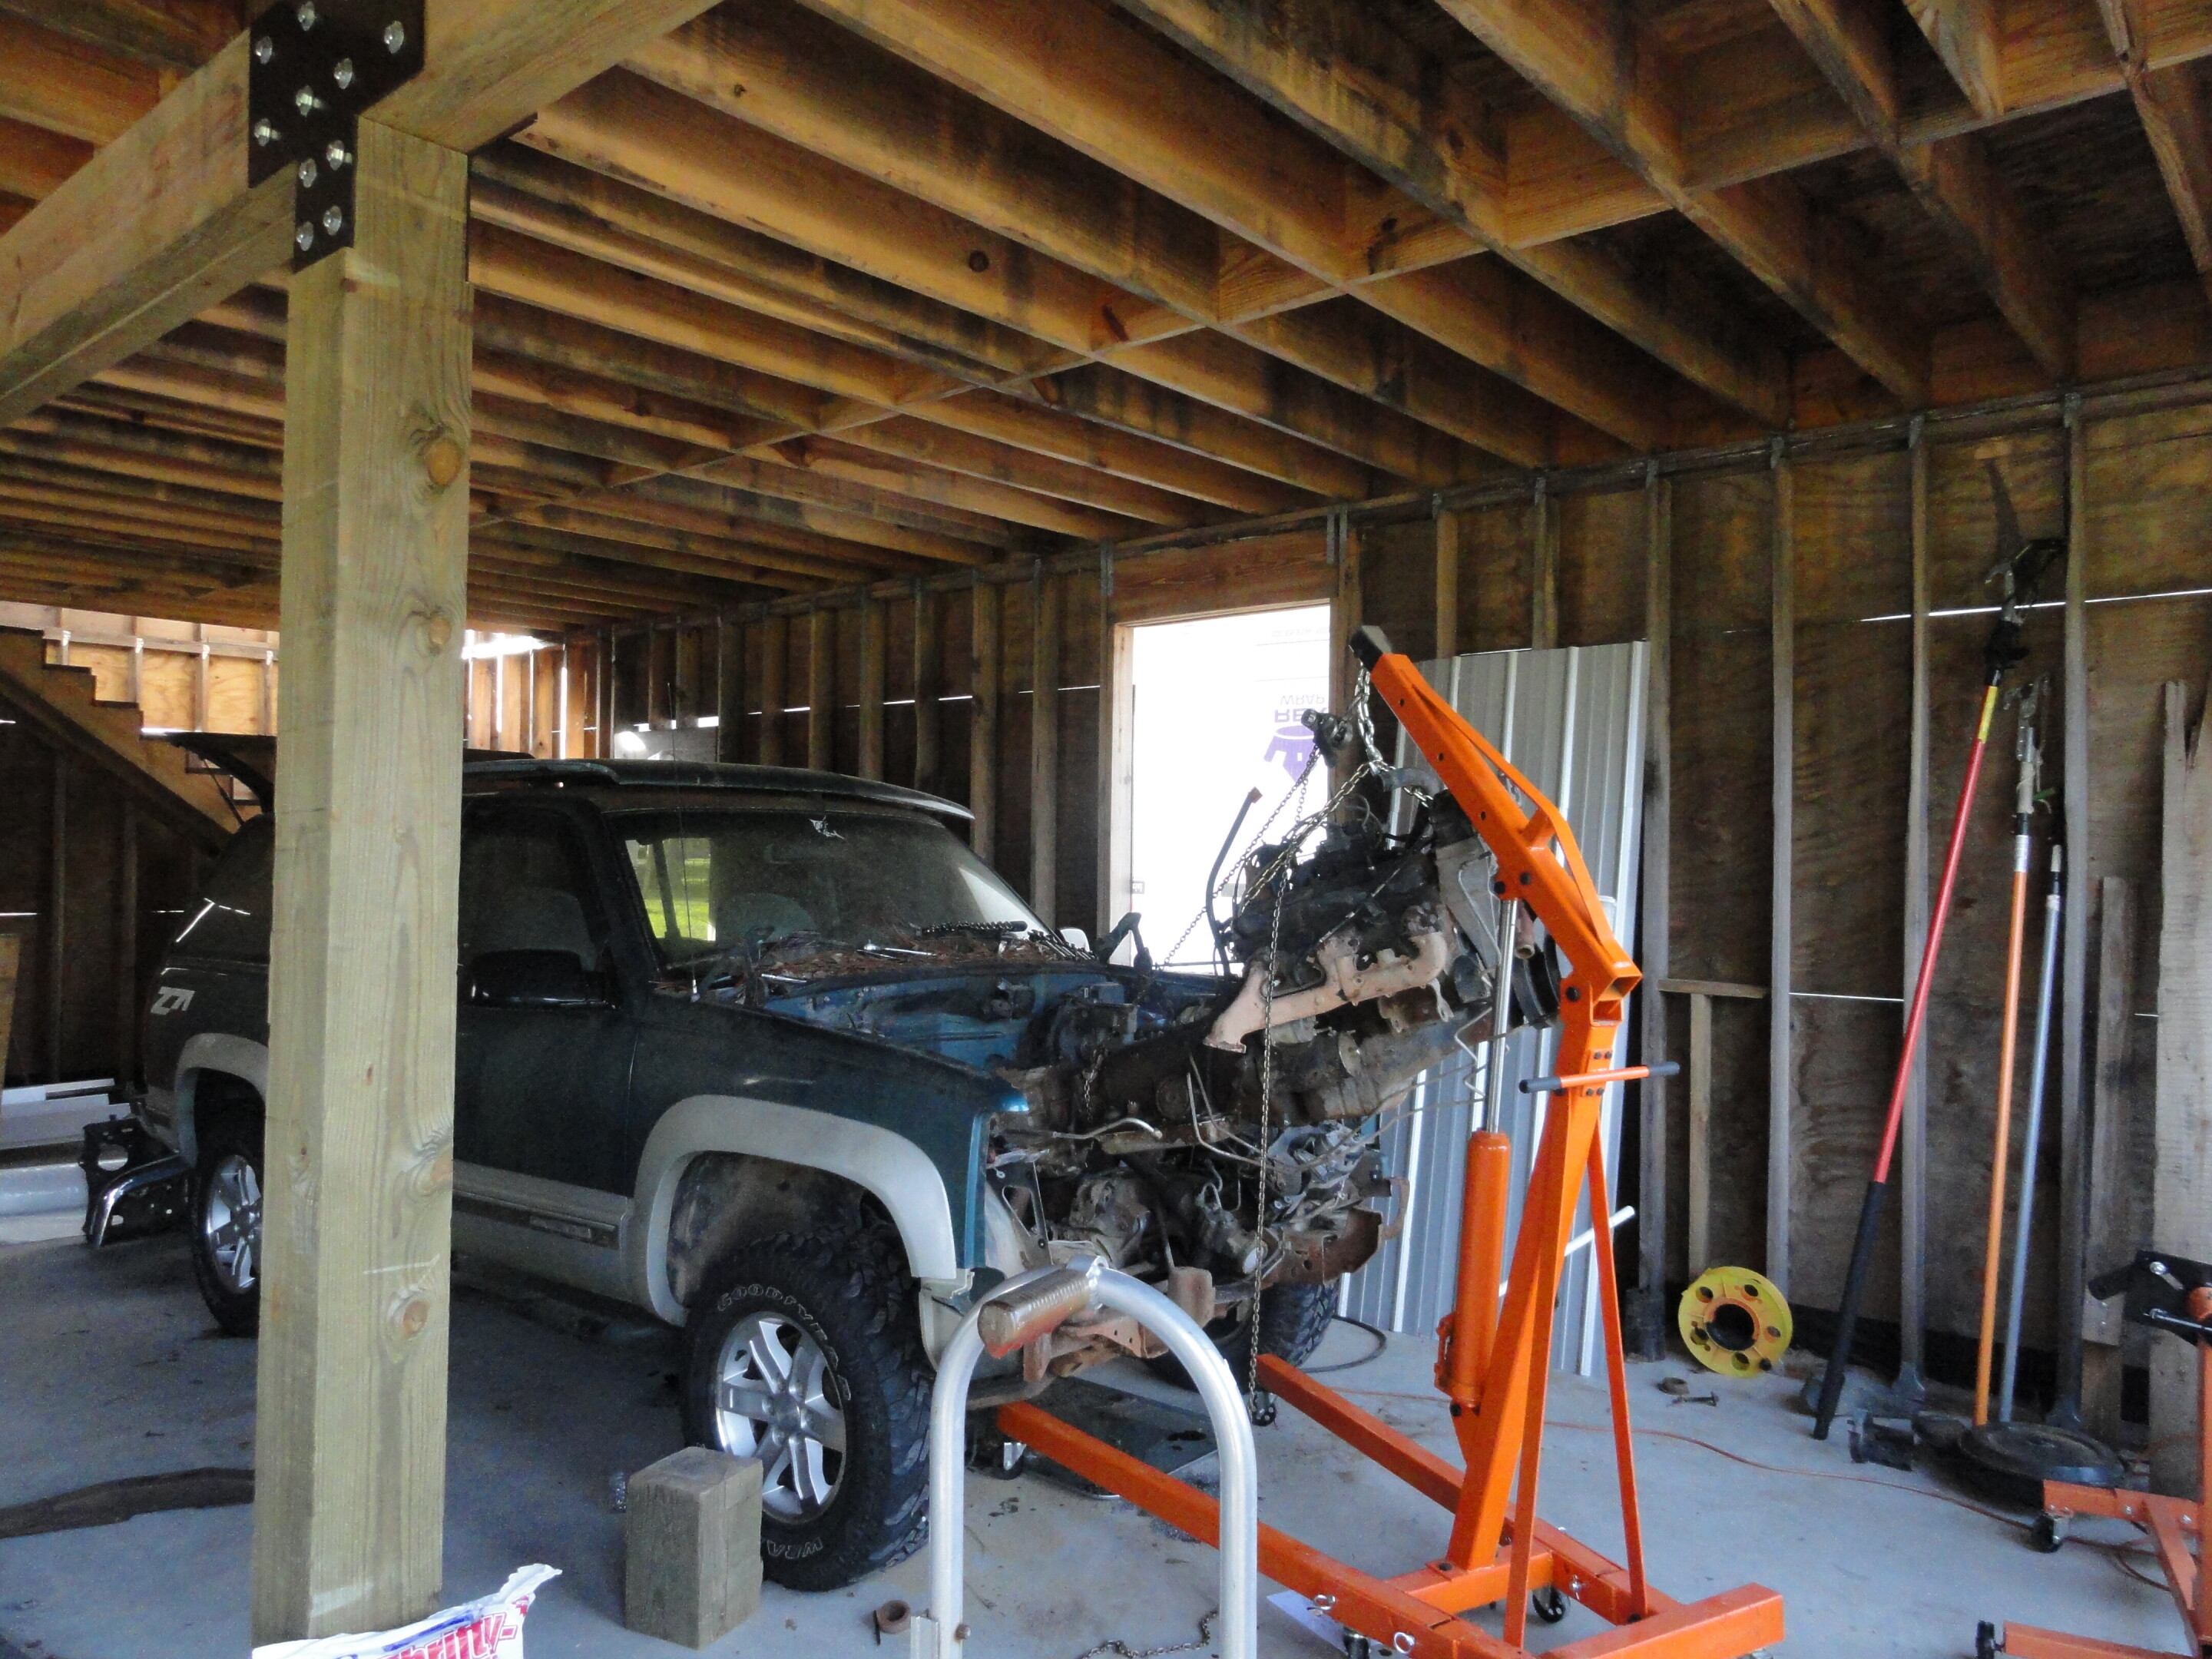
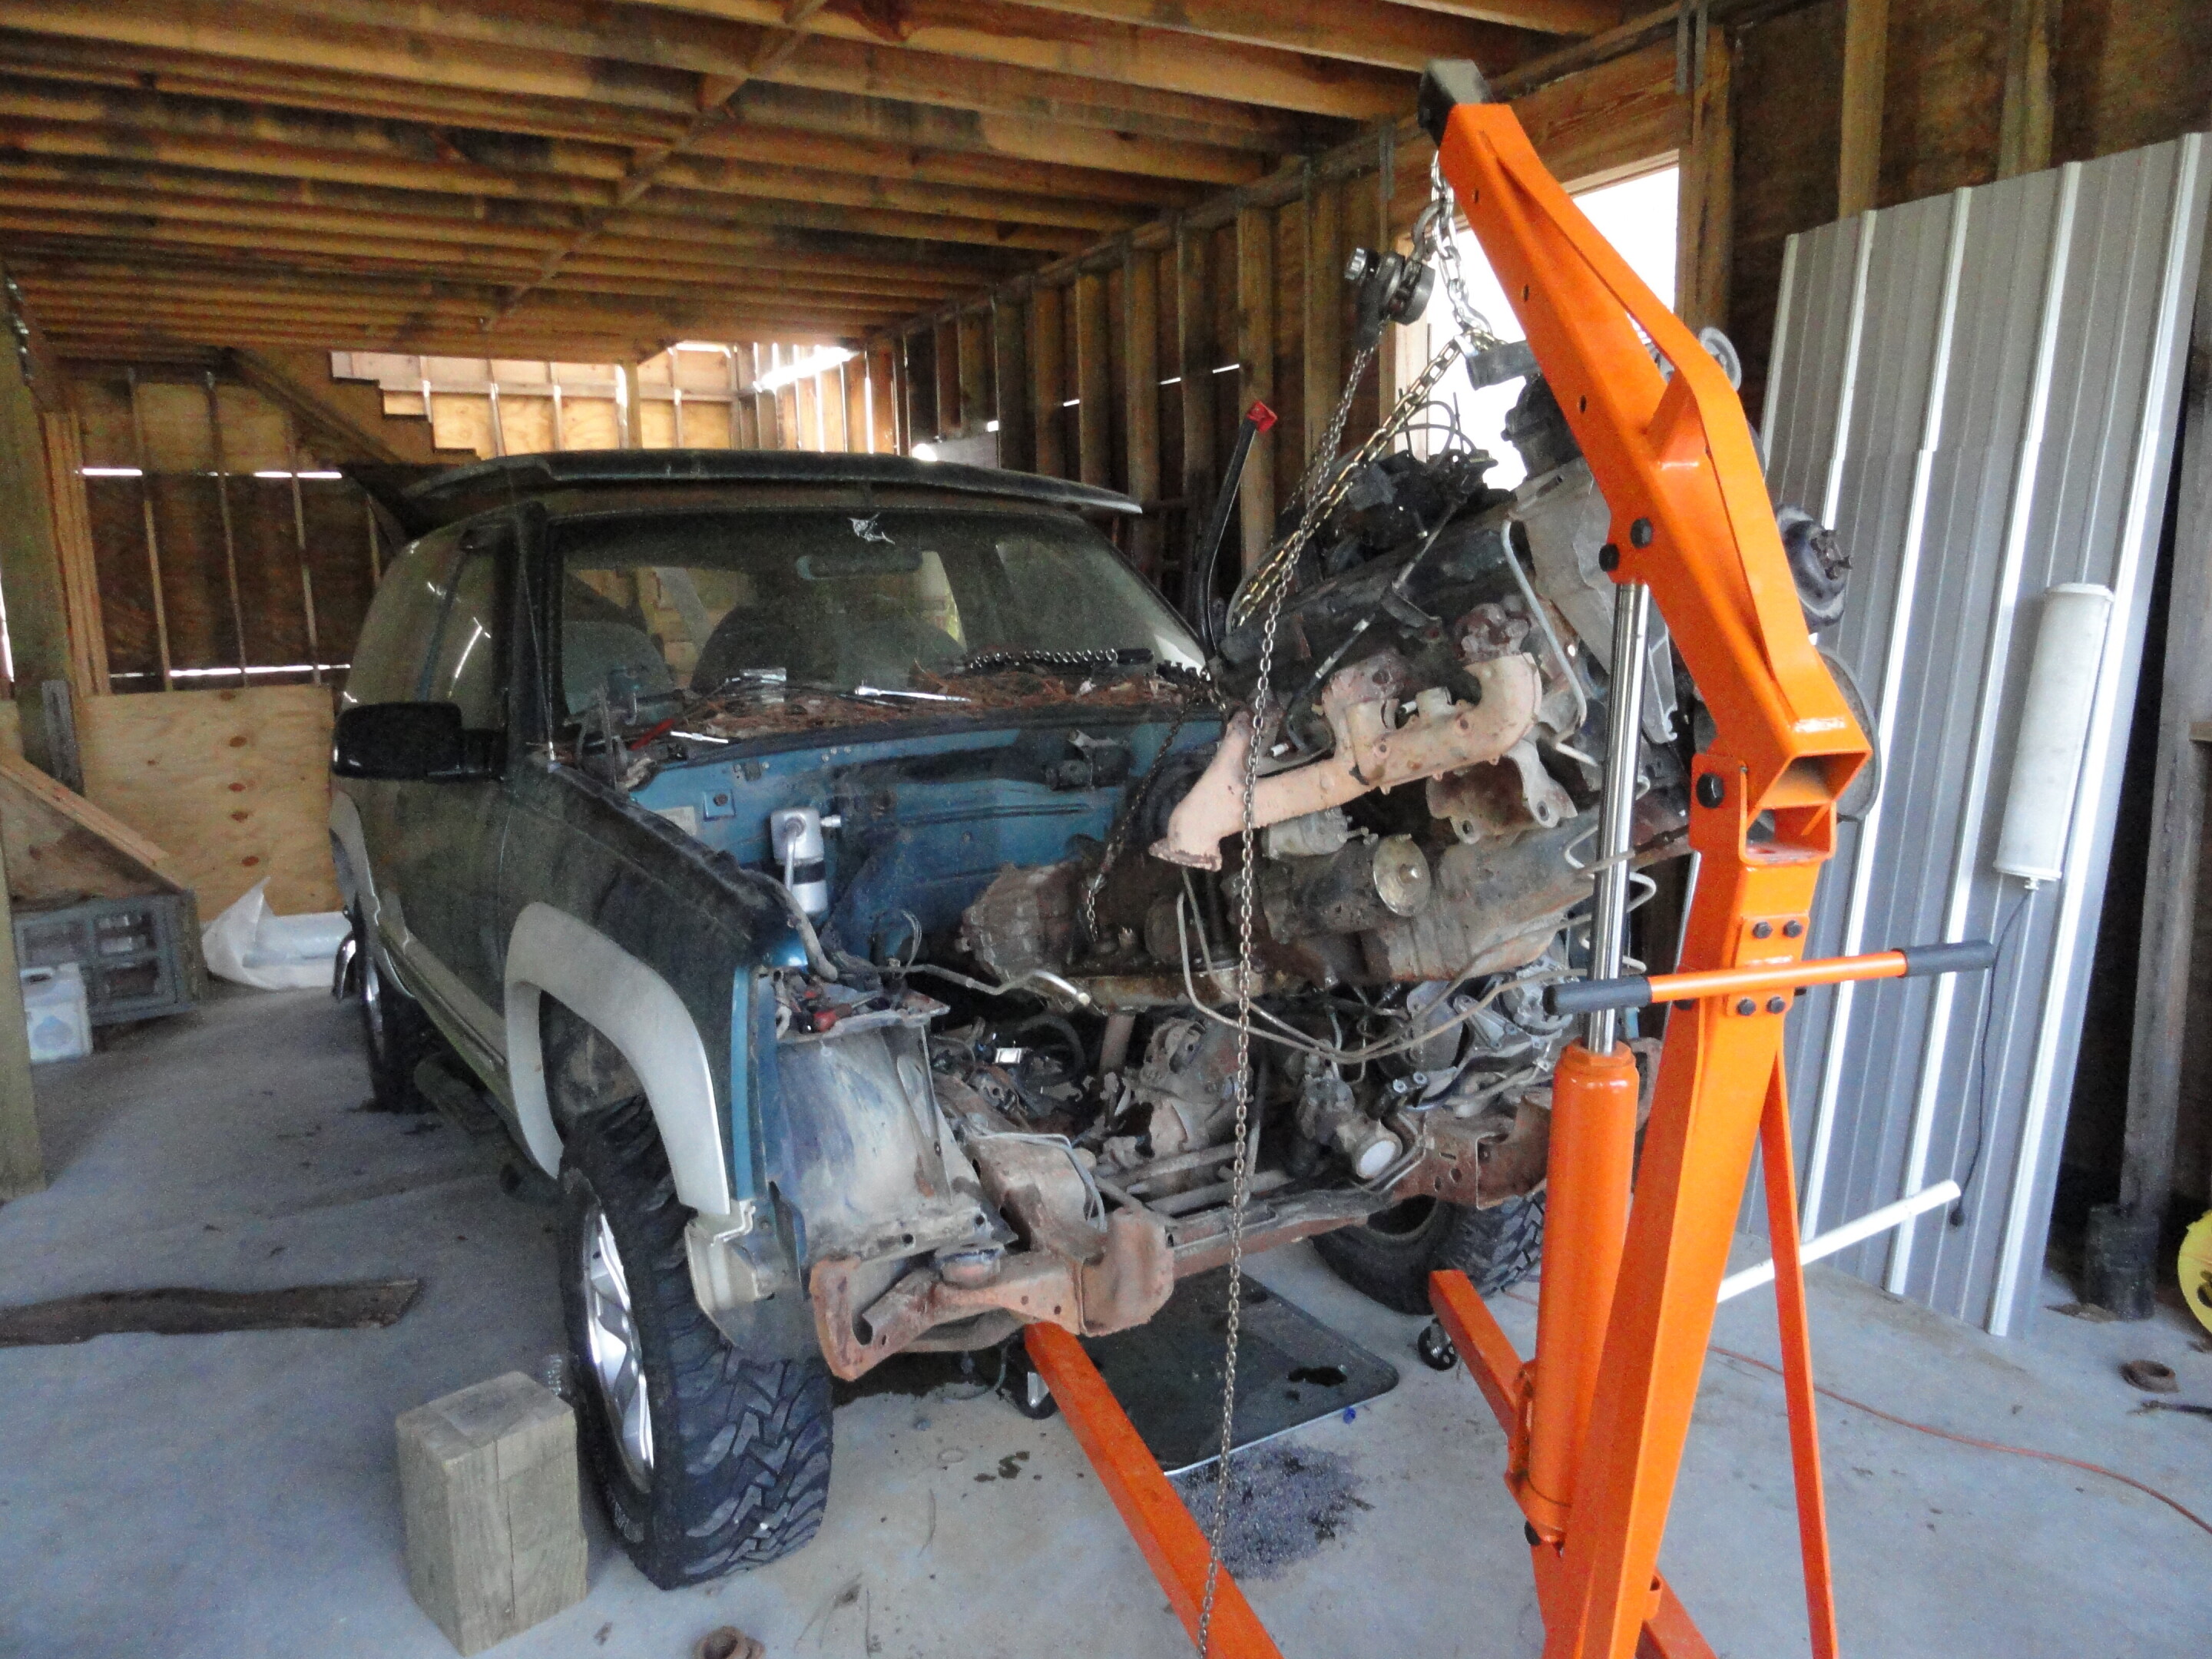
Truck after the fire and pulling the 350
For fuel I use the stock lines, and put a 255 on the stock basket. Fits right in no issues. Literally as long as you get the pump with the plug, it's a couple of crimps and Bob's your uncle.

We swapped the rear diff for one from a Suburban. It was a Jasper reman with 3.73 and G80, and the slightly bigger rear drums. Taking the bed off made accessing the pump and rear diff really easy. We also threw some drop shackles on the back since we had them on the shelf. That's my old man putting in the work.

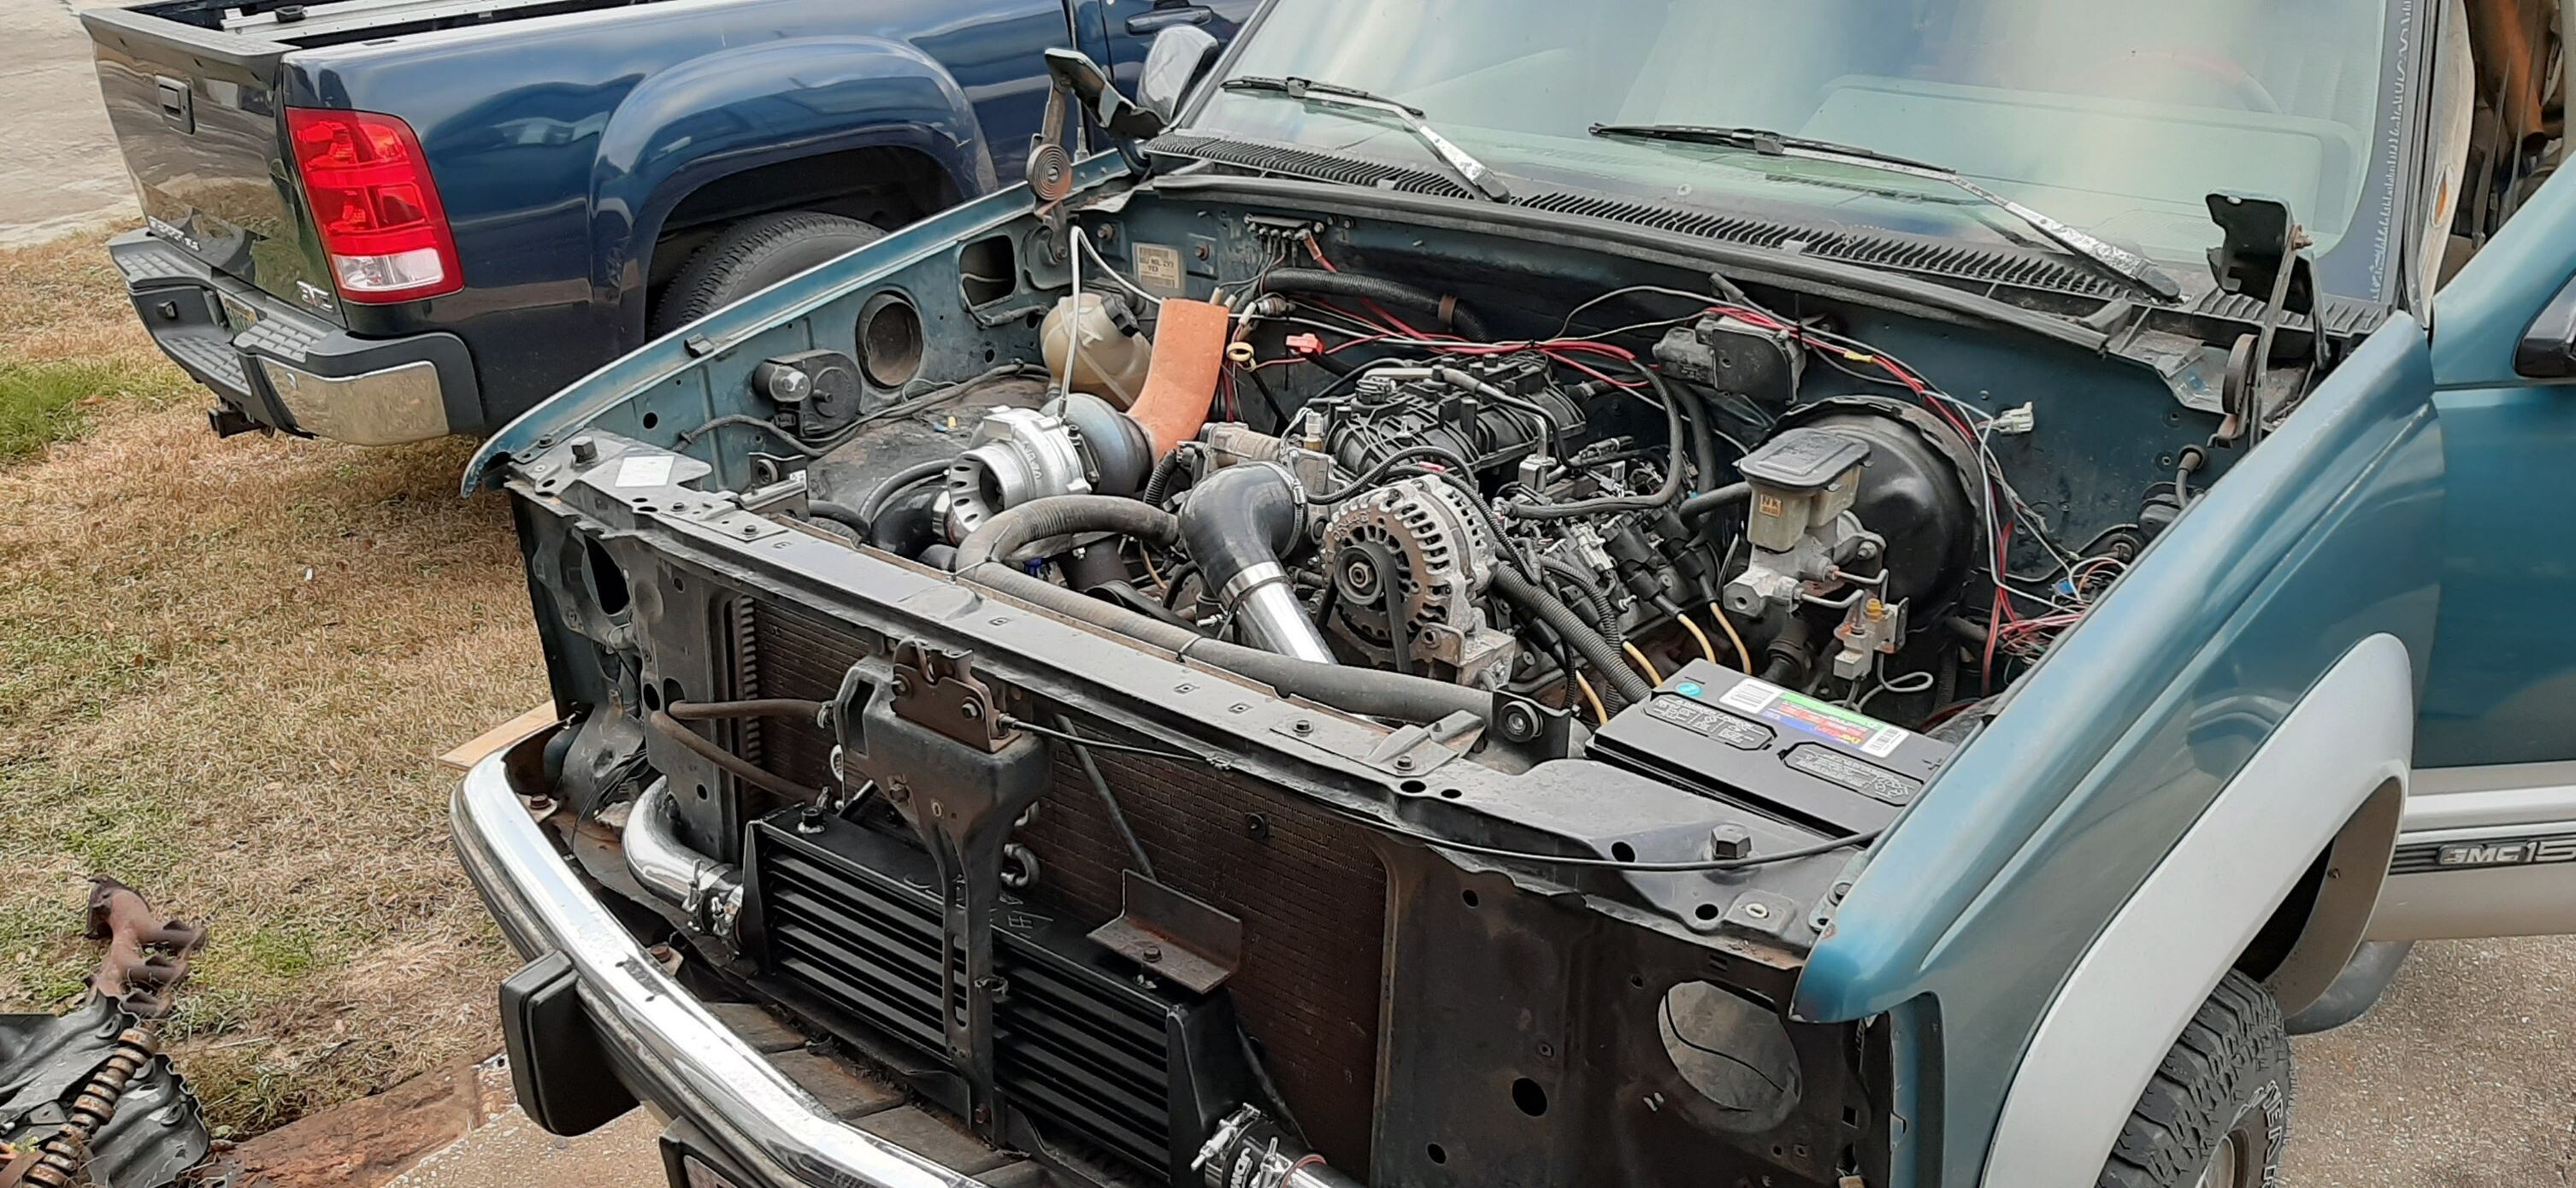
4.8 from a 01 Silverado, and a NV3500 from the salvage yard. all in about $1350 including the wiring supplies, new clutch and flywheel, and misc stuff. You see the GMT800 engine mount, will not work. I use the clamshells from a v8 truck and dirty dingo slider mounts. The lower mounted AC from the gen 3 v8 wont work with the dingo mounts. But I mean, who want's AC in a race truck?

Used dirty dingo mounts and it fell right in.

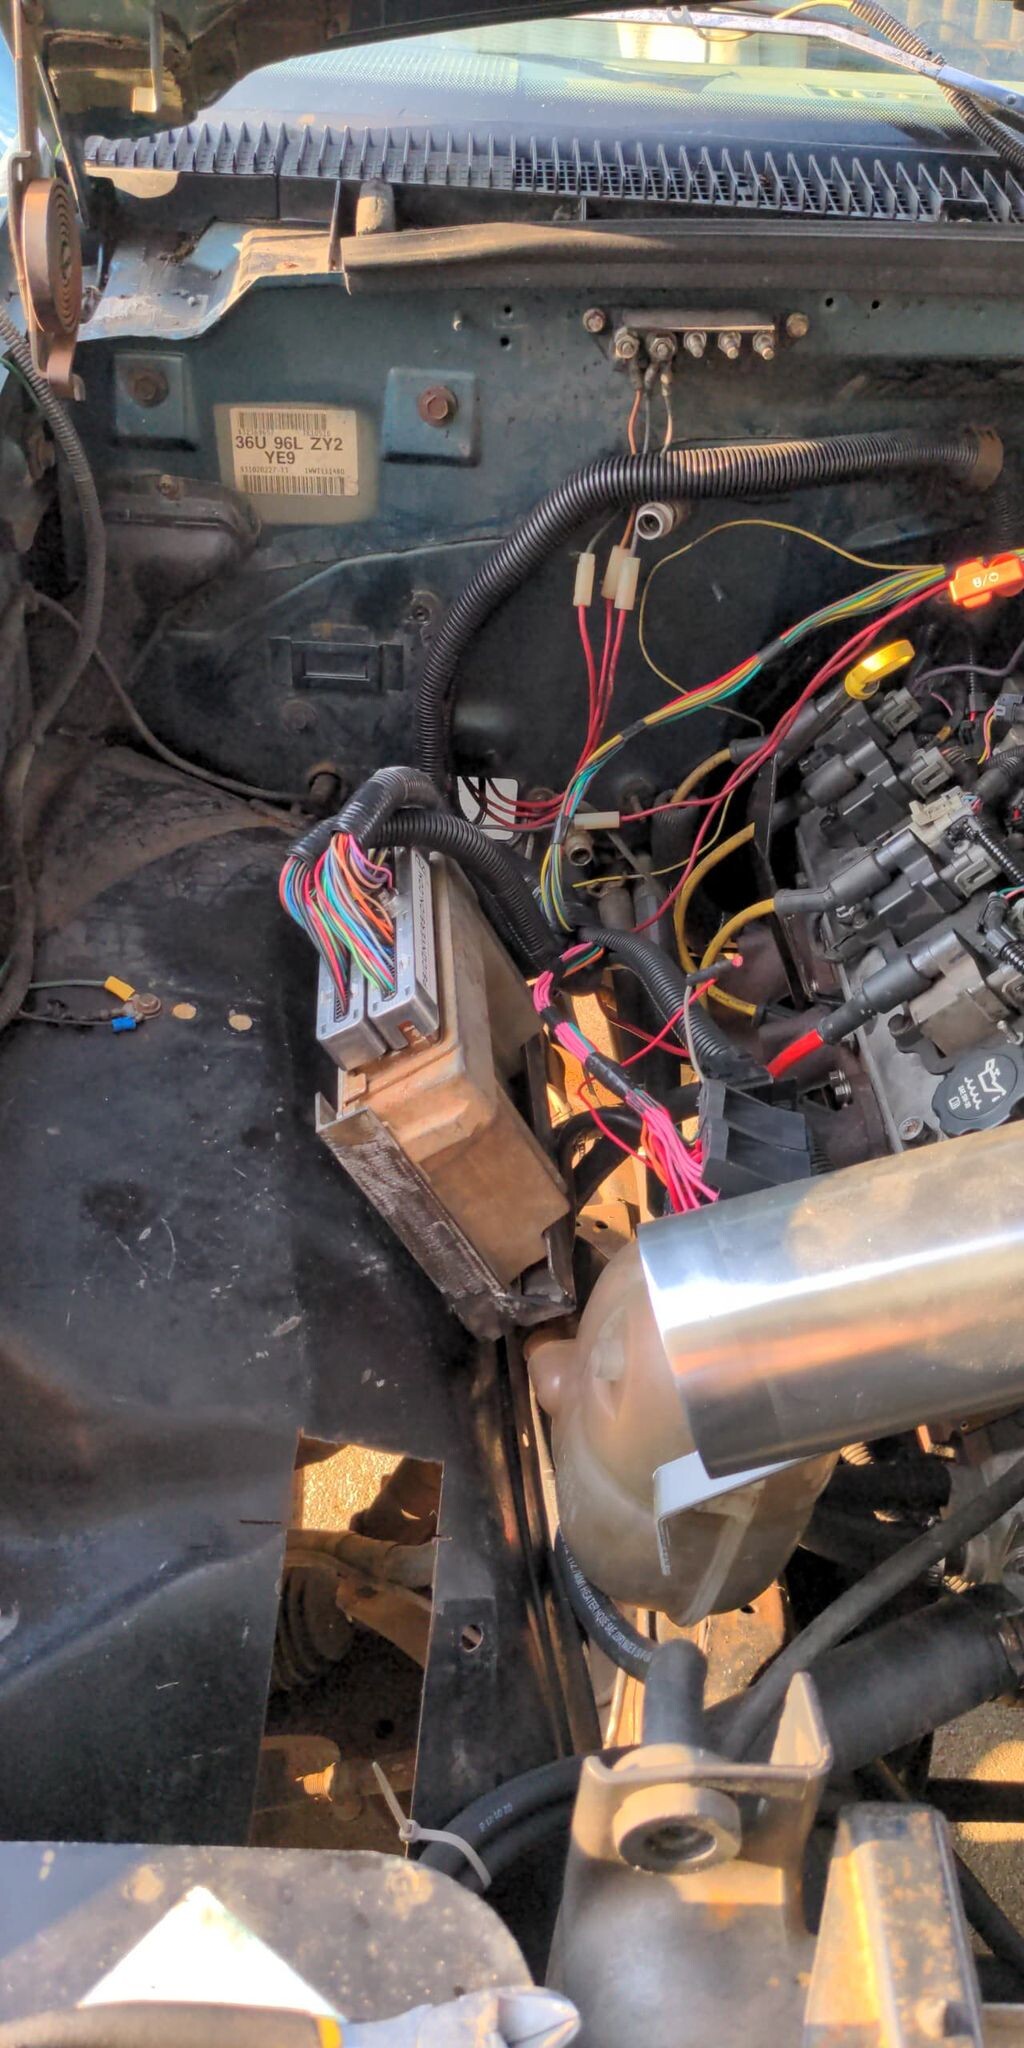
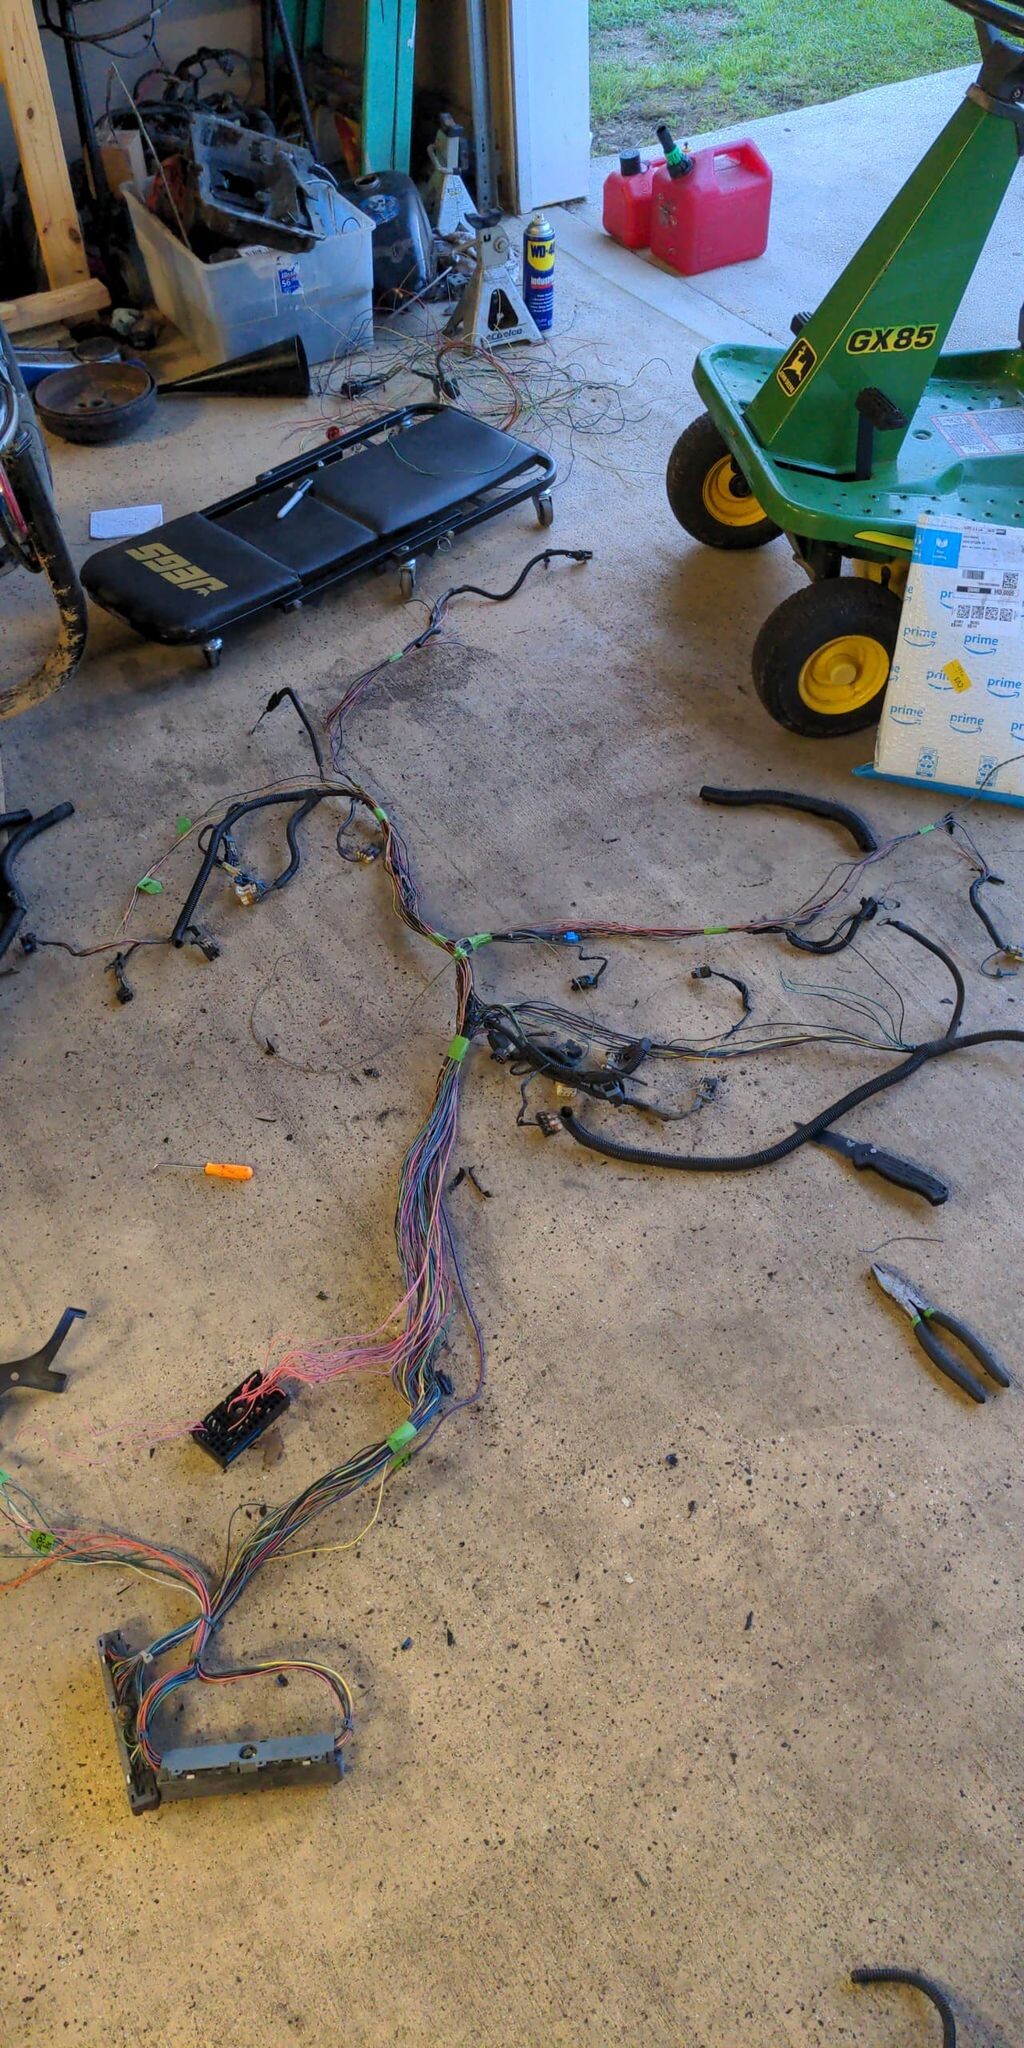
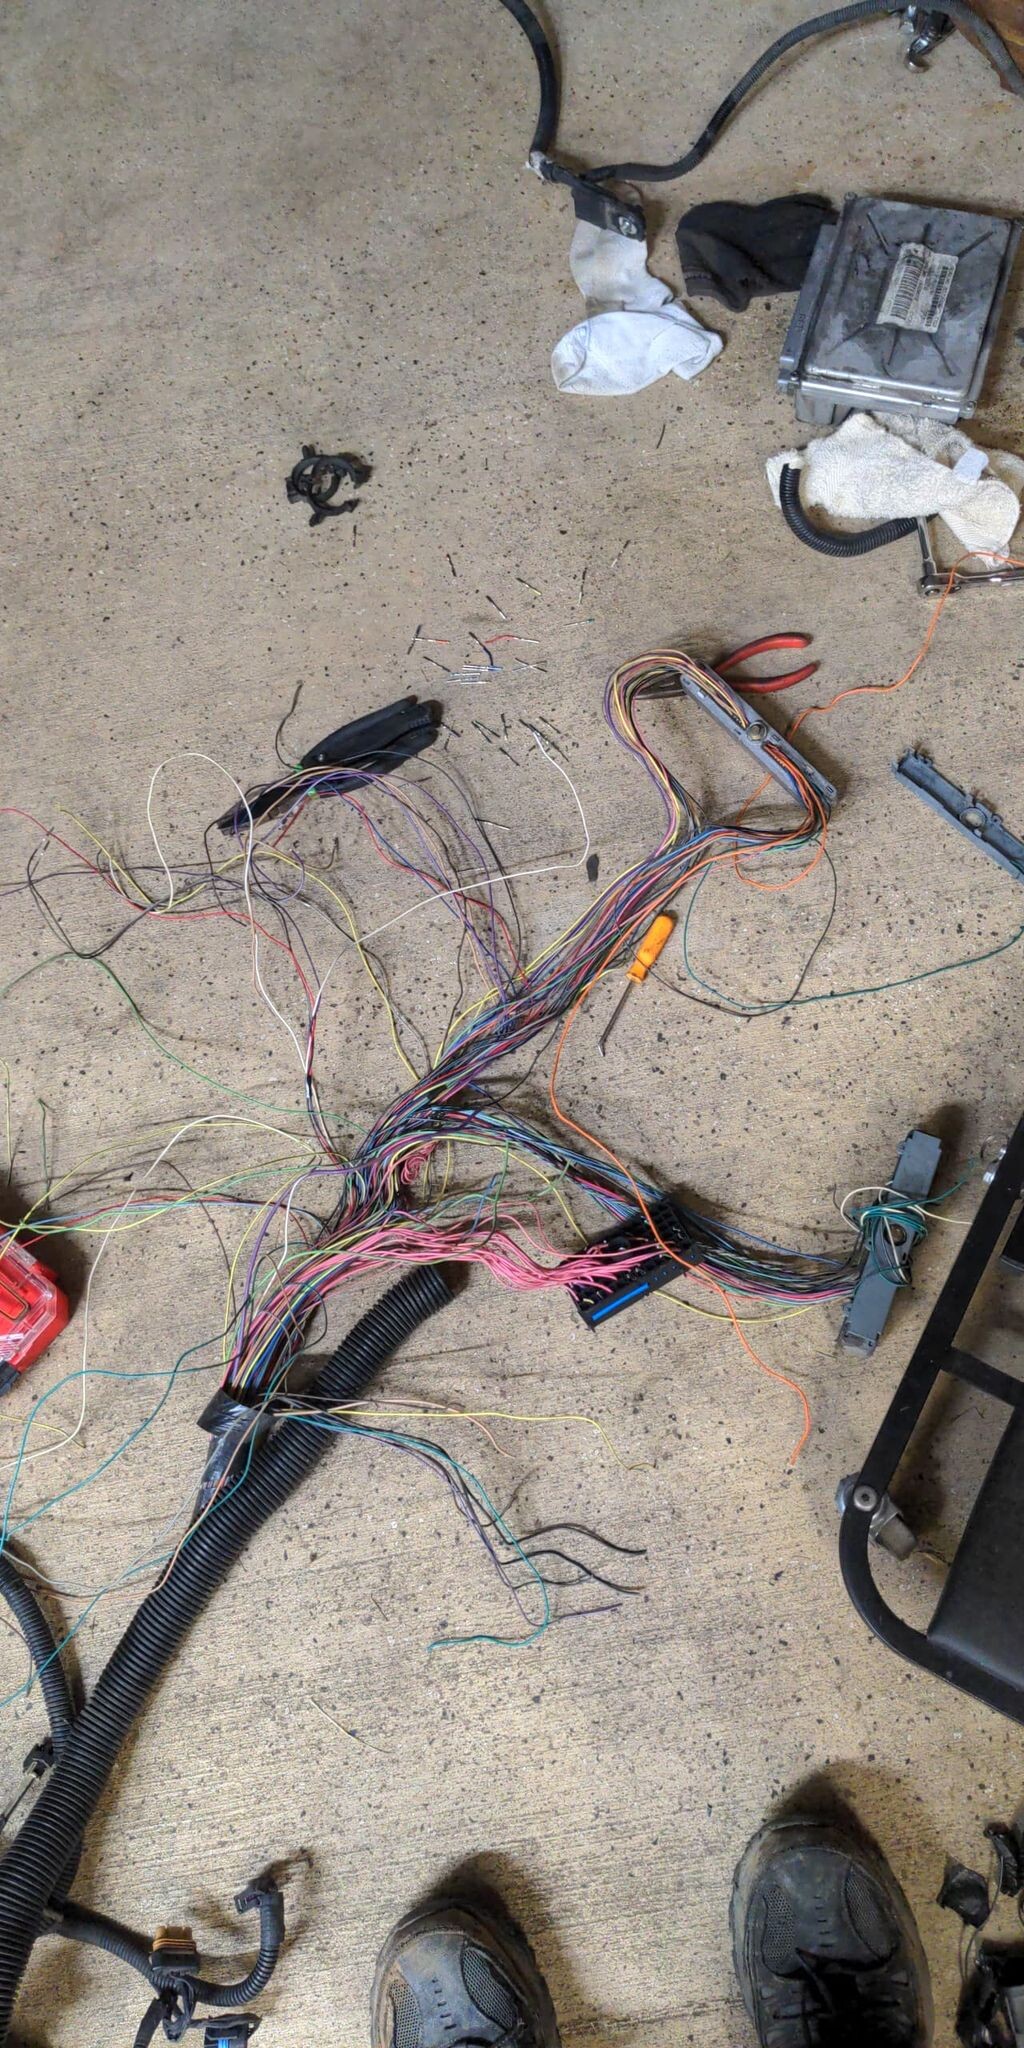
The wiring is pretty simple. Follow the LT1swap.com guide and if you can't then pay someone. https://lt1swap.com/99-02_vortec_pcm.htm lists everything you can delete, things that are optional delete, and the things that are necessary. For this truck everything in yellow went away, as well as red pins since it's a 5 speed. Pay close attention to your grounds.
I use painters tape to label everything, and start removing unneeded items nearest the ECU connector first, and working my way out. Once I get to the end, I rebundle the wires so they lay in almost stock configuration.
OBD2 is a serial connection, so under the dash (or where ever you decide) you'll need 2 grounds, 1 12v power and the serial connection from the ECU. I use this guy- https://www.ebay.com/itm/263869407188
You'll need a fan relay for efans, a relay for fuel pump, 5 fuses for your different circuits. For the fuse box I used this guy- https://www.ebay.com/itm/401777302030
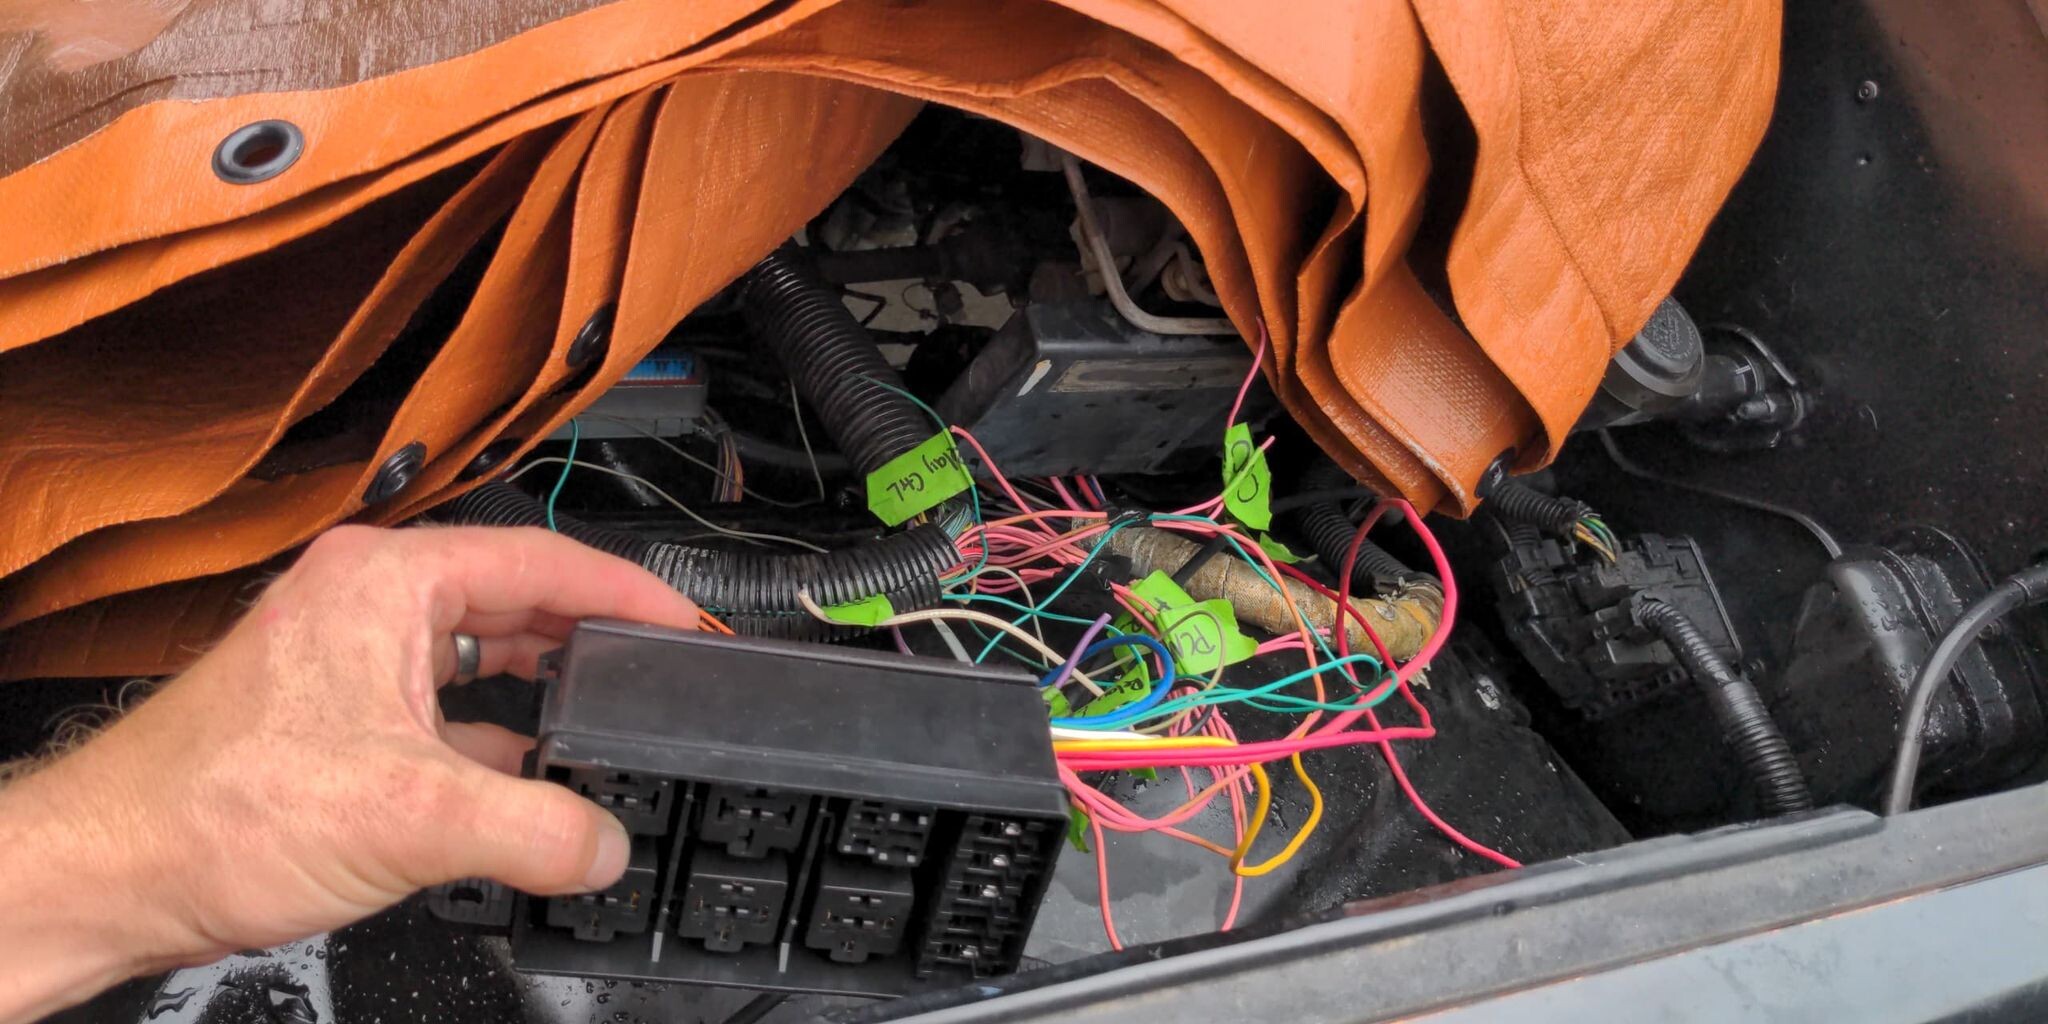
For info on the fuse panel and OBD2 port see here- https://lt1swap.com/fuseblock_obd2port.html
In the PCM you'll have to delete VATS, and since it's a 5 speed change the trans from auto to manual, and raise the abuse mode RPM to above your redline.

I guess I'll start with my dad's truck, actually the second swap I did. 1994 c1500 W/T. Originally it was a 4.3 5 speed with a 2.92 open diff. About 3 years ago the v6 started giving him issues and I had a 350 TBI laying there so we swapped it. Ran good but never great. Always had a weird issue where you'd fire it up, drive it somewhere and it wouldn't start back up. Let it sit for some length of time and It would fire up and drive. I started looking at wiring diagrams attempting to methodically sort through it which quickly tumbled into firing the parts cannon. Dad finally got sick of it, and put a carburetor on it (Damn them compooters) and after like 4 months it backfired and caught fire; burned up the engine bay and most of the wiring.
That's when I convinced him to let me swap it. I used lessons learned from my first swap and I think this one has turned out pretty okay.
Truck after the fire and pulling the 350
For fuel I use the stock lines, and put a 255 on the stock basket. Fits right in no issues. Literally as long as you get the pump with the plug, it's a couple of crimps and Bob's your uncle.
We swapped the rear diff for one from a Suburban. It was a Jasper reman with 3.73 and G80, and the slightly bigger rear drums. Taking the bed off made accessing the pump and rear diff really easy. We also threw some drop shackles on the back since we had them on the shelf. That's my old man putting in the work.
4.8 from a 01 Silverado, and a NV3500 from the salvage yard. all in about $1350 including the wiring supplies, new clutch and flywheel, and misc stuff. You see the GMT800 engine mount, will not work. I use the clamshells from a v8 truck and dirty dingo slider mounts. The lower mounted AC from the gen 3 v8 wont work with the dingo mounts. But I mean, who want's AC in a race truck?
Used dirty dingo mounts and it fell right in.
The wiring is pretty simple. Follow the LT1swap.com guide and if you can't then pay someone. https://lt1swap.com/99-02_vortec_pcm.htm lists everything you can delete, things that are optional delete, and the things that are necessary. For this truck everything in yellow went away, as well as red pins since it's a 5 speed. Pay close attention to your grounds.
I use painters tape to label everything, and start removing unneeded items nearest the ECU connector first, and working my way out. Once I get to the end, I rebundle the wires so they lay in almost stock configuration.
OBD2 is a serial connection, so under the dash (or where ever you decide) you'll need 2 grounds, 1 12v power and the serial connection from the ECU. I use this guy- https://www.ebay.com/itm/263869407188
You'll need a fan relay for efans, a relay for fuel pump, 5 fuses for your different circuits. For the fuse box I used this guy- https://www.ebay.com/itm/401777302030
For info on the fuse panel and OBD2 port see here- https://lt1swap.com/fuseblock_obd2port.html
In the PCM you'll have to delete VATS, and since it's a 5 speed change the trans from auto to manual, and raise the abuse mode RPM to above your redline.