

General Information
1971 Nova - Insanity in Progress
I bought this Nova last year when I sold my mustang, I was a active member here when this was CSVT so all the info of my old car is still on this site. Some of you know me from other sites as well as some of the old CSVT members who are still around. I apologize in advance for being a little long winded.
I was looking to get back into a classic muscle car that I could restore and modify to my liking. I choose a Nova since they are cheap and my wife wanted it to be a chevy. I enjoy all makes/models domestic or import which is why I enjoy TCG.
Specs:
1971 2 Door Nova factory v8 auto
Engine
350 block 383 stroker
Cam - unknown (I have several cam cards from the previous owners not sure which one is installed)
Rods/pistons - unknown
Heads - stock
Edelbrock intake - unknown which model
Holley 750 double pumper
Trans
700R4
3200 Stall
Shift Kit - Jegs brand
Rearend
10 bolt 8.5
3:56 gears
I knew the car needed some work before I bought it....I just underestimated how bad some of it was going to be. When I got the car the owner I purchased it from had just primer bombed the car and splatter painted the trunk (was still fresh when I went to look at the car). I would have still bought the car but would have negotiated a better price, but hey live and learn. The guy I bought the car from purchased the car from an elderly couple in Ohio who had a binder of documentation which was a huge selling point to me. Unfortunately I didn't look closely to see that the receipts didn't have much specific information. So the documentation only shows dates and what parts were replaced not what they were replaced with (for the most part anyways.) Again no biggie.
The car had 3 paint jobs in it's life plus the primer the guy I bought the car from put on it. Under the primer was a Suzuki gold that was applied in 2002. (what a FUGLY ass color) under the gold was a red. Whenever the red was put on the car it also had extensive body filler applied but no rust or sheet metal repair, more on that later. Under the red was a factory correct blue. The cowl tag says the car should be Sandalwood, while I did find it on a few parts of the car this leads me to believe someone painted the car early on in it's life or worse someone swapped the vin and cowl tag to another car . Also there were a few spots where Green was found, I'm assuming a donor car or junk yard parts replacement. To be honest with all the documentation I have it just confuses things even further. The car was also in a few fender benders, the worst being the passenger front fender.
In 2001 the whole suspension was replaced with stock equipment minus air shocks, this was also when the whole drive line was overhauled and the engine was turned into a 383 stroker. I'm just guessing and based on some info I've accumulated from Steves Nova Site SNS, everyone seems to agree this theoretical combo should be around 350-400hp 400+tq.
I drove the car for a few weeks and fixed some legal and safety equipment such as putting on the rear bumper, side mirrors and attaching the seat belts. The car actually drives pretty good, has some good low end torque and the trans shifts firm. These were all the reasons I purchased the car as I didn't want to blow the budget replacing the mechanical's right away while I concentrated on restoring the body and getting it in paint. I was originally hoping to have it in paint in early spring of this year. Currently it may see paint by spring summer of 2015. (crosses fingers)
Goals:
For now I want a nice cruiser that's got some decent hp/tq. I'd like to drive it around town and take it to a few cruises/car shows. During winter I always like to tinker and do upgrades.
My unrealistic dream goal would be to turn it into a pro-touring car. Sitting low on 18x10 or larger wheels. I would also drop in a LS series engine maybe a LQ4 on a tight budget or go wild with a LS3/6 variation. The car will stay an auto, I know some people won't understand that but I love a good auto as much as banging gears in a stick car.
Short term goals that are more realistic is to just restore the vehicle to good quality, I will keep the drivetrain as it is for now as it's in good shape and if anything blows up take it to the next level at that time (budget pending of course). The body will be fully repaired and painted by myself. It will be painted a blue (unsure of which specific color code at this time) but it will be a medium to dark hue.
Bottom line is all work will be done by me, in my garage with whatever tools I currently have or acquire. Hence the whole reason for purchasing this car.
Now to what's happened since I started work along with pics.
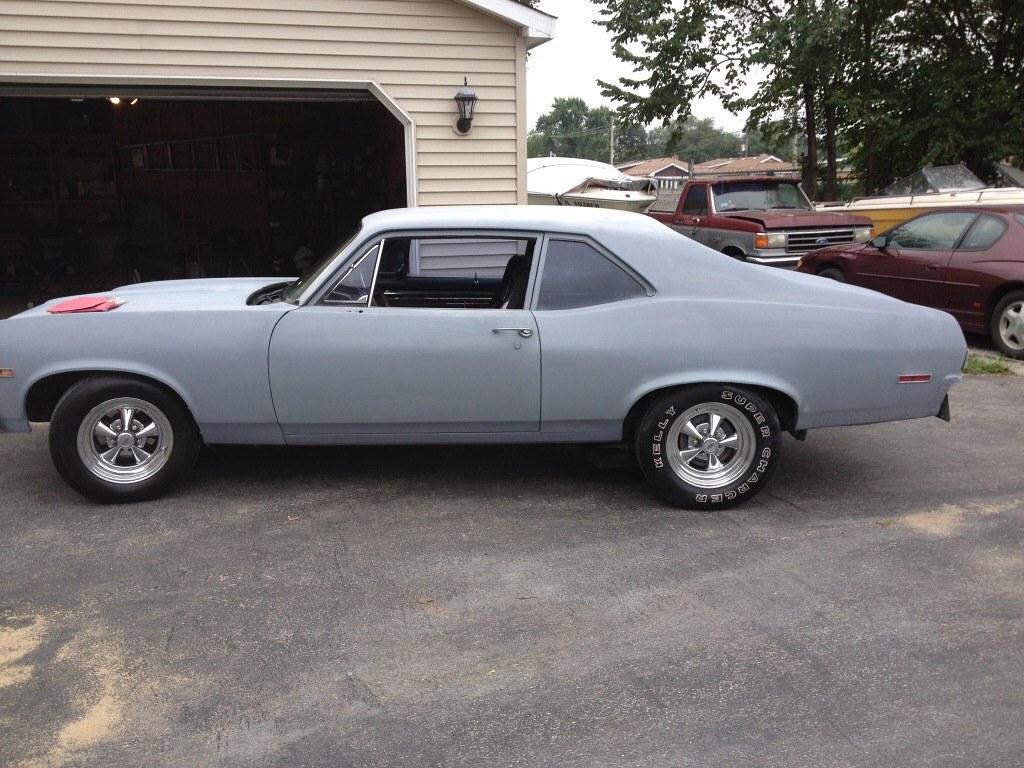
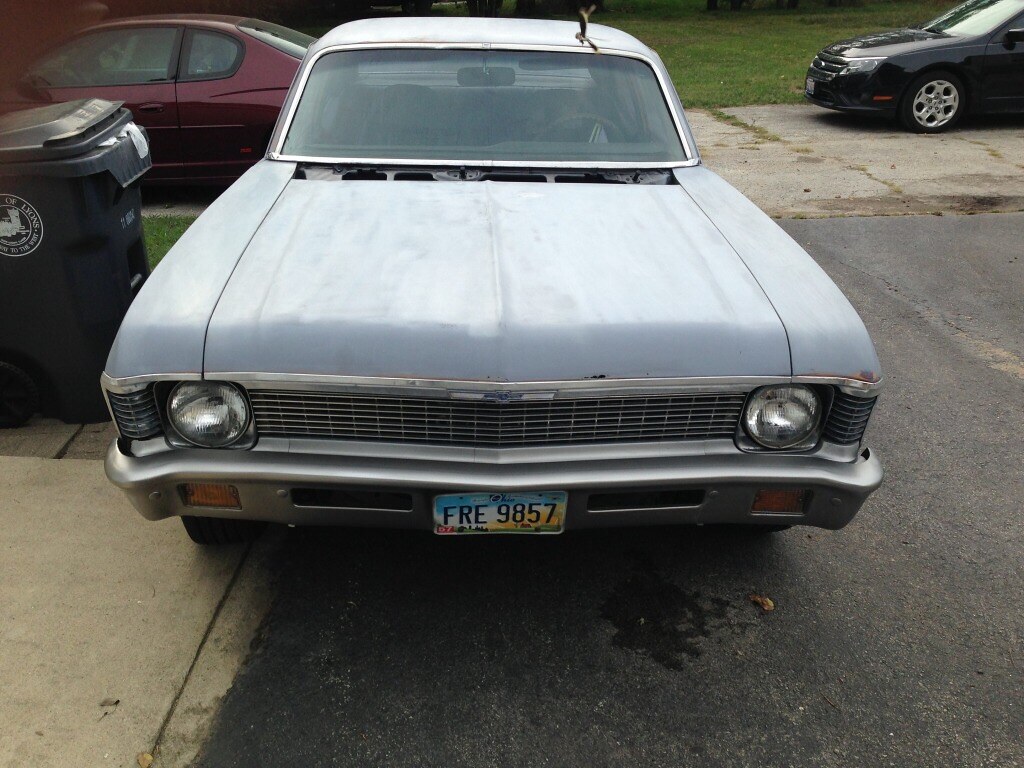
As I purchased it, as you can see the body doesn't look bad at all. Looking at it very throughly I could tell there was bondo/mud applied and I did notice some rust in the rear quarters and in the trunk area (which is common for these cars) I also noticed the body bushings were bad again another common problem with age.
 IMG_1489 by Chris Watkins, on Flickr
 IMG_1490 by Chris Watkins, on Flickr
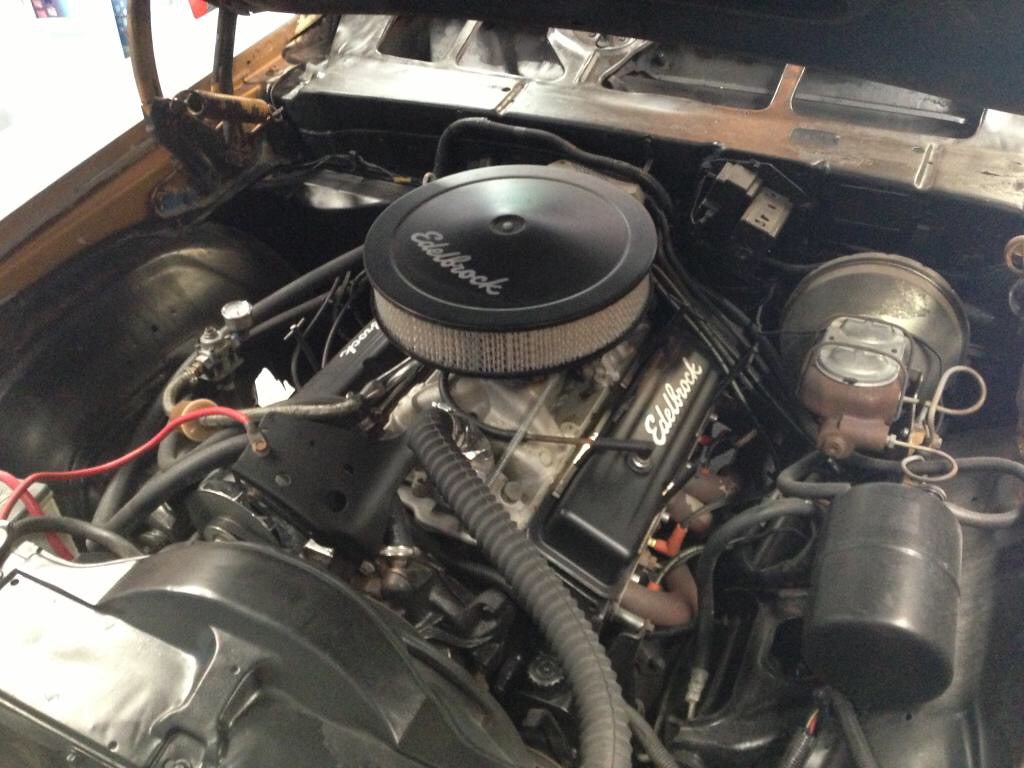
Engine Bay, looks can be decieving, the whole front accessory system is a redneck engineer mess along with the fan and rad shroud.
 IMG_1487 by Chris Watkins, on Flickr
 IMG_1503 by Chris Watkins, on Flickr
 IMG_1504 by Chris Watkins, on Flickr
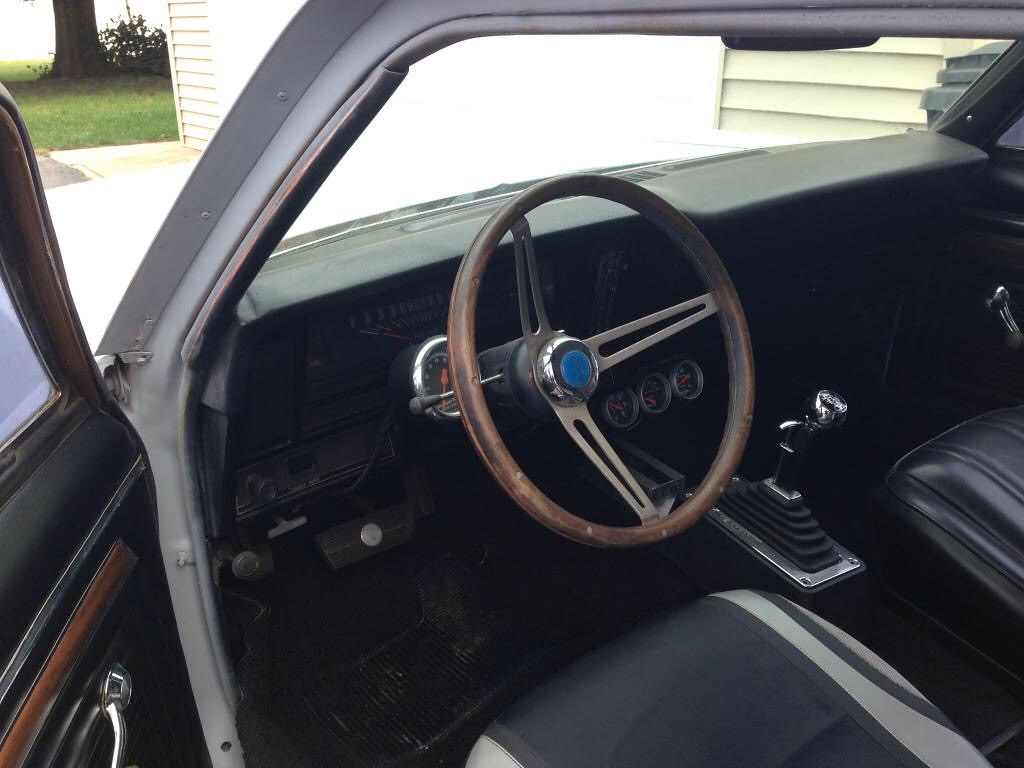
Pics of the interior, the seats are trashed and the carpet doesn't fit right as it's either a universal or not the correct for this make/model/year.
 IMG_1499 by Chris Watkins, on Flickr
I'll break this up into a few posts.
I bought this Nova last year when I sold my mustang, I was a active member here when this was CSVT so all the info of my old car is still on this site. Some of you know me from other sites as well as some of the old CSVT members who are still around. I apologize in advance for being a little long winded.
I was looking to get back into a classic muscle car that I could restore and modify to my liking. I choose a Nova since they are cheap and my wife wanted it to be a chevy. I enjoy all makes/models domestic or import which is why I enjoy TCG.
Specs:
1971 2 Door Nova factory v8 auto
Engine
350 block 383 stroker
Cam - unknown (I have several cam cards from the previous owners not sure which one is installed)
Rods/pistons - unknown
Heads - stock
Edelbrock intake - unknown which model
Holley 750 double pumper
Trans
700R4
3200 Stall
Shift Kit - Jegs brand
Rearend
10 bolt 8.5
3:56 gears
I knew the car needed some work before I bought it....I just underestimated how bad some of it was going to be. When I got the car the owner I purchased it from had just primer bombed the car and splatter painted the trunk (was still fresh when I went to look at the car). I would have still bought the car but would have negotiated a better price, but hey live and learn. The guy I bought the car from purchased the car from an elderly couple in Ohio who had a binder of documentation which was a huge selling point to me. Unfortunately I didn't look closely to see that the receipts didn't have much specific information. So the documentation only shows dates and what parts were replaced not what they were replaced with (for the most part anyways.) Again no biggie.
The car had 3 paint jobs in it's life plus the primer the guy I bought the car from put on it. Under the primer was a Suzuki gold that was applied in 2002. (what a FUGLY ass color) under the gold was a red. Whenever the red was put on the car it also had extensive body filler applied but no rust or sheet metal repair, more on that later. Under the red was a factory correct blue. The cowl tag says the car should be Sandalwood, while I did find it on a few parts of the car this leads me to believe someone painted the car early on in it's life or worse someone swapped the vin and cowl tag to another car
. Also there were a few spots where Green was found, I'm assuming a donor car or junk yard parts replacement. To be honest with all the documentation I have it just confuses things even further. The car was also in a few fender benders, the worst being the passenger front fender.In 2001 the whole suspension was replaced with stock equipment minus air shocks, this was also when the whole drive line was overhauled and the engine was turned into a 383 stroker. I'm just guessing and based on some info I've accumulated from Steves Nova Site SNS, everyone seems to agree this theoretical combo should be around 350-400hp 400+tq.
I drove the car for a few weeks and fixed some legal and safety equipment such as putting on the rear bumper, side mirrors and attaching the seat belts. The car actually drives pretty good, has some good low end torque and the trans shifts firm. These were all the reasons I purchased the car as I didn't want to blow the budget replacing the mechanical's right away while I concentrated on restoring the body and getting it in paint. I was originally hoping to have it in paint in early spring of this year. Currently it may see paint by spring summer of 2015. (crosses fingers)
Goals:
For now I want a nice cruiser that's got some decent hp/tq. I'd like to drive it around town and take it to a few cruises/car shows. During winter I always like to tinker and do upgrades.
My unrealistic dream goal would be to turn it into a pro-touring car. Sitting low on 18x10 or larger wheels. I would also drop in a LS series engine maybe a LQ4 on a tight budget or go wild with a LS3/6 variation. The car will stay an auto, I know some people won't understand that but I love a good auto as much as banging gears in a stick car.
Short term goals that are more realistic is to just restore the vehicle to good quality, I will keep the drivetrain as it is for now as it's in good shape and if anything blows up take it to the next level at that time (budget pending of course). The body will be fully repaired and painted by myself. It will be painted a blue (unsure of which specific color code at this time) but it will be a medium to dark hue.
Bottom line is all work will be done by me, in my garage with whatever tools I currently have or acquire. Hence the whole reason for purchasing this car.
Now to what's happened since I started work along with pics.
As I purchased it, as you can see the body doesn't look bad at all. Looking at it very throughly I could tell there was bondo/mud applied and I did notice some rust in the rear quarters and in the trunk area (which is common for these cars) I also noticed the body bushings were bad again another common problem with age.
IMG_1489 by Chris Watkins, on Flickr
IMG_1490 by Chris Watkins, on FlickrEngine Bay, looks can be decieving, the whole front accessory system is a redneck engineer mess along with the fan and rad shroud.
IMG_1487 by Chris Watkins, on Flickr
IMG_1503 by Chris Watkins, on Flickr
IMG_1504 by Chris Watkins, on FlickrPics of the interior, the seats are trashed and the carpet doesn't fit right as it's either a universal or not the correct for this make/model/year.
IMG_1499 by Chris Watkins, on FlickrI'll break this up into a few posts.


 steel cities grey metallic and widened corvette ralleyes /thread


