Well I figured the rest of ya may be interested and/or looking to learn more...
first off the SII 3800 valves as they open the airflow encounters a "shelf" that hinders low and mid lift airflow greatly, what i have done is to use simple tools to relieve the block bores out to the Mickey Mouse "ears" in a used (already compressed) headgasket and to match the heads to these relieved area's to allow for a smoother path of airflow into the cylinder bore.
a couple of things to note first....due to casting/machining tolerances the benefits will vary a small bit from one engine to another for this reason you should have a pair of used headgaskets from your engine, the heads that you will be using (make sure they are marked to go to their respective bank, aka bank 1 and bank 2 and make sure they will be installed in the manner that you will be modifying them in.) a sharpie marker and a scribe/pick for marking
2nd i have compared the combustion fire-rings from my pair of used felpro's and used GM gaskets and the fire ring locations are identical, (but i include this since it's best to double check) in relation to the 1/4 inch locating dowels. But as i said...double check.
3rd i have noted slight misalignments’ between the chambers/valves and the bores...a bit of eyeball measuring led me to switch which bank of the engine my heads are on to better center the valves in the bores, you may or may not go this far but it's free power, and i'm anal about stuff like this...")
to make it perfect i'd need a locating dowel that has a .008 offset on my bank 1 head (.002 on bank 2) but i dont wish to have to face the intake side of the head, so i'm leaving this alone, even though it appears you can use aftermarket available sbc offset dowels...like i said...if your anal, you may want to look into this...
4th it is best to do the block relieving BEFORE the cylinders are honed or after a rotating assembly mockup with blue machinists dye and rotated over till a clear indicator of the top compression rings maximum height. this is to make sure that when you grind the block that you come close to but DO NOT intrude upon the ring seating area...L67's and L36's vary in this a bit and aftermarket pistons surely do as well. in my buildup i'm using all factory parts (rods and pistons labeled to their respective bores etc) so i have a clear location of the ring travel area...i will be using my Sunnen hone to do a quick cleanup since the bores are in very good shape, and just utilize new file to fit rings in the OE pistons.
it is best to error on the side of caution...you do not HAVE to go that close to the ring swept area to realize the benefits’ of unshrouding your valves...
IF YOU HAVE ANY QUESTIONS JUST ASK....I DONT WANT YOU DESTROYING A BLOCK/HEAD BECAUSE YOU WERE AFRAID TO SOUND STUPID!!!!11!!! NO SUCH THING AS A STUPID QUESTION!!!!
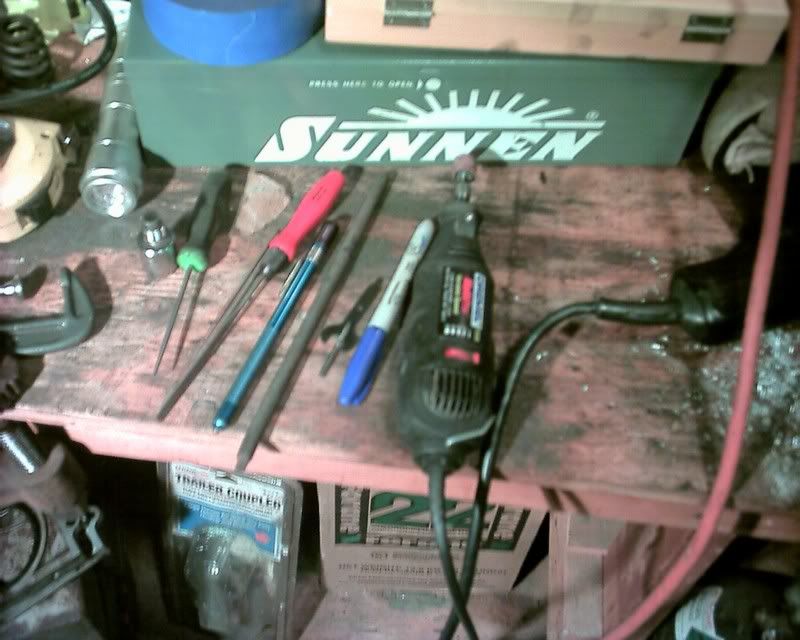
Tools Required:
2 used (pre crushed) headgaskets in my case felpro's same as i will be using the same in our final assembly
Sharpie pen (my dykem is all used up...plus most of ya can get a sharpie marker easier than dykem)
A Scribe or pick, a dental pick works as well for scribing the area to be ground away
Dremel tool, I used a 1/8th inch carbide bit for roughing in and a med grit sanding drum for final grinding
Good lighting and steady hands
Mini hand files for deburring the edges
and for the heads two 1/4 drill bits, 1/4 inch steel rod or 1/4 inch collet grinding bits for assuring the alignment of the head gasket to the head surface for scribing the chamber relief’s.
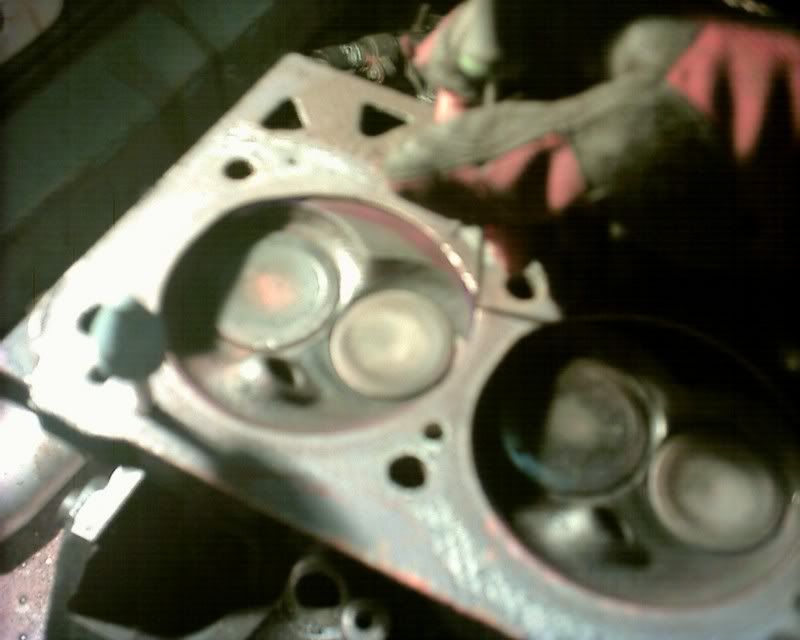
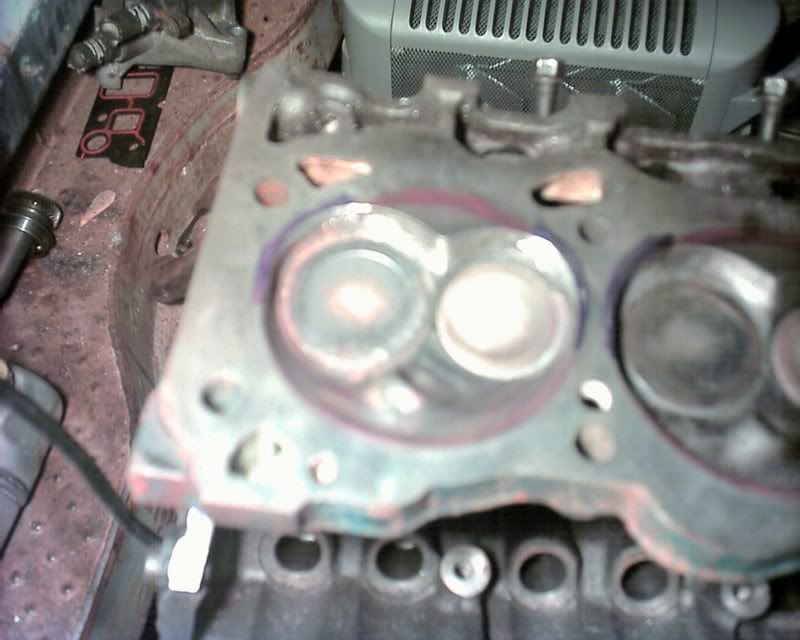
Me playing with a spare L36 head you can see the 1/4 inch shank grinding bits i used to hold the head gasket in place while scribing the chamber/fire ring location
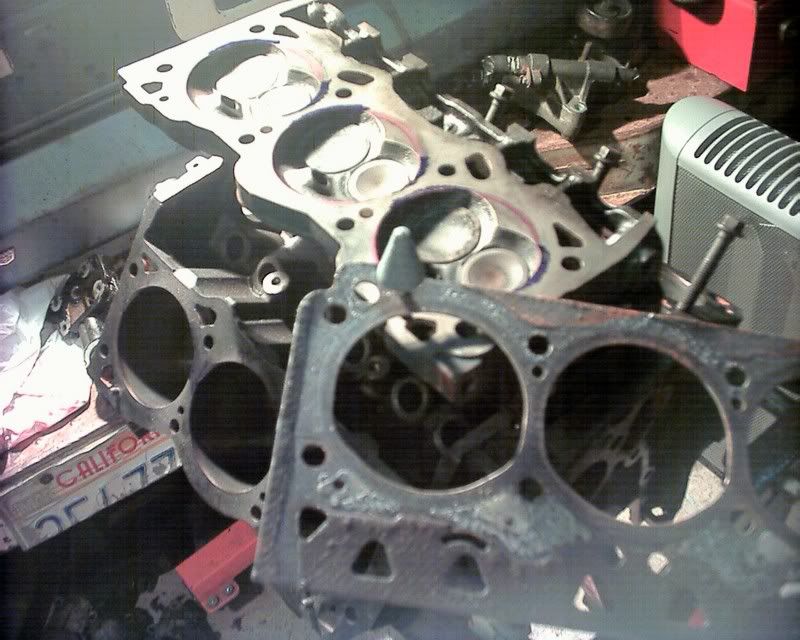
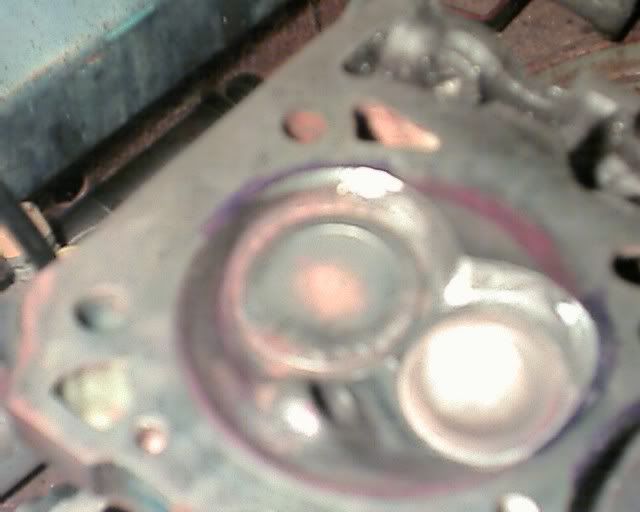
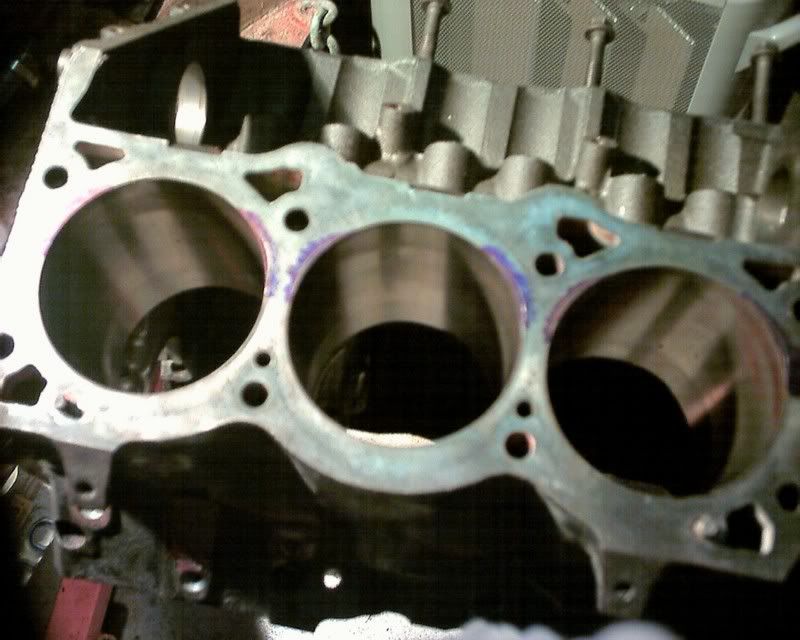
Roughing in the block reliefs...I should note that i am taking the material removal pretty far to within .010 of the fire ring and less than that from the ring swept area...

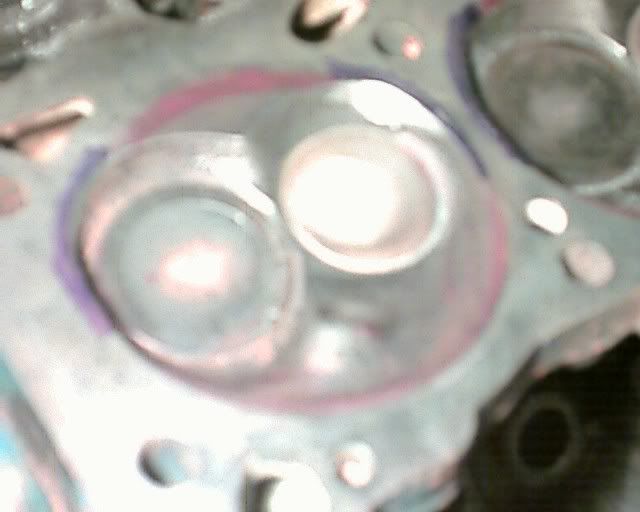
BTW it IS possible to do this with the block in the car but care must be taken to grease the gap between the piston and bore liberally to make it easy to remove all metal shavings from the grinding from the bore you will also have a tough time making things perfect but as I said you dont need to go to the extreme like me to realize gains... don’t mind the AC accumulator as it's for a breather tank setup
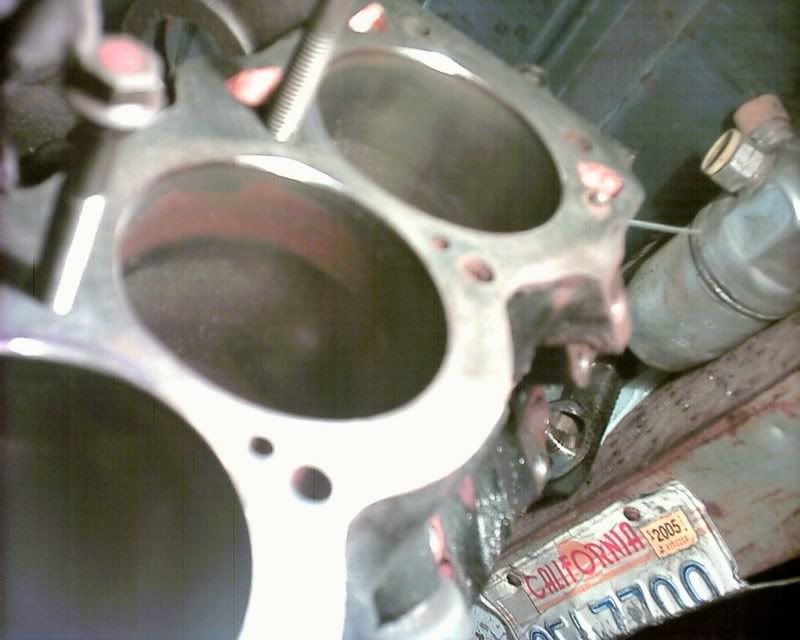
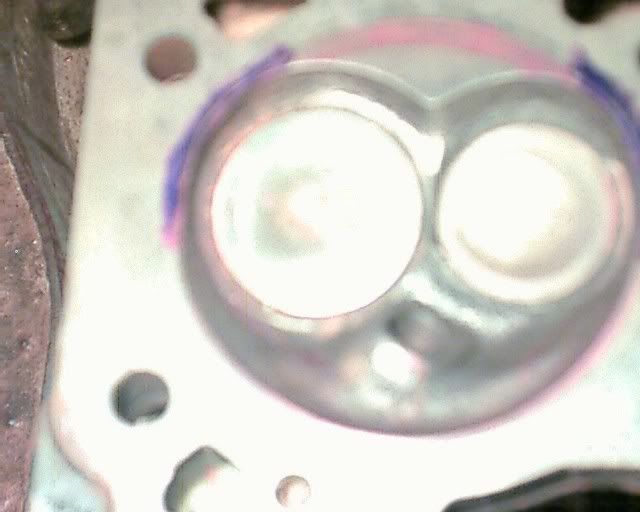
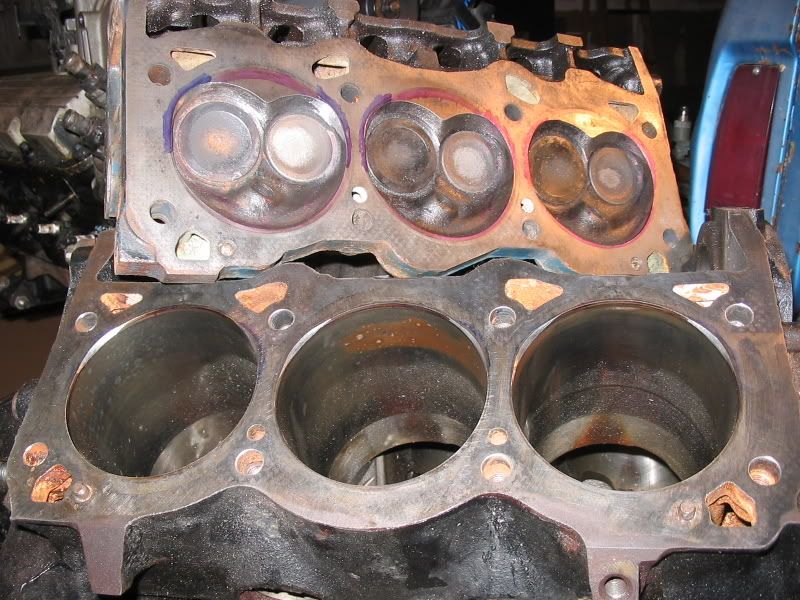
i know it's not too clear but you should be able to make out the scribed marks on bank 1 before grinding
more as i type it all out...
first off the SII 3800 valves as they open the airflow encounters a "shelf" that hinders low and mid lift airflow greatly, what i have done is to use simple tools to relieve the block bores out to the Mickey Mouse "ears" in a used (already compressed) headgasket and to match the heads to these relieved area's to allow for a smoother path of airflow into the cylinder bore.
a couple of things to note first....due to casting/machining tolerances the benefits will vary a small bit from one engine to another for this reason you should have a pair of used headgaskets from your engine, the heads that you will be using (make sure they are marked to go to their respective bank, aka bank 1 and bank 2 and make sure they will be installed in the manner that you will be modifying them in.) a sharpie marker and a scribe/pick for marking
2nd i have compared the combustion fire-rings from my pair of used felpro's and used GM gaskets and the fire ring locations are identical, (but i include this since it's best to double check) in relation to the 1/4 inch locating dowels. But as i said...double check.
3rd i have noted slight misalignments’ between the chambers/valves and the bores...a bit of eyeball measuring led me to switch which bank of the engine my heads are on to better center the valves in the bores, you may or may not go this far but it's free power, and i'm anal about stuff like this...
to make it perfect i'd need a locating dowel that has a .008 offset on my bank 1 head (.002 on bank 2) but i dont wish to have to face the intake side of the head, so i'm leaving this alone, even though it appears you can use aftermarket available sbc offset dowels...like i said...if your anal, you may want to look into this...
4th it is best to do the block relieving BEFORE the cylinders are honed or after a rotating assembly mockup with blue machinists dye and rotated over till a clear indicator of the top compression rings maximum height. this is to make sure that when you grind the block that you come close to but DO NOT intrude upon the ring seating area...L67's and L36's vary in this a bit and aftermarket pistons surely do as well. in my buildup i'm using all factory parts (rods and pistons labeled to their respective bores etc) so i have a clear location of the ring travel area...i will be using my Sunnen hone to do a quick cleanup since the bores are in very good shape, and just utilize new file to fit rings in the OE pistons.
it is best to error on the side of caution...you do not HAVE to go that close to the ring swept area to realize the benefits’ of unshrouding your valves...
IF YOU HAVE ANY QUESTIONS JUST ASK....I DONT WANT YOU DESTROYING A BLOCK/HEAD BECAUSE YOU WERE AFRAID TO SOUND STUPID!!!!11!!! NO SUCH THING AS A STUPID QUESTION!!!!
Tools Required:
2 used (pre crushed) headgaskets in my case felpro's same as i will be using the same in our final assembly
Sharpie pen (my dykem is all used up...plus most of ya can get a sharpie marker easier than dykem)
A Scribe or pick, a dental pick works as well for scribing the area to be ground away
Dremel tool, I used a 1/8th inch carbide bit for roughing in and a med grit sanding drum for final grinding
Good lighting and steady hands
Mini hand files for deburring the edges
and for the heads two 1/4 drill bits, 1/4 inch steel rod or 1/4 inch collet grinding bits for assuring the alignment of the head gasket to the head surface for scribing the chamber relief’s.
Me playing with a spare L36 head you can see the 1/4 inch shank grinding bits i used to hold the head gasket in place while scribing the chamber/fire ring location
Roughing in the block reliefs...I should note that i am taking the material removal pretty far to within .010 of the fire ring and less than that from the ring swept area...
BTW it IS possible to do this with the block in the car but care must be taken to grease the gap between the piston and bore liberally to make it easy to remove all metal shavings from the grinding from the bore you will also have a tough time making things perfect but as I said you dont need to go to the extreme like me to realize gains... don’t mind the AC accumulator as it's for a breather tank setup
i know it's not too clear but you should be able to make out the scribed marks on bank 1 before grinding
more as i type it all out...